Are you also in embroidery fever? Then we have something for you! Embroidering flower letters is very trendy because you combine hand lettering with delicate embroidery. At the same time, you create a personal gift or a loving decorative highlight for your home. Whether as a birth gift for a baby, as a monogram for your best friend or as an eye-catcher in a picture frame – if you want to embroider flower letters, all you need is a little patience, colorful yarns and a desire for creativity. So grab your embroidery supplies and let’s get started!
Table of Contents: Embroidering floral letters
You need that
Optionally, you can also use pearl thread, metallic thread or small beads if you want to give your work even more structure.
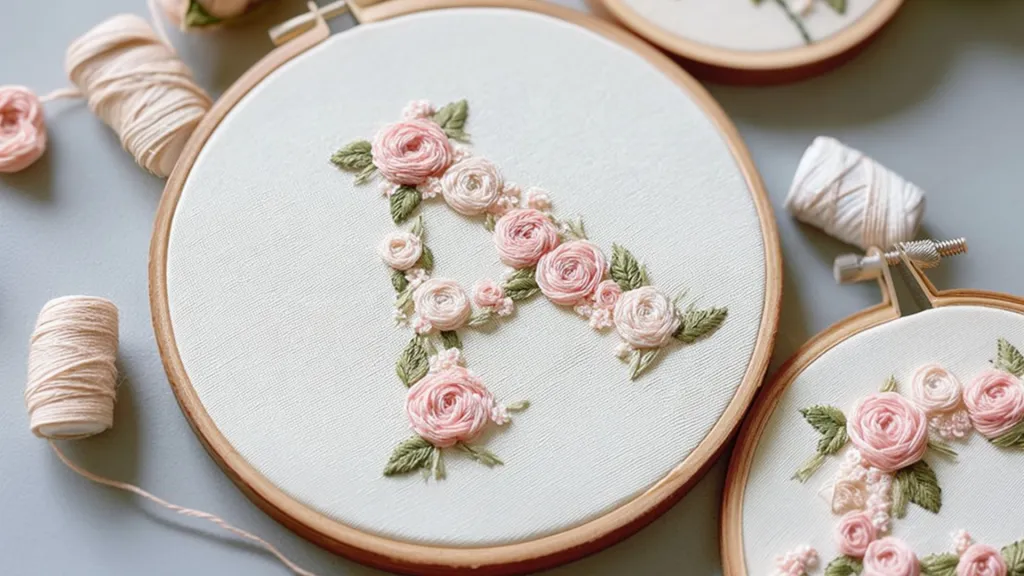
A flower letter in an embroidery hoop is always a pretty and personal gift. Credit: Midjourney: This image was created with the help of an AI.
Step-by-step instructions
1. Prepare template and record letters
First you choose a letter. Draw it on paper and play with the shape. Try out whether you prefer straight or curved letters and cut out your drawn letter.
Then stretch the fabric tightly into the embroidery frame. Then transfer the letter onto the fabric with the water-soluble pen. Make sure to draw clear lines as this will help you stay oriented while embroidering.
2. Place flowers in the letter
Now the creative part of embroidering flower letters begins. Take a second color and loosely draw small flowers into the letter shape. Distribute them unevenly because symmetry quickly becomes boring. Place larger flowers in one spot and add smaller buds or simple dots next to them.
Also plan to use different types of flowers: simple five-petal daisies, small roses in spirals, or mini French knot flowers. This creates depth and your letter looks like a blooming meadow.
3. optional: embroider contours
If you want to outline your flower letter, embroider the outside line of the letter first. The backstitch is particularly suitable for this because it creates a clean, continuous line. Work slowly and evenly to keep the shape clearly visible.
If you want, you can embroider the outline in a neutral color to emphasize the colorful flowers more. Alternatively, choose a strong color so that the letter immediately catches the eye.
4. Work out flowers and add details
If you are working without an outer outline, then simply use the outer line of your letter as a guide, which you will wash out later. Fill the pre-drawn flowers with life. Embroider the petals with the satin stitch or daisy stitch. Use French knots for small buds as they provide a nice structure.
Switch between colors and stitch types to give your work a varied look. You can also add small leaves or tendrils that extend slightly beyond the letter line. It is precisely these small “outliers” that give your motif dynamism.
5. Finishing and washing out
Finally, check your work and add additional mini flowers or dots if necessary. Then carefully wash the fabric so that the lines of the water-soluble pen disappear. Let everything dry thoroughly and then stretch the fabric straight again.
Reading tips: Learn how to embroider a sweet chamomile flower here, or even embroider the cute snowdrops.
Creative gift idea with personality
When you try flower letter embroidery, you’ll create custom works of art with personal meaning. The alternation of large and small flowers and their uneven distribution make each design appear unique. At the same time, you can combine colors, stitches and sizes again and again. That’s exactly why it remains a timeless DIY trend that inspires both beginners and advanced craftsmen.
Create gorgeous, customizable DIY paperweights from dollar store glass candle holders with no mold. This easy project makes a great gift idea, and you [...]
Published: Feb 3, 2021 · Modified: Nov 5, 2025 by Shelly · This post may contain affiliate links · 1 Comment Cooking with kids doesn’t have to be comp [...]
Ollie's Test Results I went with the Premium test, which shows everything, and found it very informative. When Ollie joined our family, we were told s [...]
Published: Feb 12, 2023 · Modified: Nov 18, 2025 by Shelly · This post may contain affiliate links · 2 Comments Fun February Coloring Pages The fabulo [...]
Apply the Vinyl Decal Before applying the decal, clean the surface well. I like using a little isopropyl alcohol because it removes grease and dries q [...]
These photo frame decoration ideas are perfect for beginners! Make a gift or unique home decor with these 40+ picture frame ideas. Skill Level: Beginn [...]
This Mod Podge tissue paper frame is perfect for whipping up quickly and adding color to your home. So easy, beginning crafters will enjoy this projec [...]
If you’ve ever found a beautiful piece of paper begging to be used in a craft, this decoupage picture frame is perfect – so easy to make! If you’ve ev [...]
We use cookies on our website to give you the most relevant experience by remembering your preferences and repeat visits. By clicking “Accept”, you consent to the use of ALL the cookies.
This website uses cookies to improve your experience while you navigate through the website. Out of these, the cookies that are categorized as necessary are stored on your browser as they are essential for the working of basic functionalities of the website. We also use third-party cookies that help us analyze and understand how you use this website. These cookies will be stored in your browser only with your consent. You also have the option to opt-out of these cookies. But opting out of some of these cookies may affect your browsing experience.
Necessary cookies are absolutely essential for the website to function properly. These cookies ensure basic functionalities and security features of the website, anonymously.
Cookie
Duration
Description
cookielawinfo-checbox-analytics
11 months
This cookie is set by GDPR Cookie Consent plugin. The cookie is used to store the user consent for the cookies in the category "Analytics".
cookielawinfo-checbox-functional
11 months
The cookie is set by GDPR cookie consent to record the user consent for the cookies in the category "Functional".
cookielawinfo-checbox-others
11 months
This cookie is set by GDPR Cookie Consent plugin. The cookie is used to store the user consent for the cookies in the category "Other.
cookielawinfo-checkbox-necessary
11 months
This cookie is set by GDPR Cookie Consent plugin. The cookies is used to store the user consent for the cookies in the category "Necessary".
cookielawinfo-checkbox-performance
11 months
This cookie is set by GDPR Cookie Consent plugin. The cookie is used to store the user consent for the cookies in the category "Performance".
viewed_cookie_policy
11 months
The cookie is set by the GDPR Cookie Consent plugin and is used to store whether or not user has consented to the use of cookies. It does not store any personal data.
Functional cookies help to perform certain functionalities like sharing the content of the website on social media platforms, collect feedbacks, and other third-party features.
Performance cookies are used to understand and analyze the key performance indexes of the website which helps in delivering a better user experience for the visitors.
Analytical cookies are used to understand how visitors interact with the website. These cookies help provide information on metrics the number of visitors, bounce rate, traffic source, etc.
Advertisement cookies are used to provide visitors with relevant ads and marketing campaigns. These cookies track visitors across websites and collect information to provide customized ads.