More Games
-
Winter Snow Sledding Coloring Page
Published: Feb 22, 2019 · Modified: Dec 3, 2025 by Shelly · This post may contain affiliate links · Leave a Comment This Winter Sledding Snow Coloring [...] -
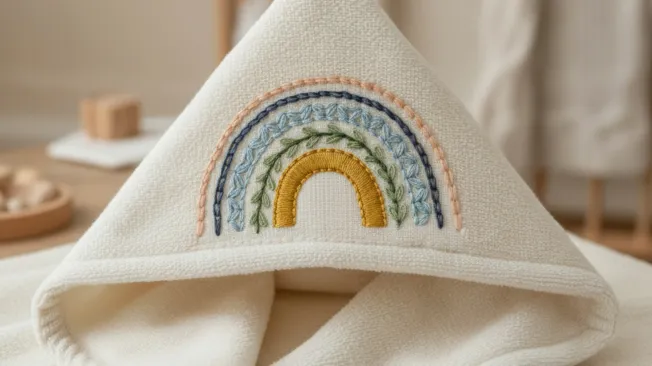
How to Sew an Easy Baby Blanket for Beginners
Add Quilting Stitches These final stitches are not just decorative. Quilting holds the batting in place so it does not shift, bunch, or become lumpy o [...] -
Make your own dip-dye candles in 5 steps
Do you love creative DIY projects that are not only fun but also look great? Then the dip dye technique is just right for you. With just a few [...] -
Easy DIY Photo Gift Ideas for Any Occasion
These photo gift ideas and DIY projects make it simple to turn photos into thoughtful gifts for family, friends, and memorable moments. If you love gi [...] -
How to Use Resin 101: Your Complete Guide
Learn how to use resin in crafts! Resin makes the coolest projects; get tips and tricks as well as frequently asked questions for beginners. This is y [...] -
Sweet Chili Meatballs Recipe for Game Day Appetizers
This chili meatball recipe makes sweet, spicy meatballs that are perfect for game-day appetizers or easy party food. If you are looking for an easy ap [...] -
Spring decoration with rubber boots: This is how the entrance area blossoms
Spring brings color into the garden – and also into your entrance area. Instead of throwing away your old kicks, you can transform them into a [...] -
February Coloring Pages (Printable)
Published: Feb 12, 2023 · Modified: Nov 18, 2025 by Shelly · This post may contain affiliate links · 2 Comments Fun February Coloring Pages The fabulo [...] -
Lanterns made from jam jars: Creative DIY for the balcony
Empty glasses are much too good for the glass container! With a little tracing paper and creativity, you can, for example, make atmospheric lan [...] -
Make maritime lanterns with sand: This is how maritime upcycling works
With maritime lanterns with sand you can bring a real holiday feeling home. All you need is a few materials, a little creativity and a little patience [...]


