This post and photos may contain Amazon or other affiliate links. If you purchase something through any link, I may receive a small commission at no extra charge to you. Any supplies used may be given to me free of charge, however, all projects and opinions are my own.
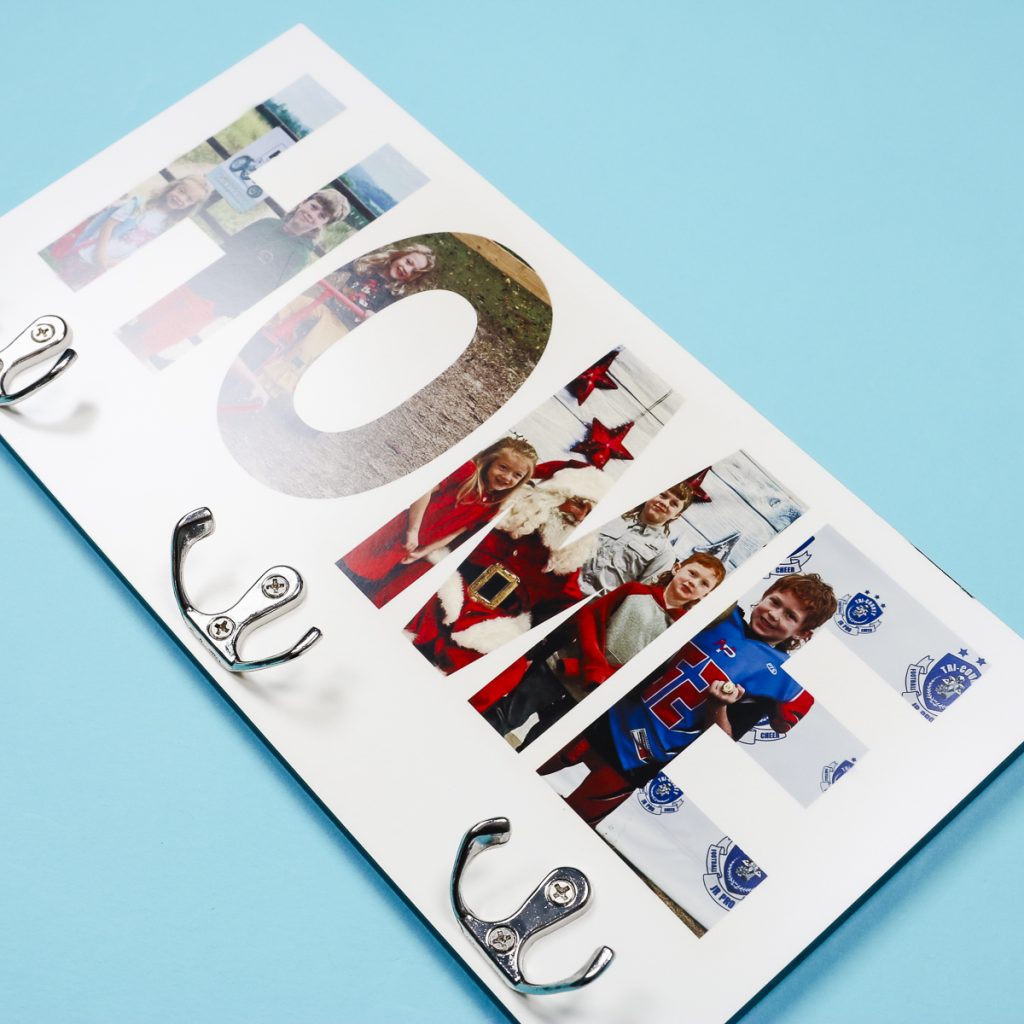
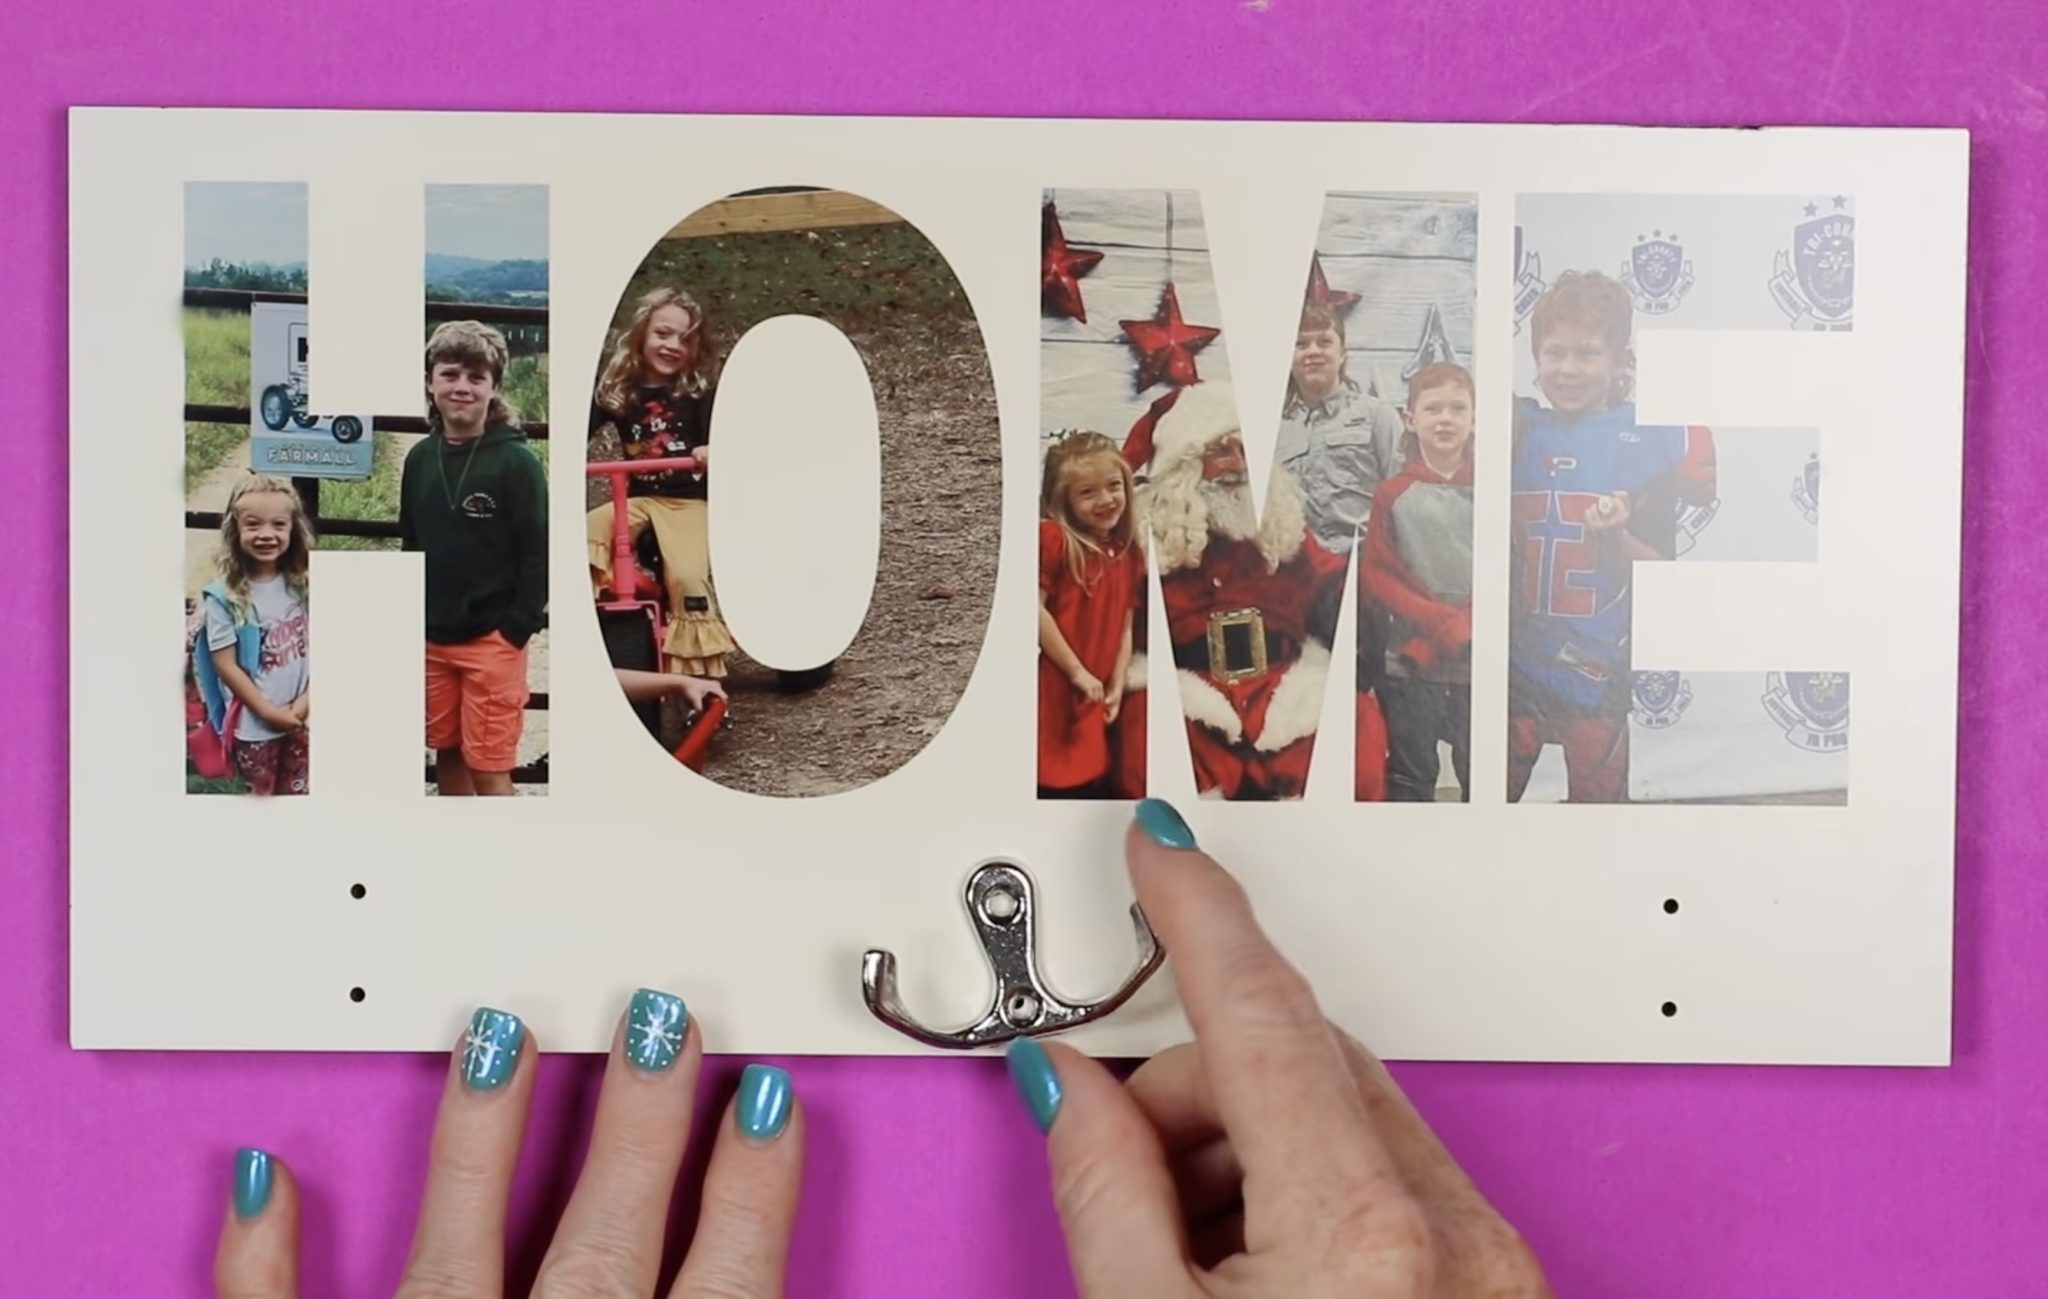
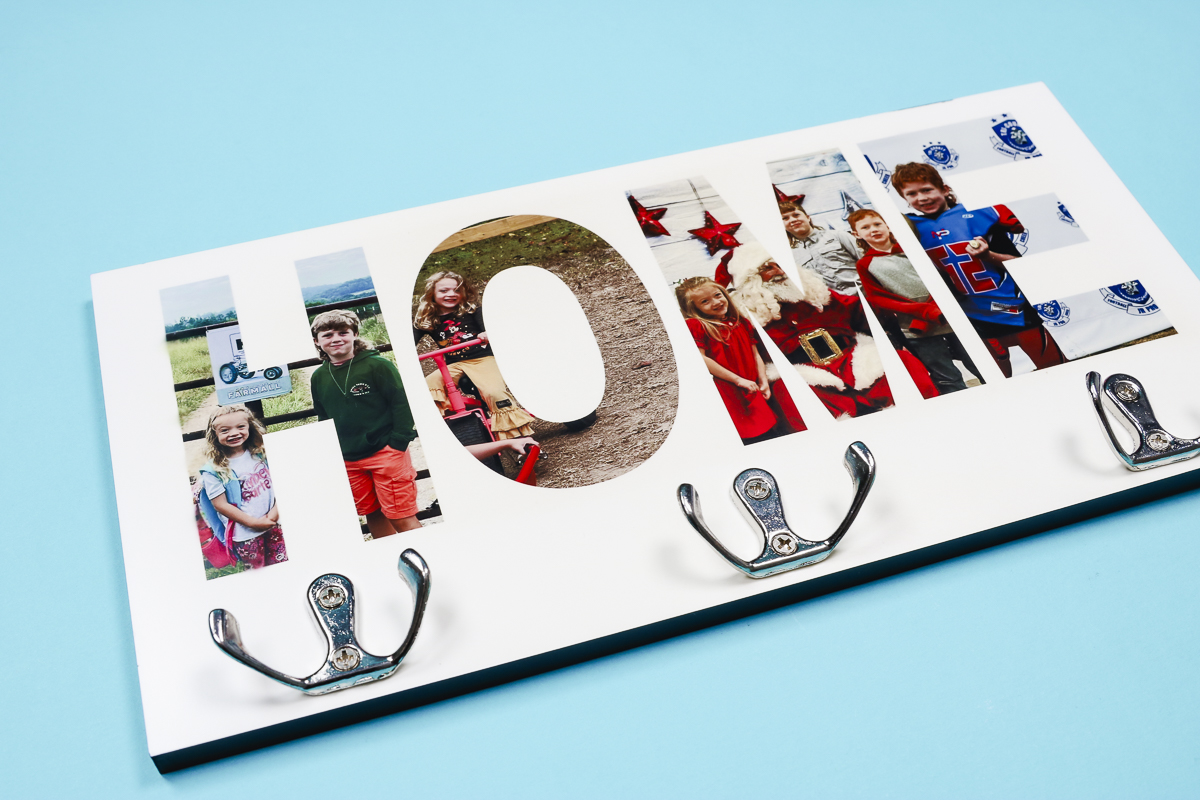
If you’re still in organization mode, I think you’re going to love this project. This sublimation hanging organizer is perfect for any room in your home and can be customized to match any decor.
Whether you’re looking for a home for your keys, towels, or dog leashes, this project fits the bill.
I’m using my large EasyPress today. If you’re trying to find the right heat press for your craft room, you can learn more about it in my EasyPress 3 review.
Pin
I used photos and the word home for my sublimation hanging organizer but you can create this project with any design or word you’d like. If you don’t want to use photos, you could choose an all-over design. You could also change the word to something like Keys, or maybe a pet’s name.
You can watch me make this project from start to finish by pressing play on the video below.
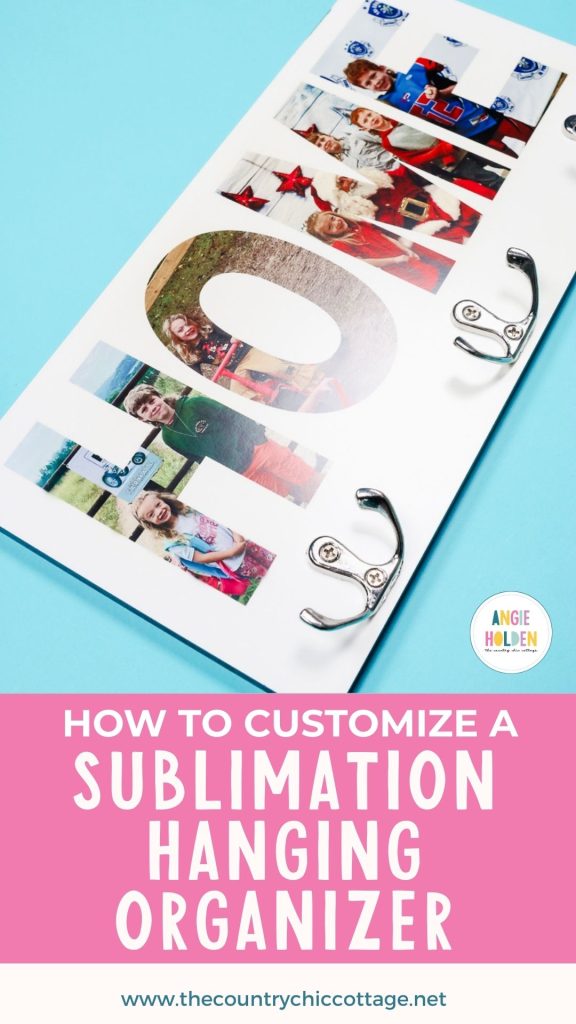
How to Customize a Sublimation Hanging Organizer
This is one of the easiest sublimation and organization projects I’ve made this year. I love how easy it is to customize, making it perfect for so many different areas in your home.
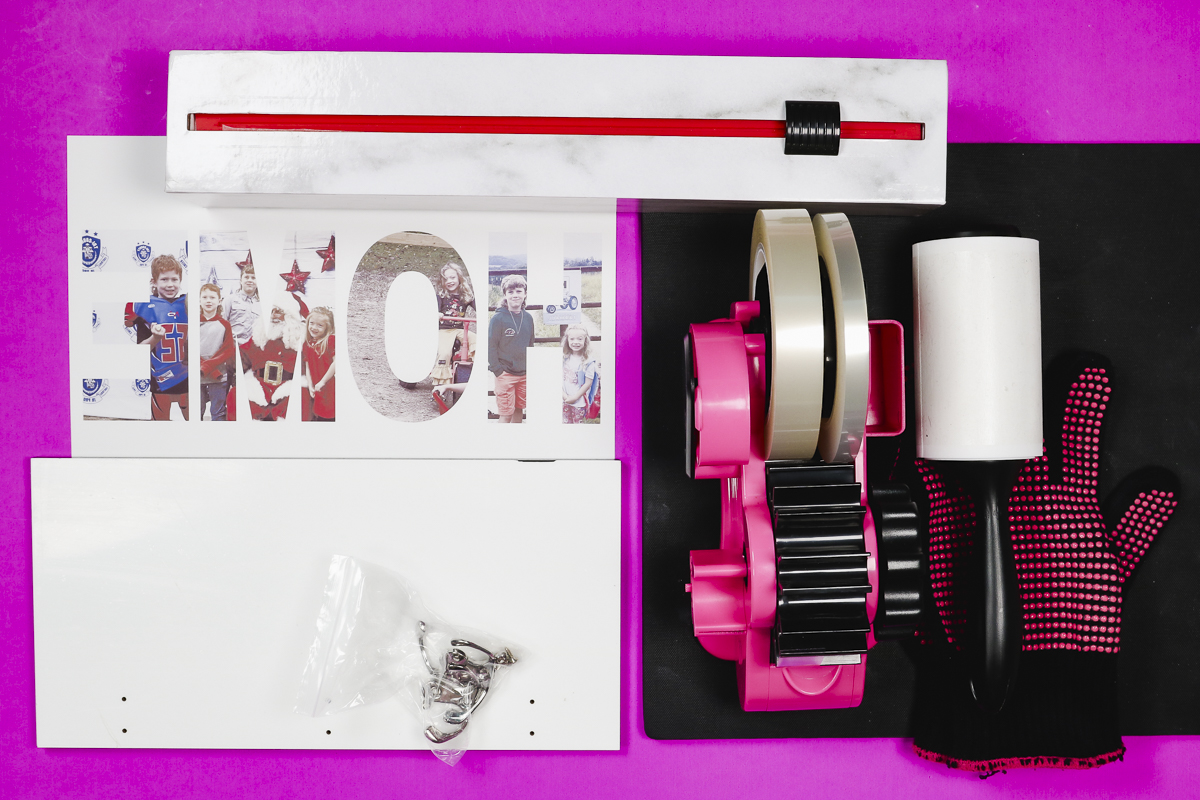
Supplies Used
Pin
Step 1. Create Template in Canva
I am using Canva to create my design today, and the process is really easy.
To begin, open Canva and click Create, then choose Custom Size. I have sized my canvas to be the same size as my sublimation paper, which is 8.5 by 11 inches.
Note – if you want to cover the entire surface or have your word go from edge to edge, you will need to use 8.5 by 14 sublimation paper.
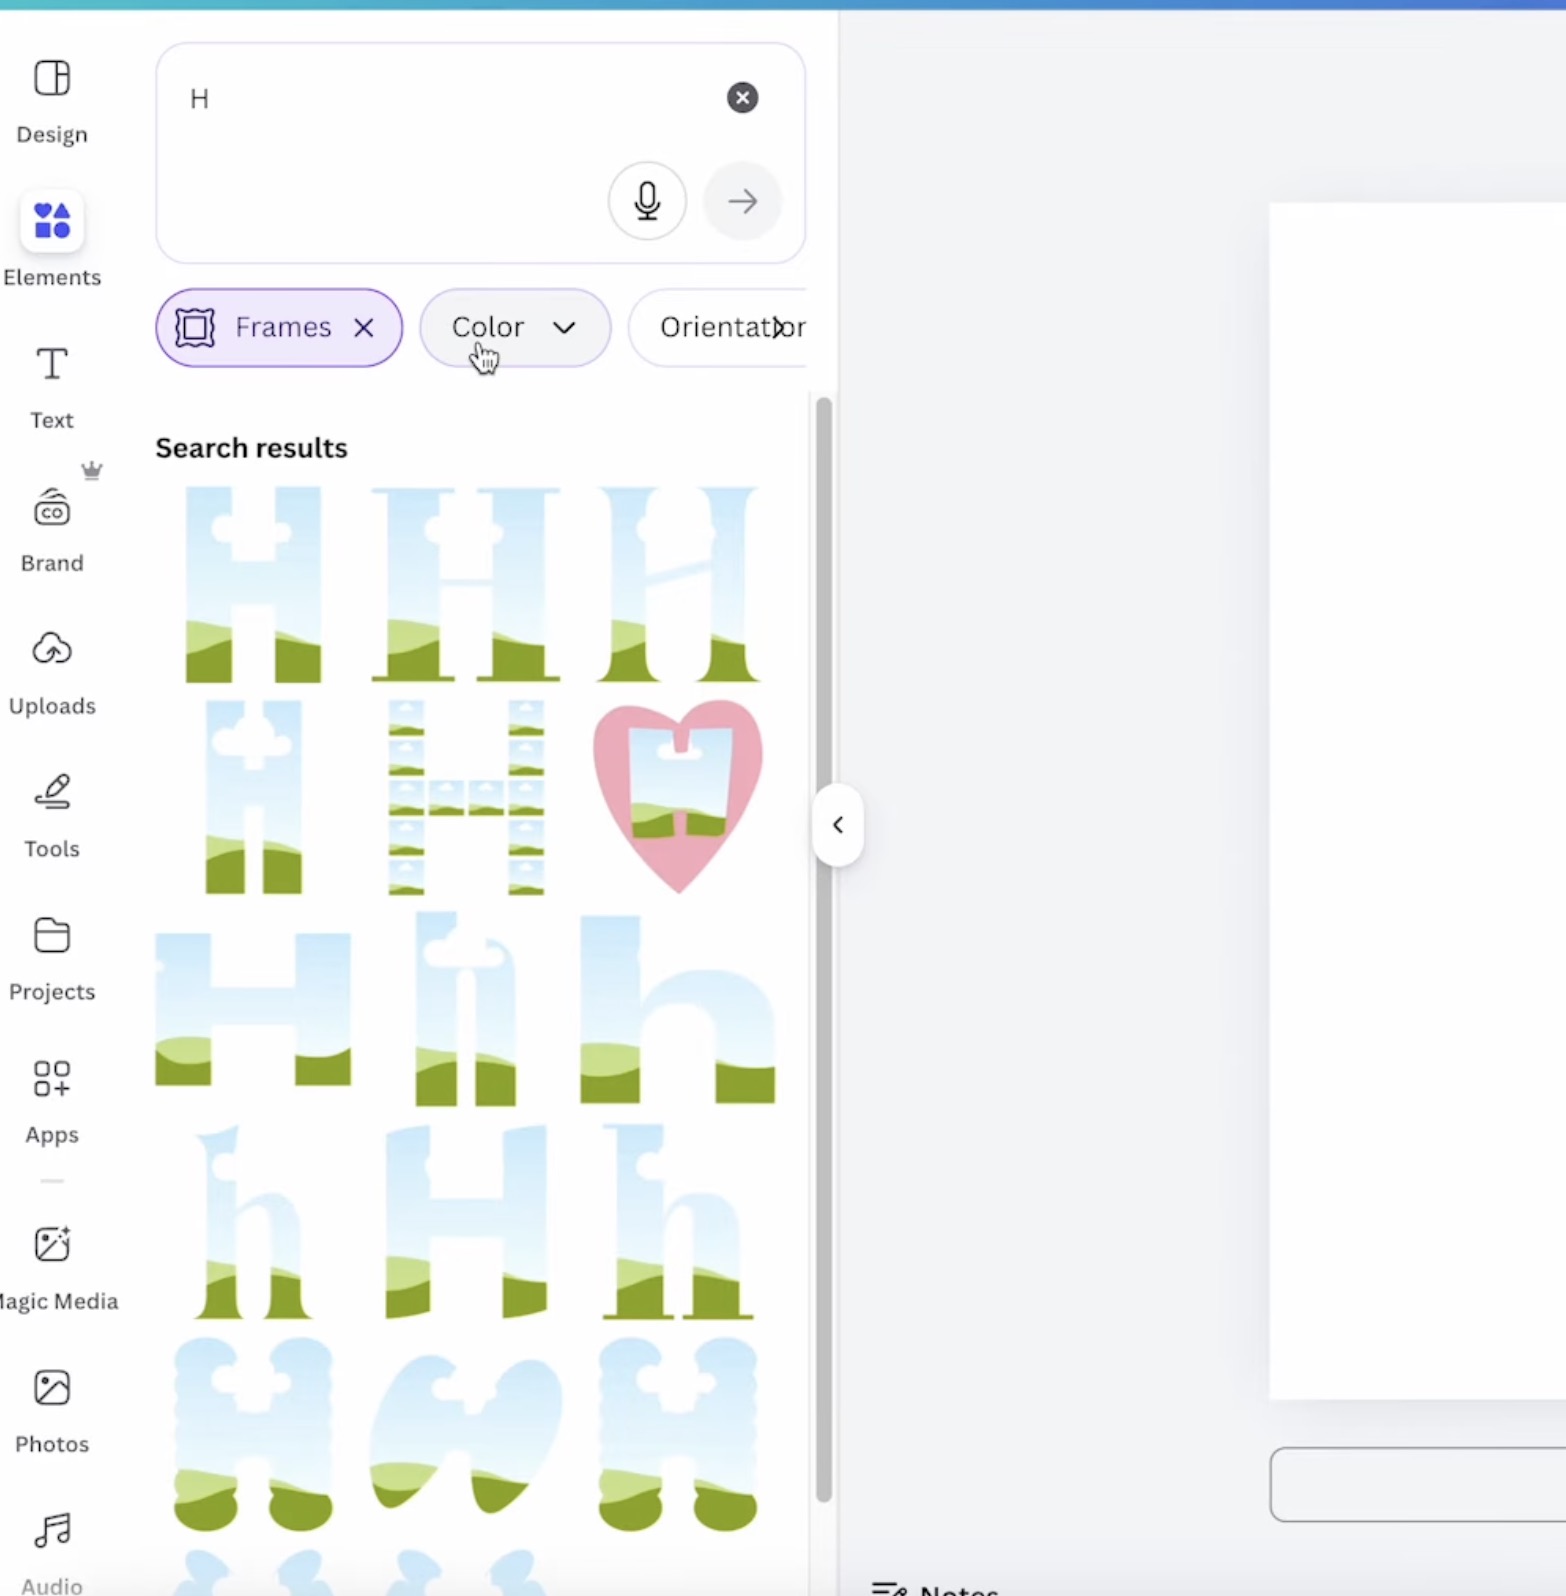
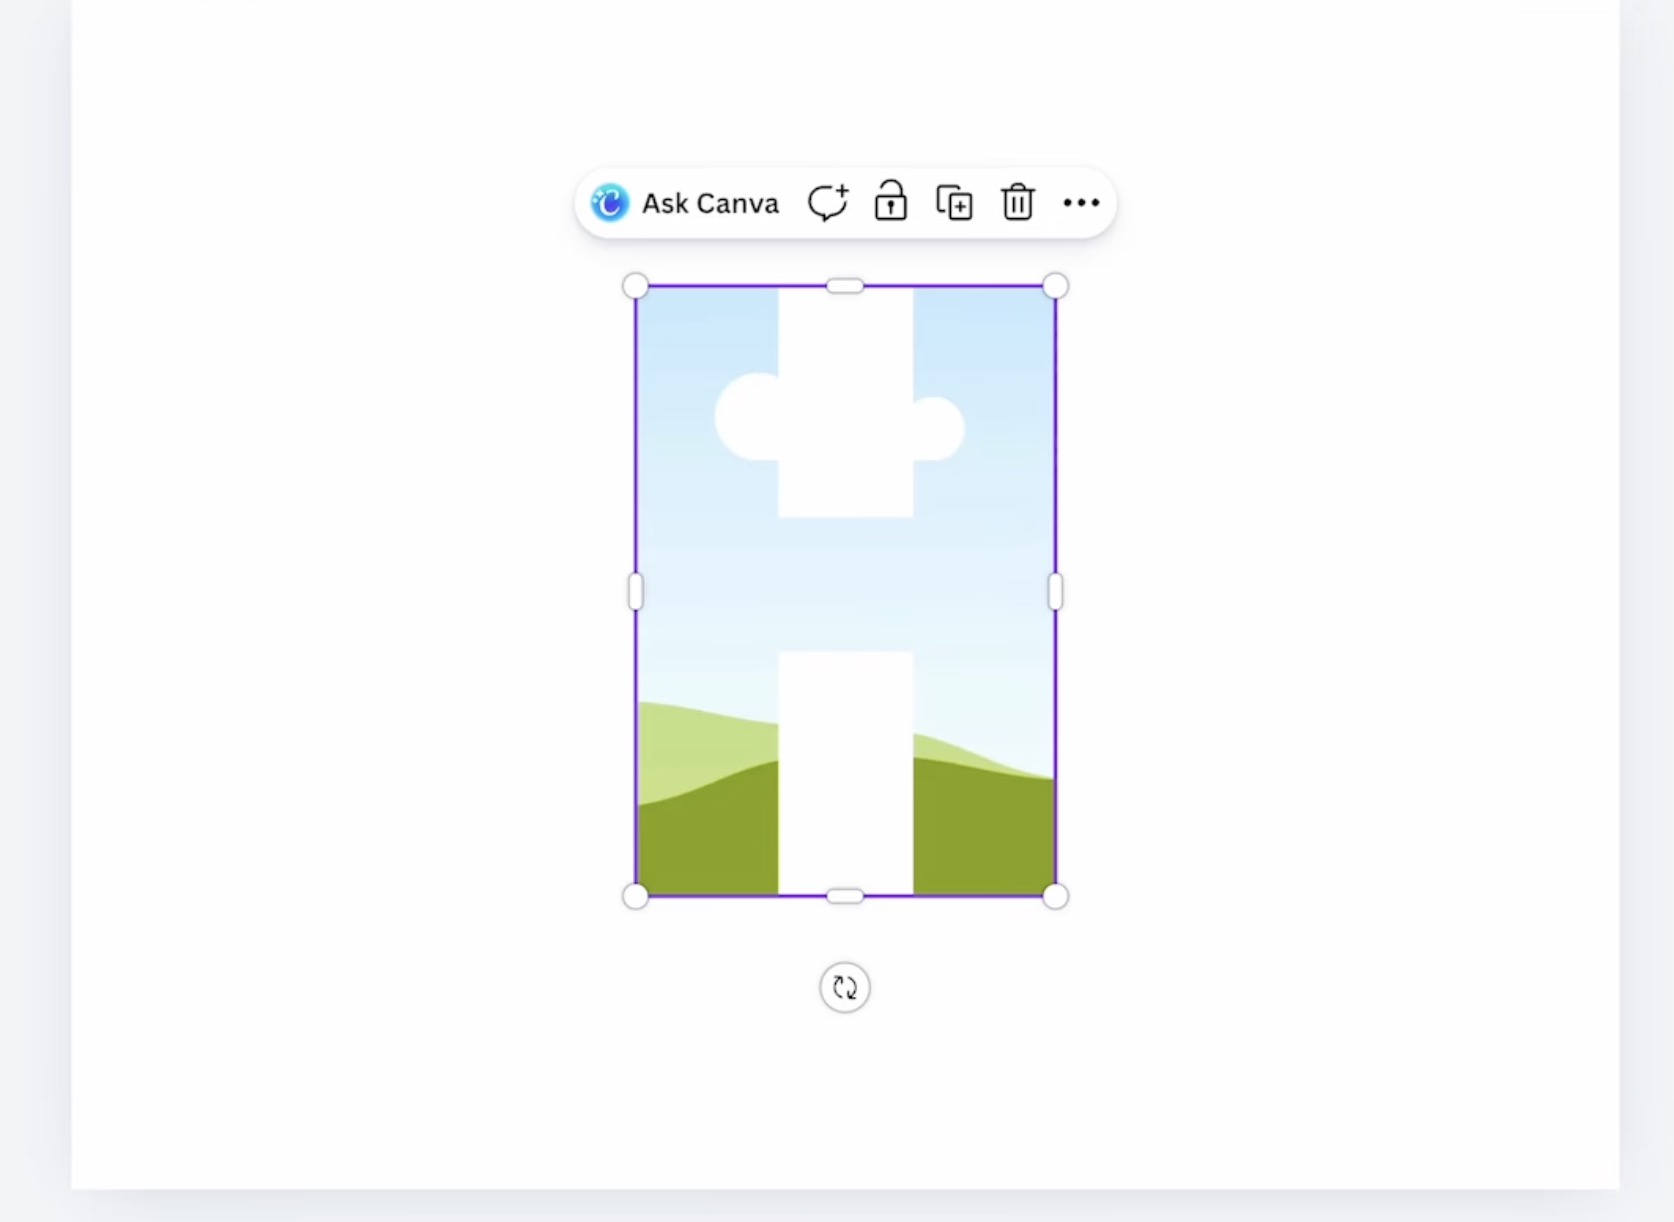
To make your design like I did, first, click on Elements and then search for the letter you want to use. I typed H, and then, below that, I clicked Frame.
Pin
Here you can see a lot of different options pop up. Choose the letter design you like best, and it will add to your canvas.
Pin
Repeat this step for each additional letter.
Pin
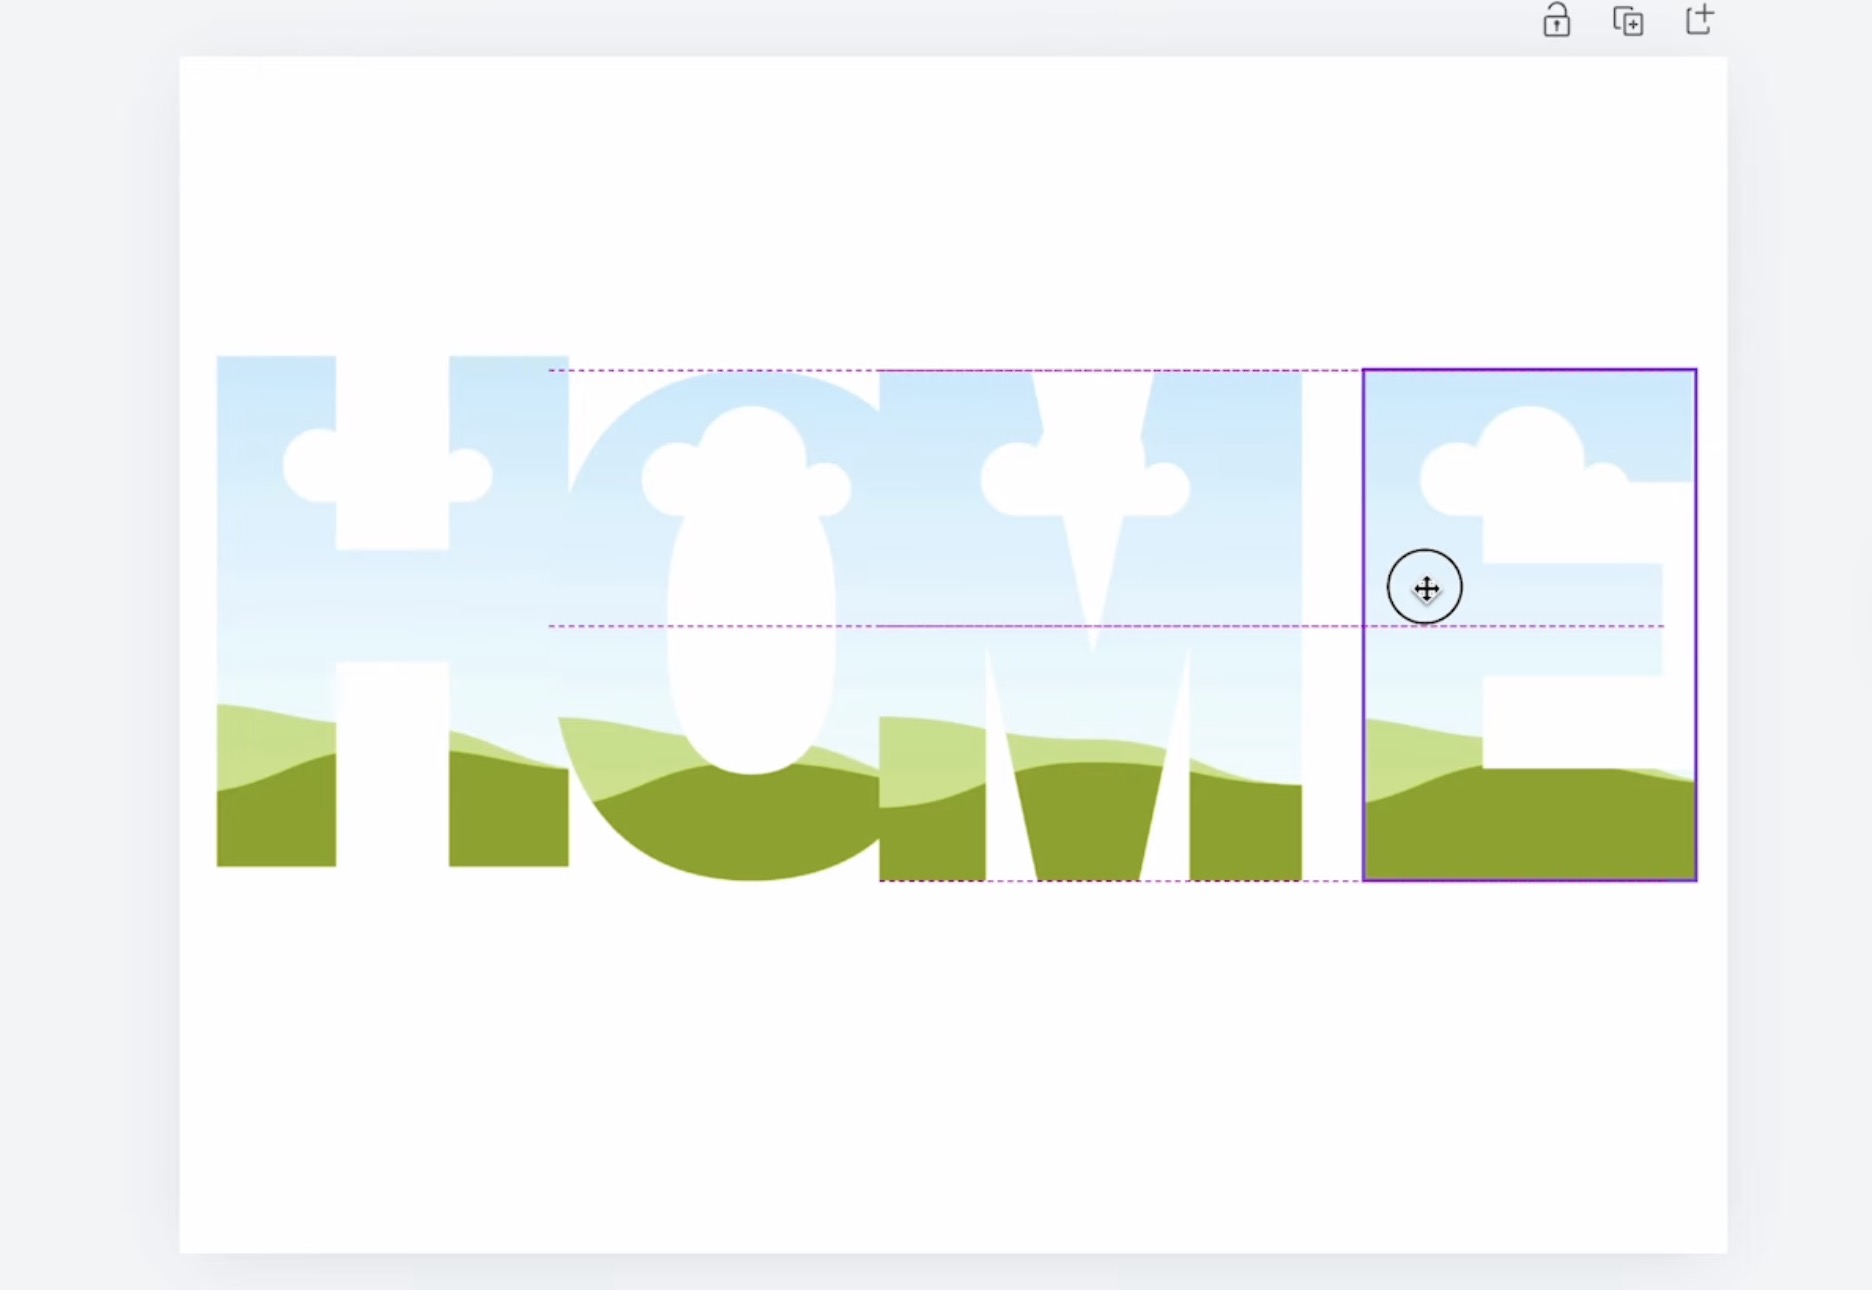
Move the letters to spell out the word and then resize as needed.
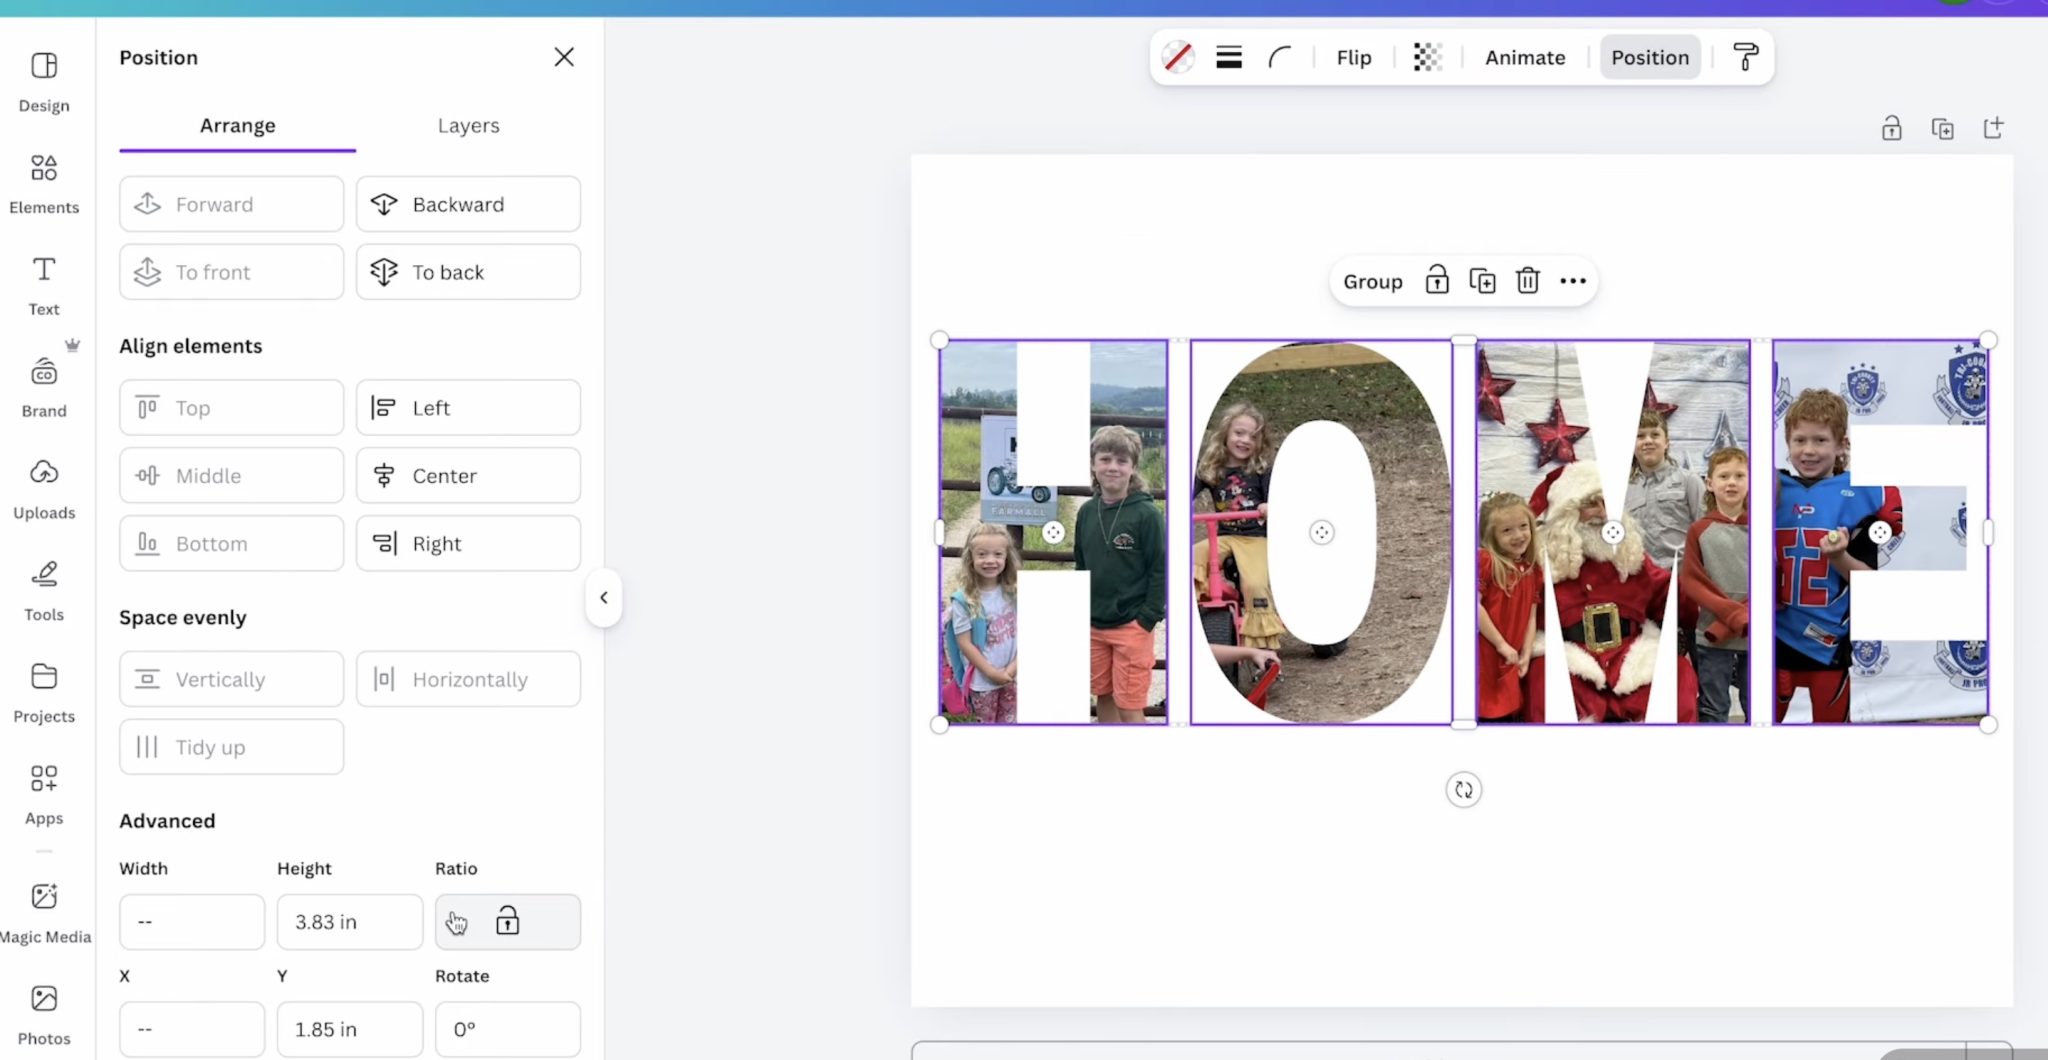
Select all the letters and then click Position and align the top. After that, with all the letters selected, click Position and Tidy Up. This will move the letters so they’re all exactly the same distance apart.
Pin
At this point, you can check if the design is the size you want. You can make the letters larger or smaller and repeat the Position steps.
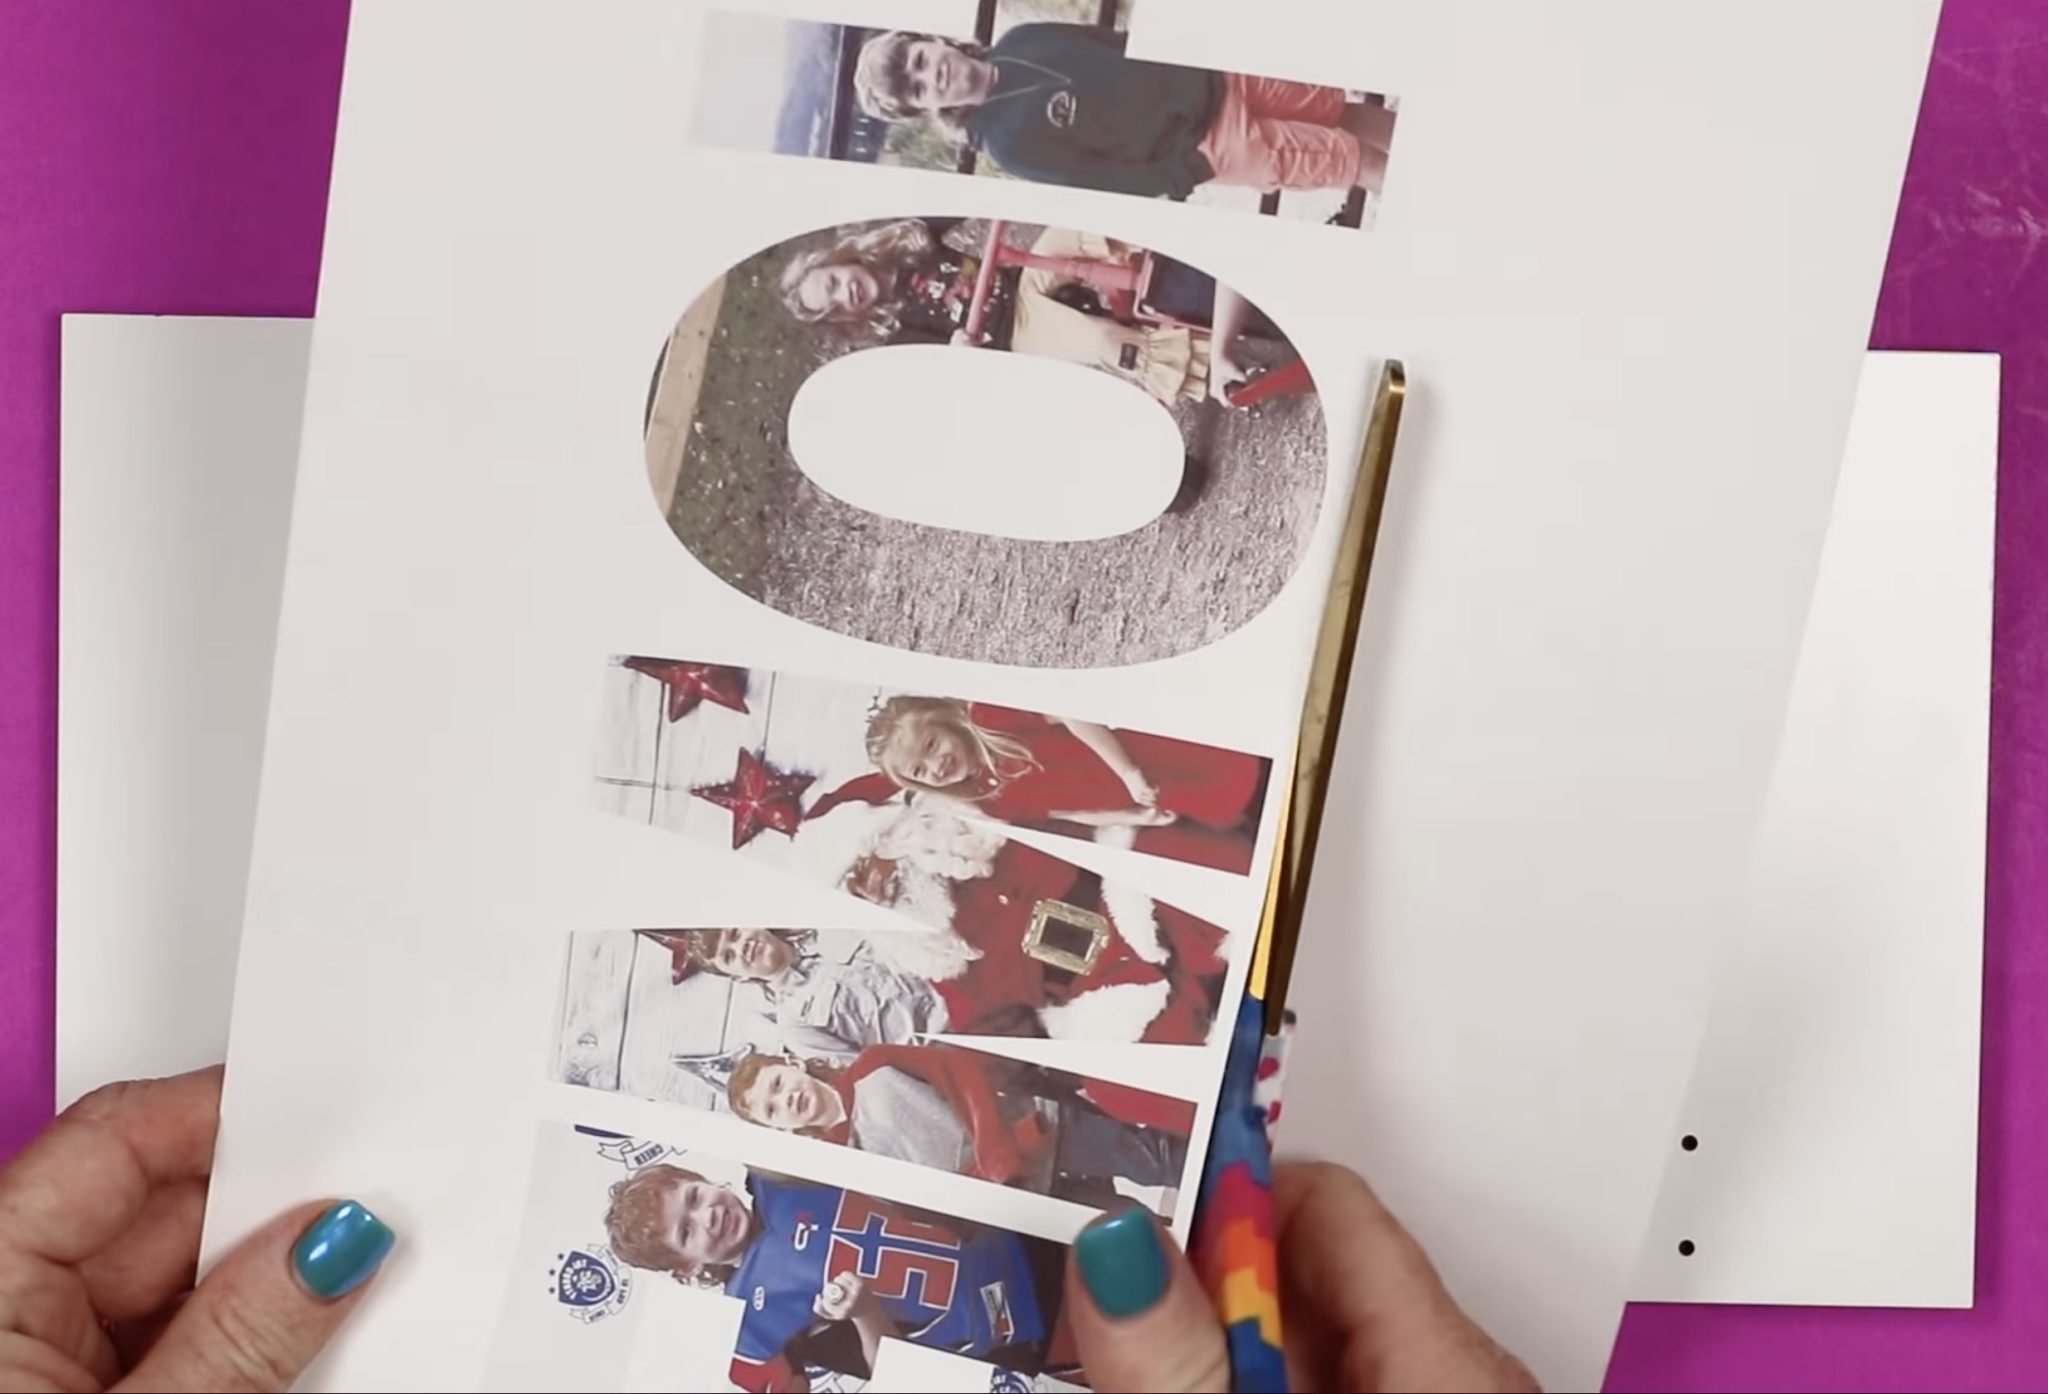
Step 2. Add Photos of Your Choice
Next, upload the photos you’re going to use.
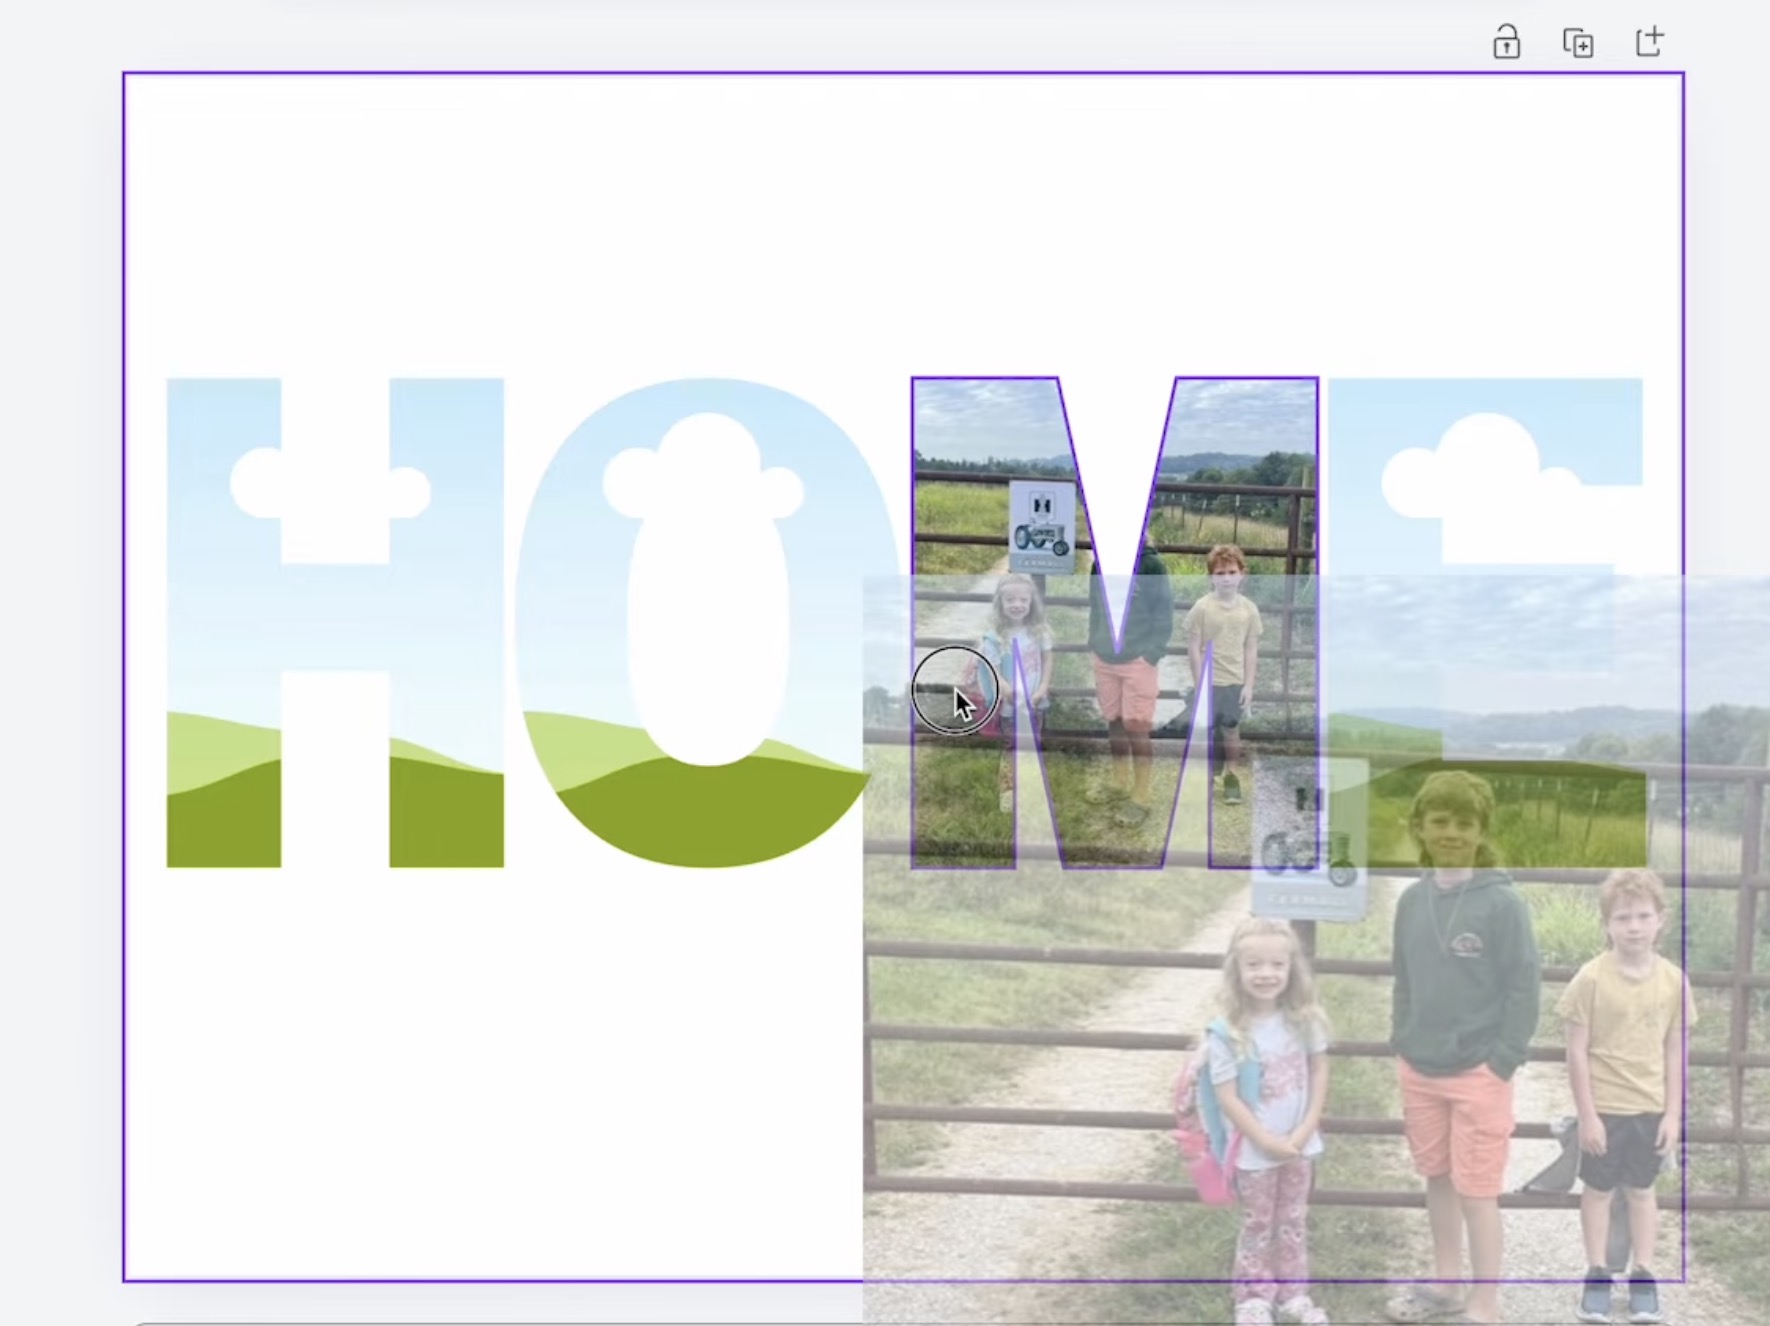
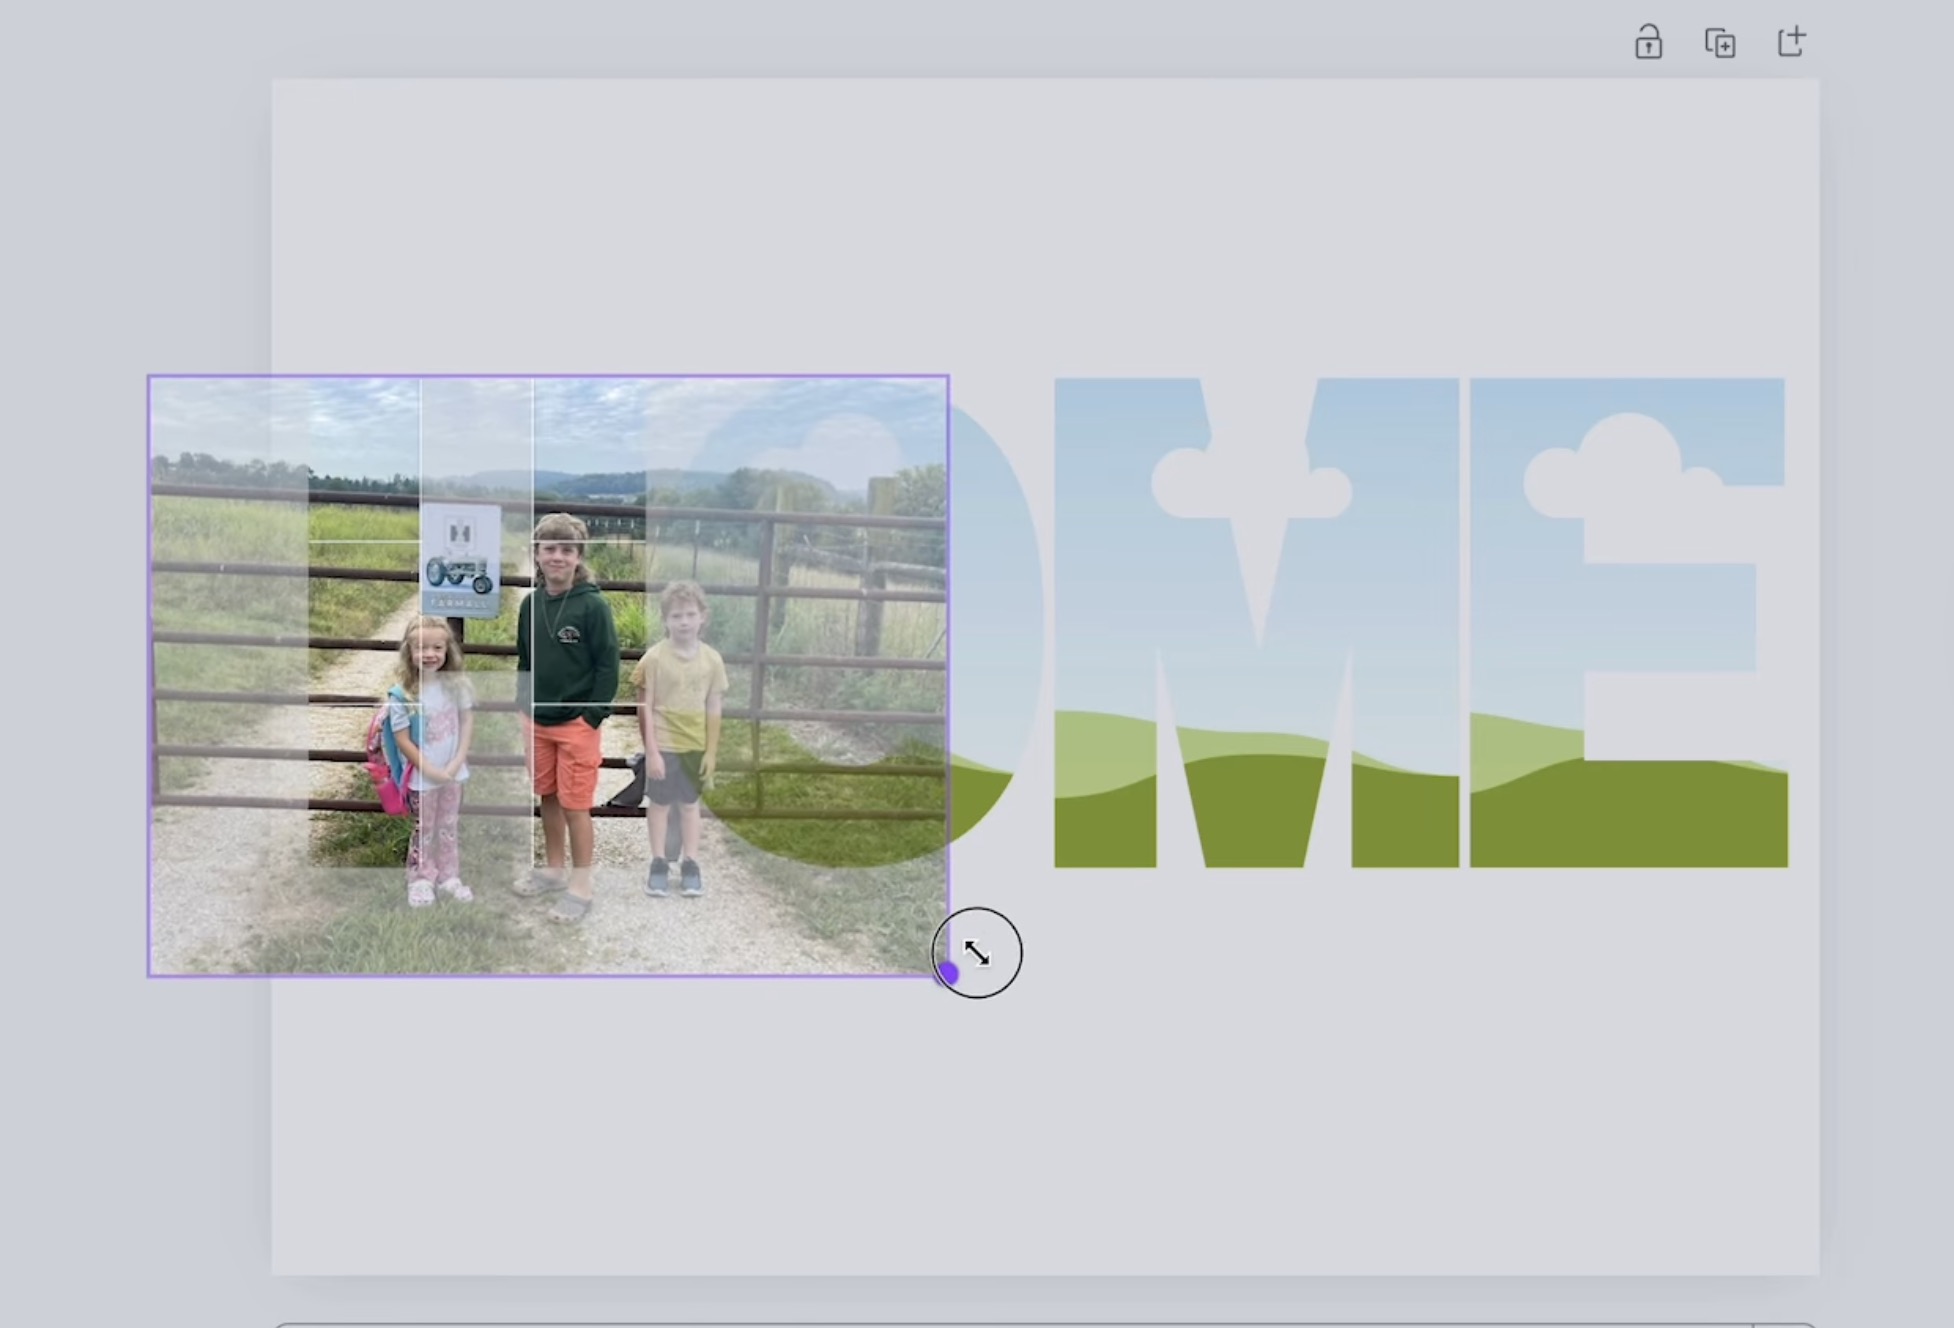
With the photos uploaded, click on a photo and drag it to the letter you want and release it.
Pin
With the photo on the letter, you can double-click the photo and move/resize it until it looks like you want.
Pin
Note – if you’re using photos, make sure to pay attention to faces or other important parts of the photo so you don’t cut them off weirdly.
Repeat this process for each letter/photo.
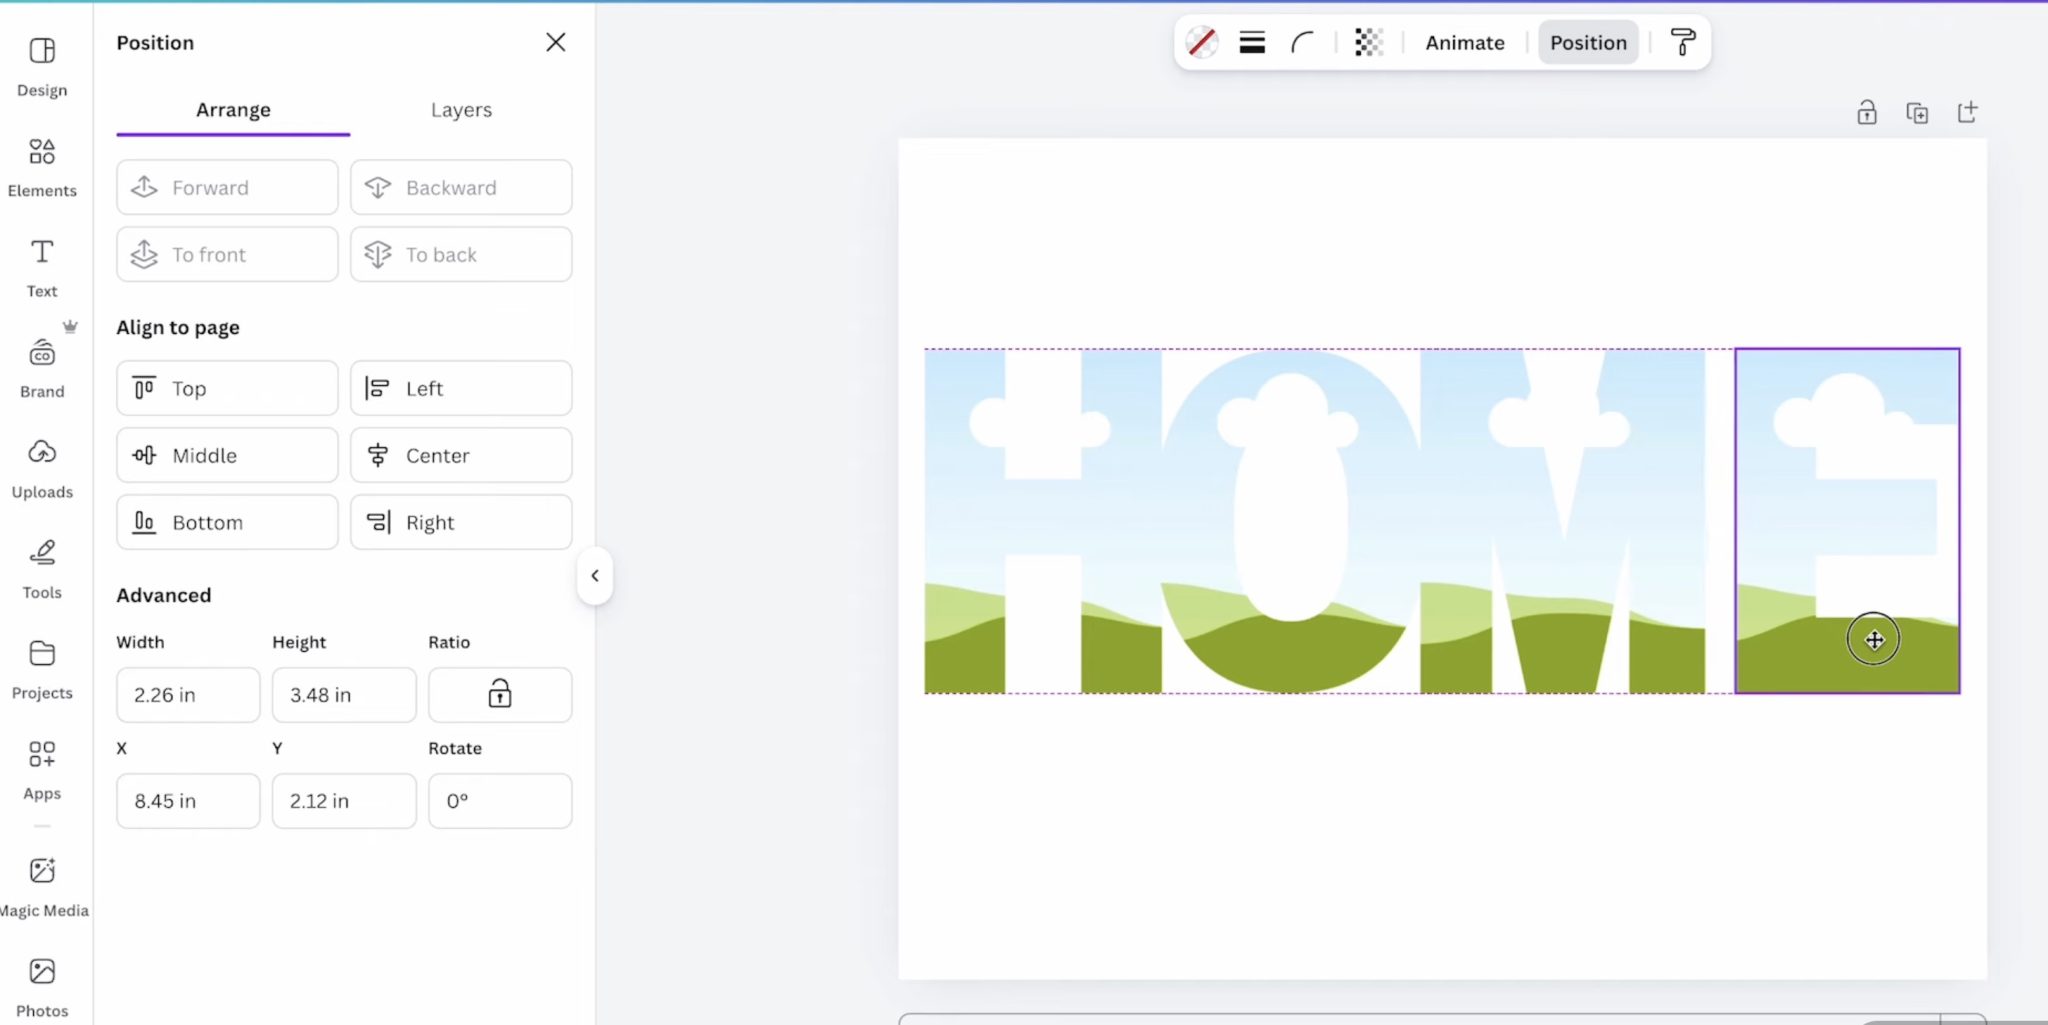
At this point, you can select all the letters and then click Position, and that will give you the actual size of your design. Mine measures 3.83 inches high and 10.5 inches wide.
Pin
I wanted the design to be just under 4 inches, and at 10.5 inches, that leaves a nice border on each end.
Step 3. Print Design
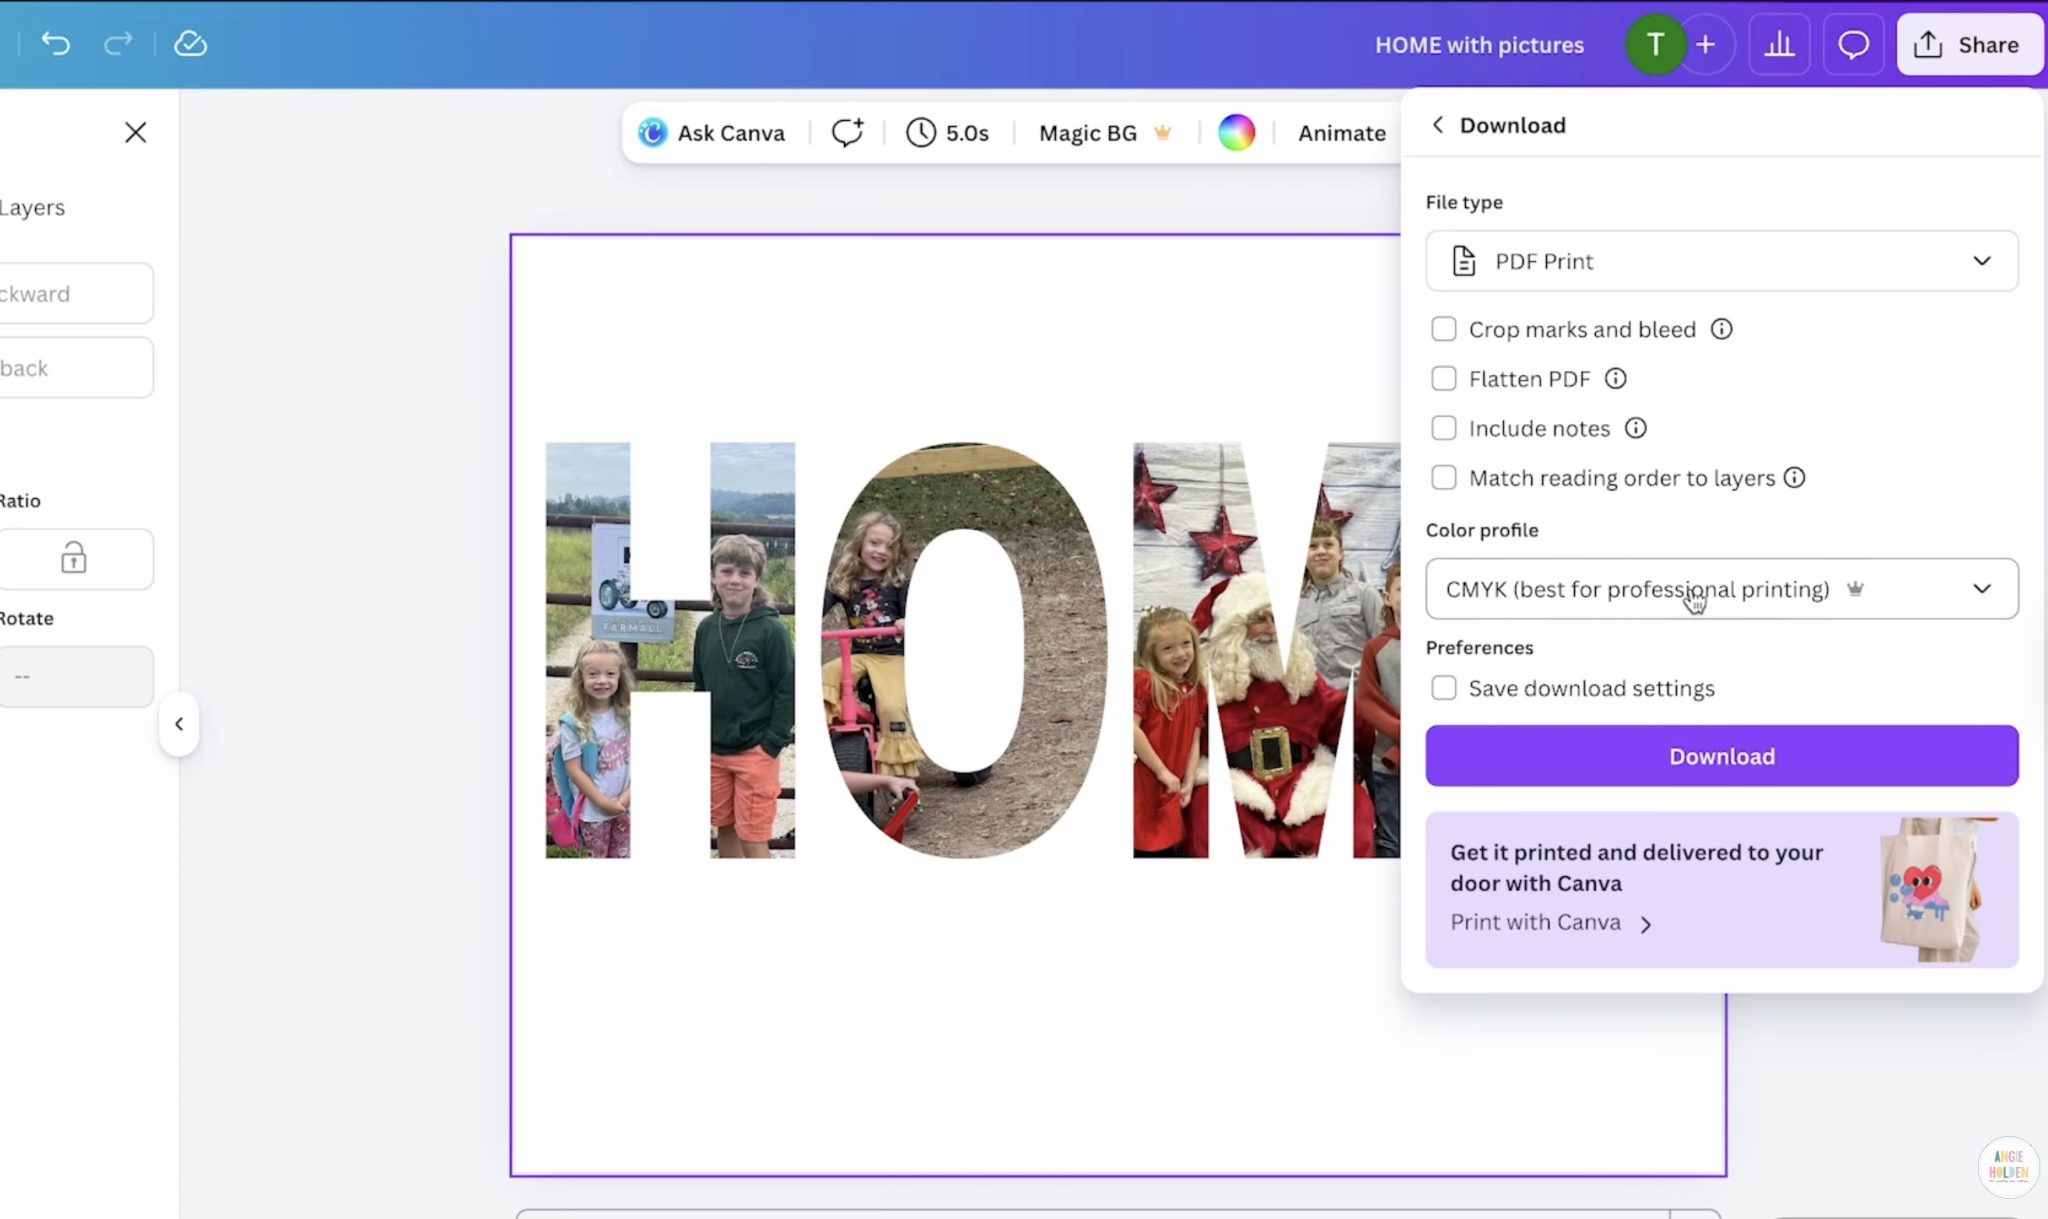
You cannot print directly from Canva. Click Share and then Download, and I like to choose PDF for Print and CMYK. I get the best results with these settings and my sublimation printer.
Pin
Note – you need to mirror your design. If you didn’t do it during the design process, make sure you do it when you send it to the printer.
Pin
For this project, you need a sublimation print. That is sublimation ink printed on sublimation paper from a sublimation printer. You can’t do this project with a regular printer and regular ink.
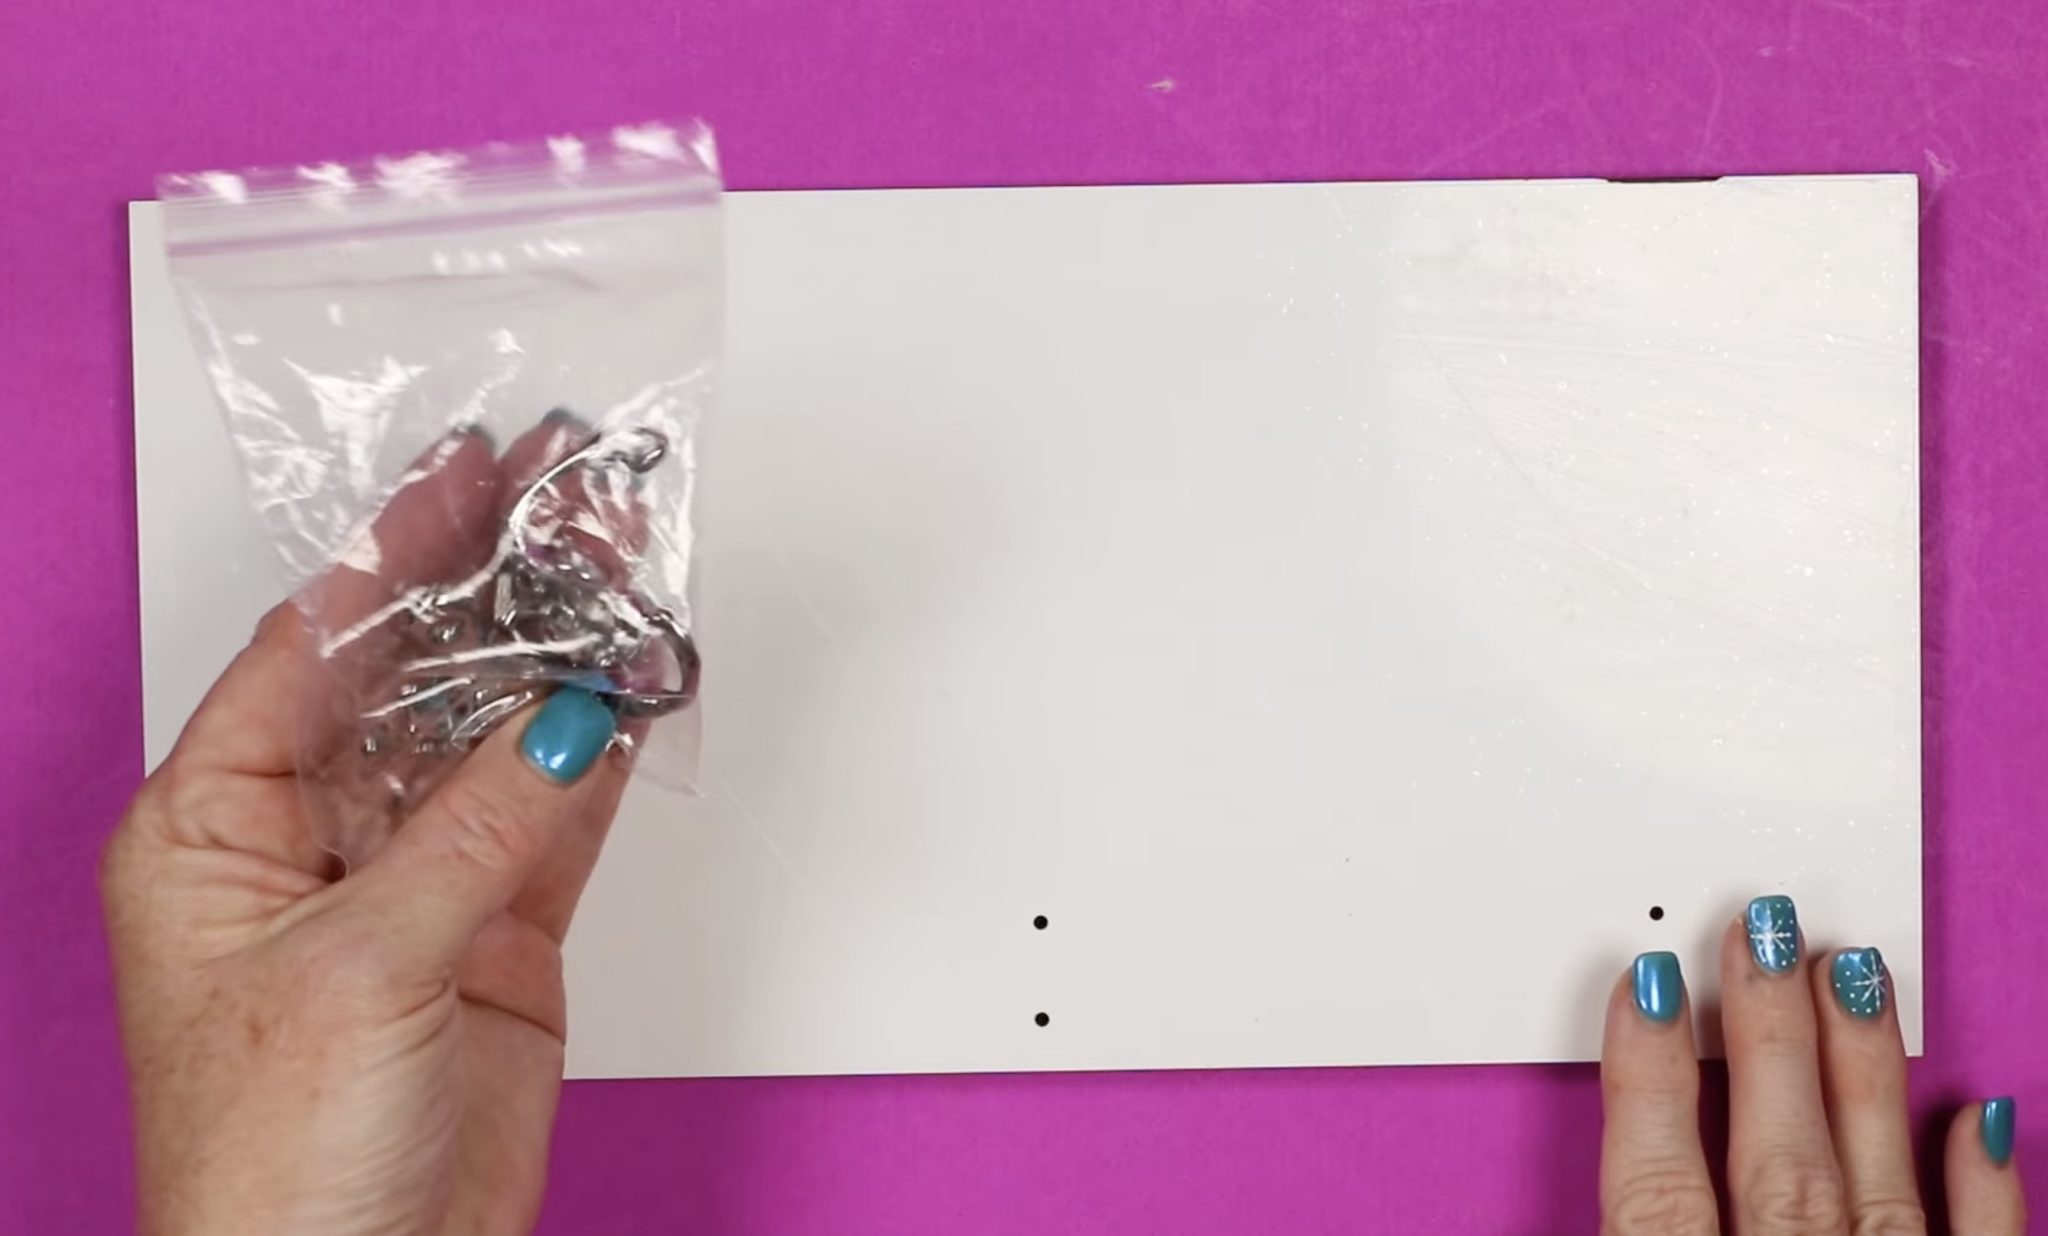
Step 4. Prepare Blank
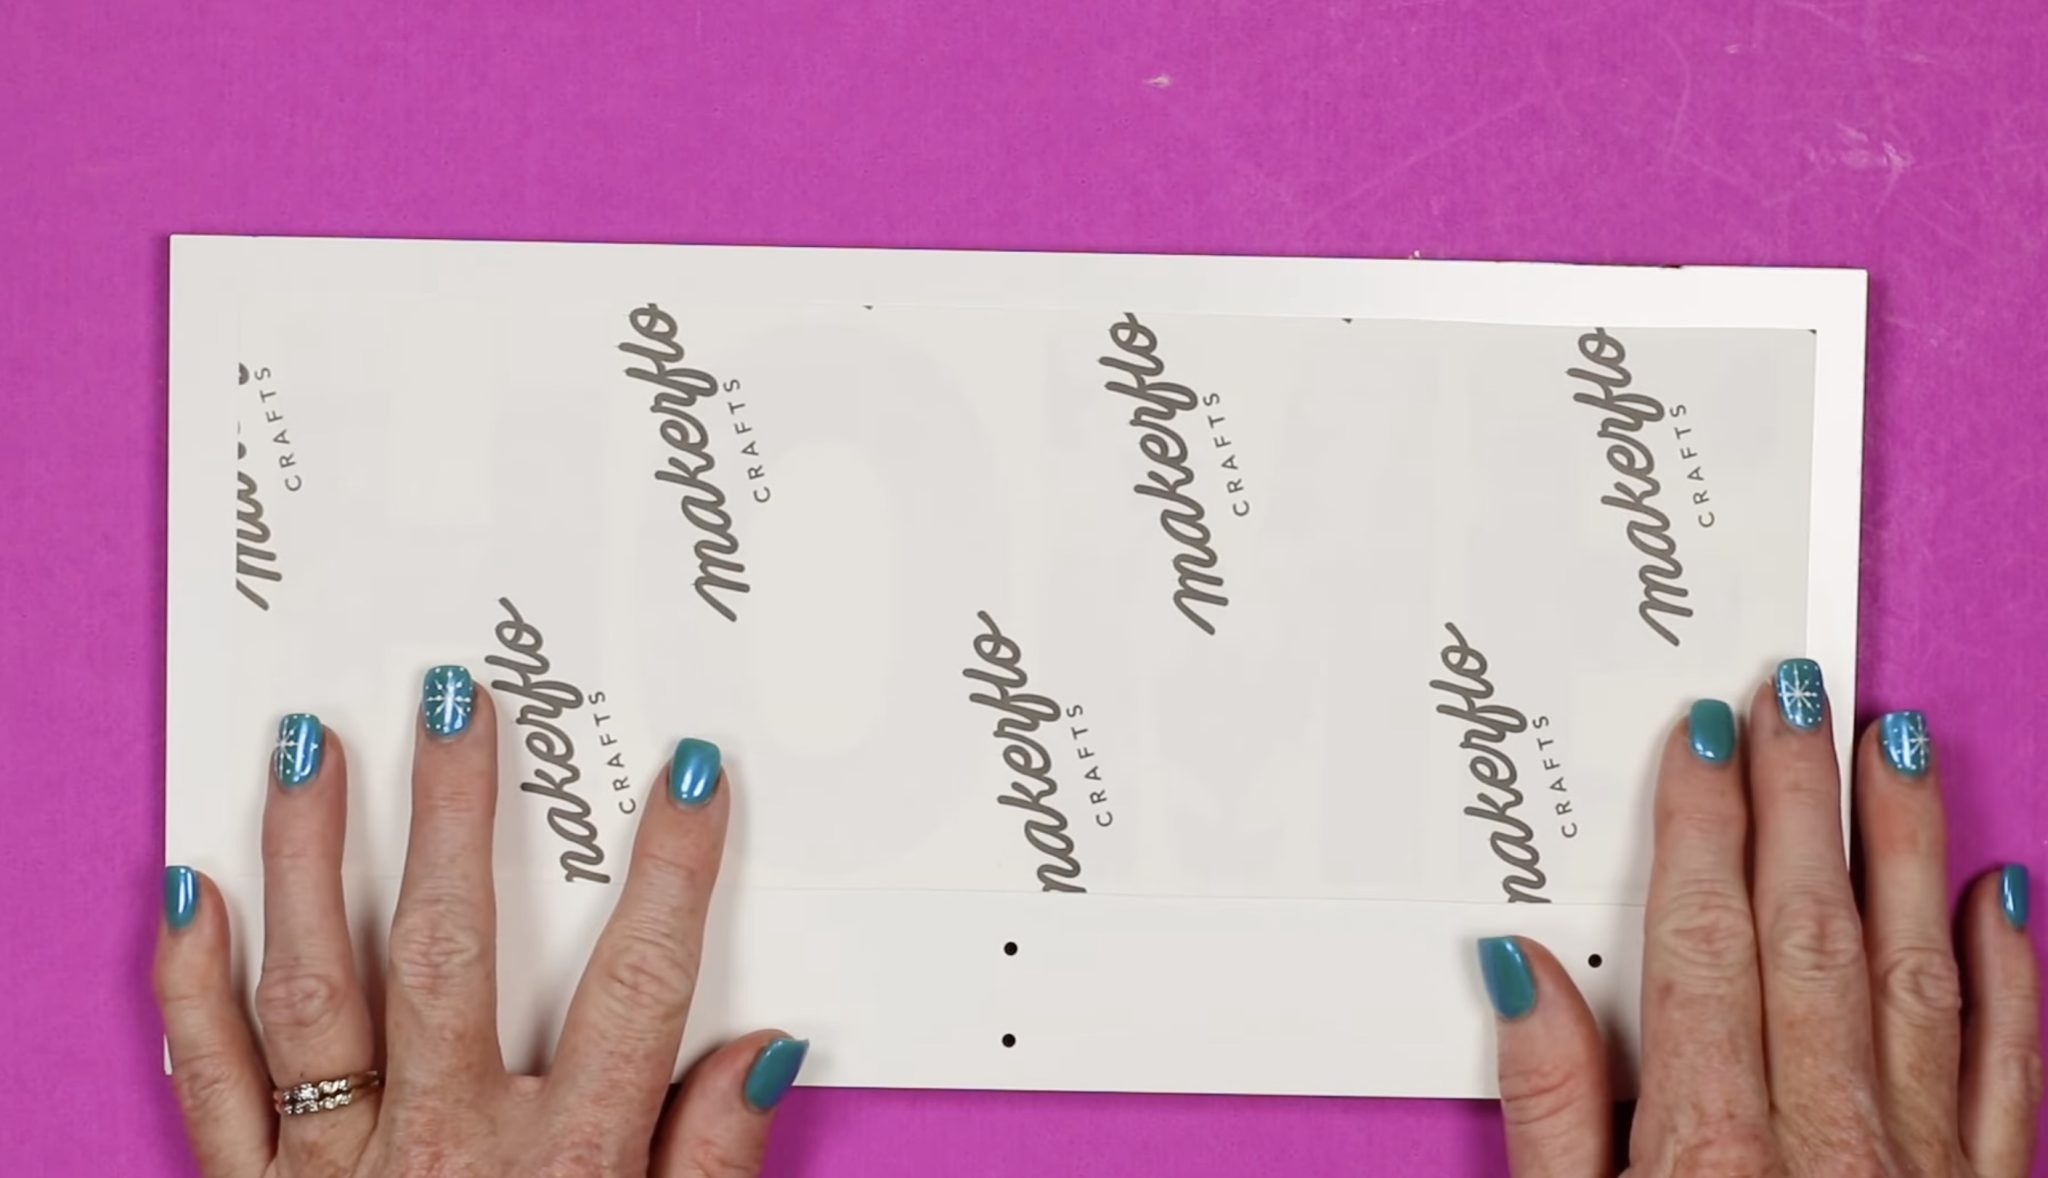
When you open the sublimation hanging organizer, it will have a protective film on the white side of the print, and the hooks are not attached.
Pin
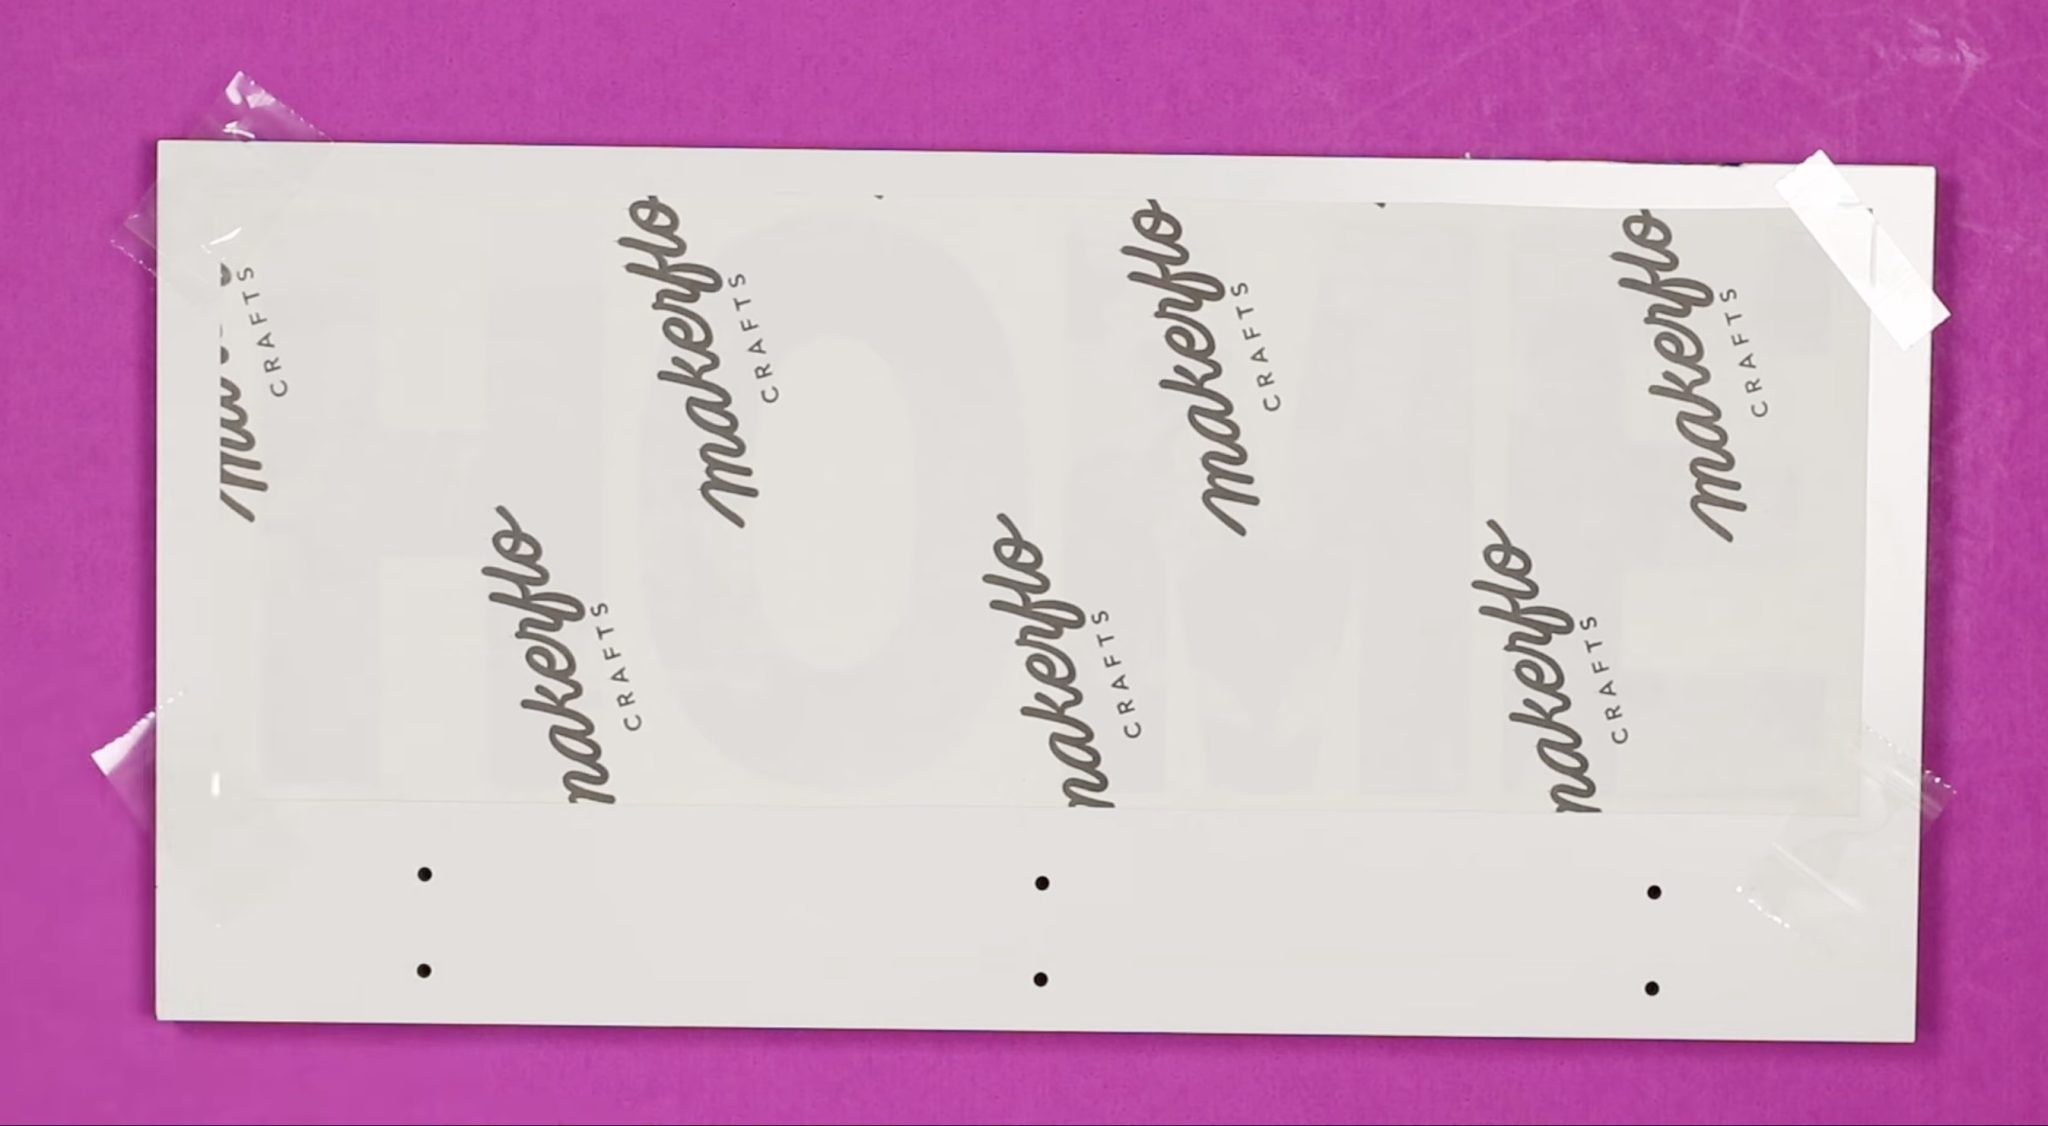
Move the hooks to the side and remove the protective film. If your organizer looks scratched or dirty when you first open it, that is likely because of the protective film.
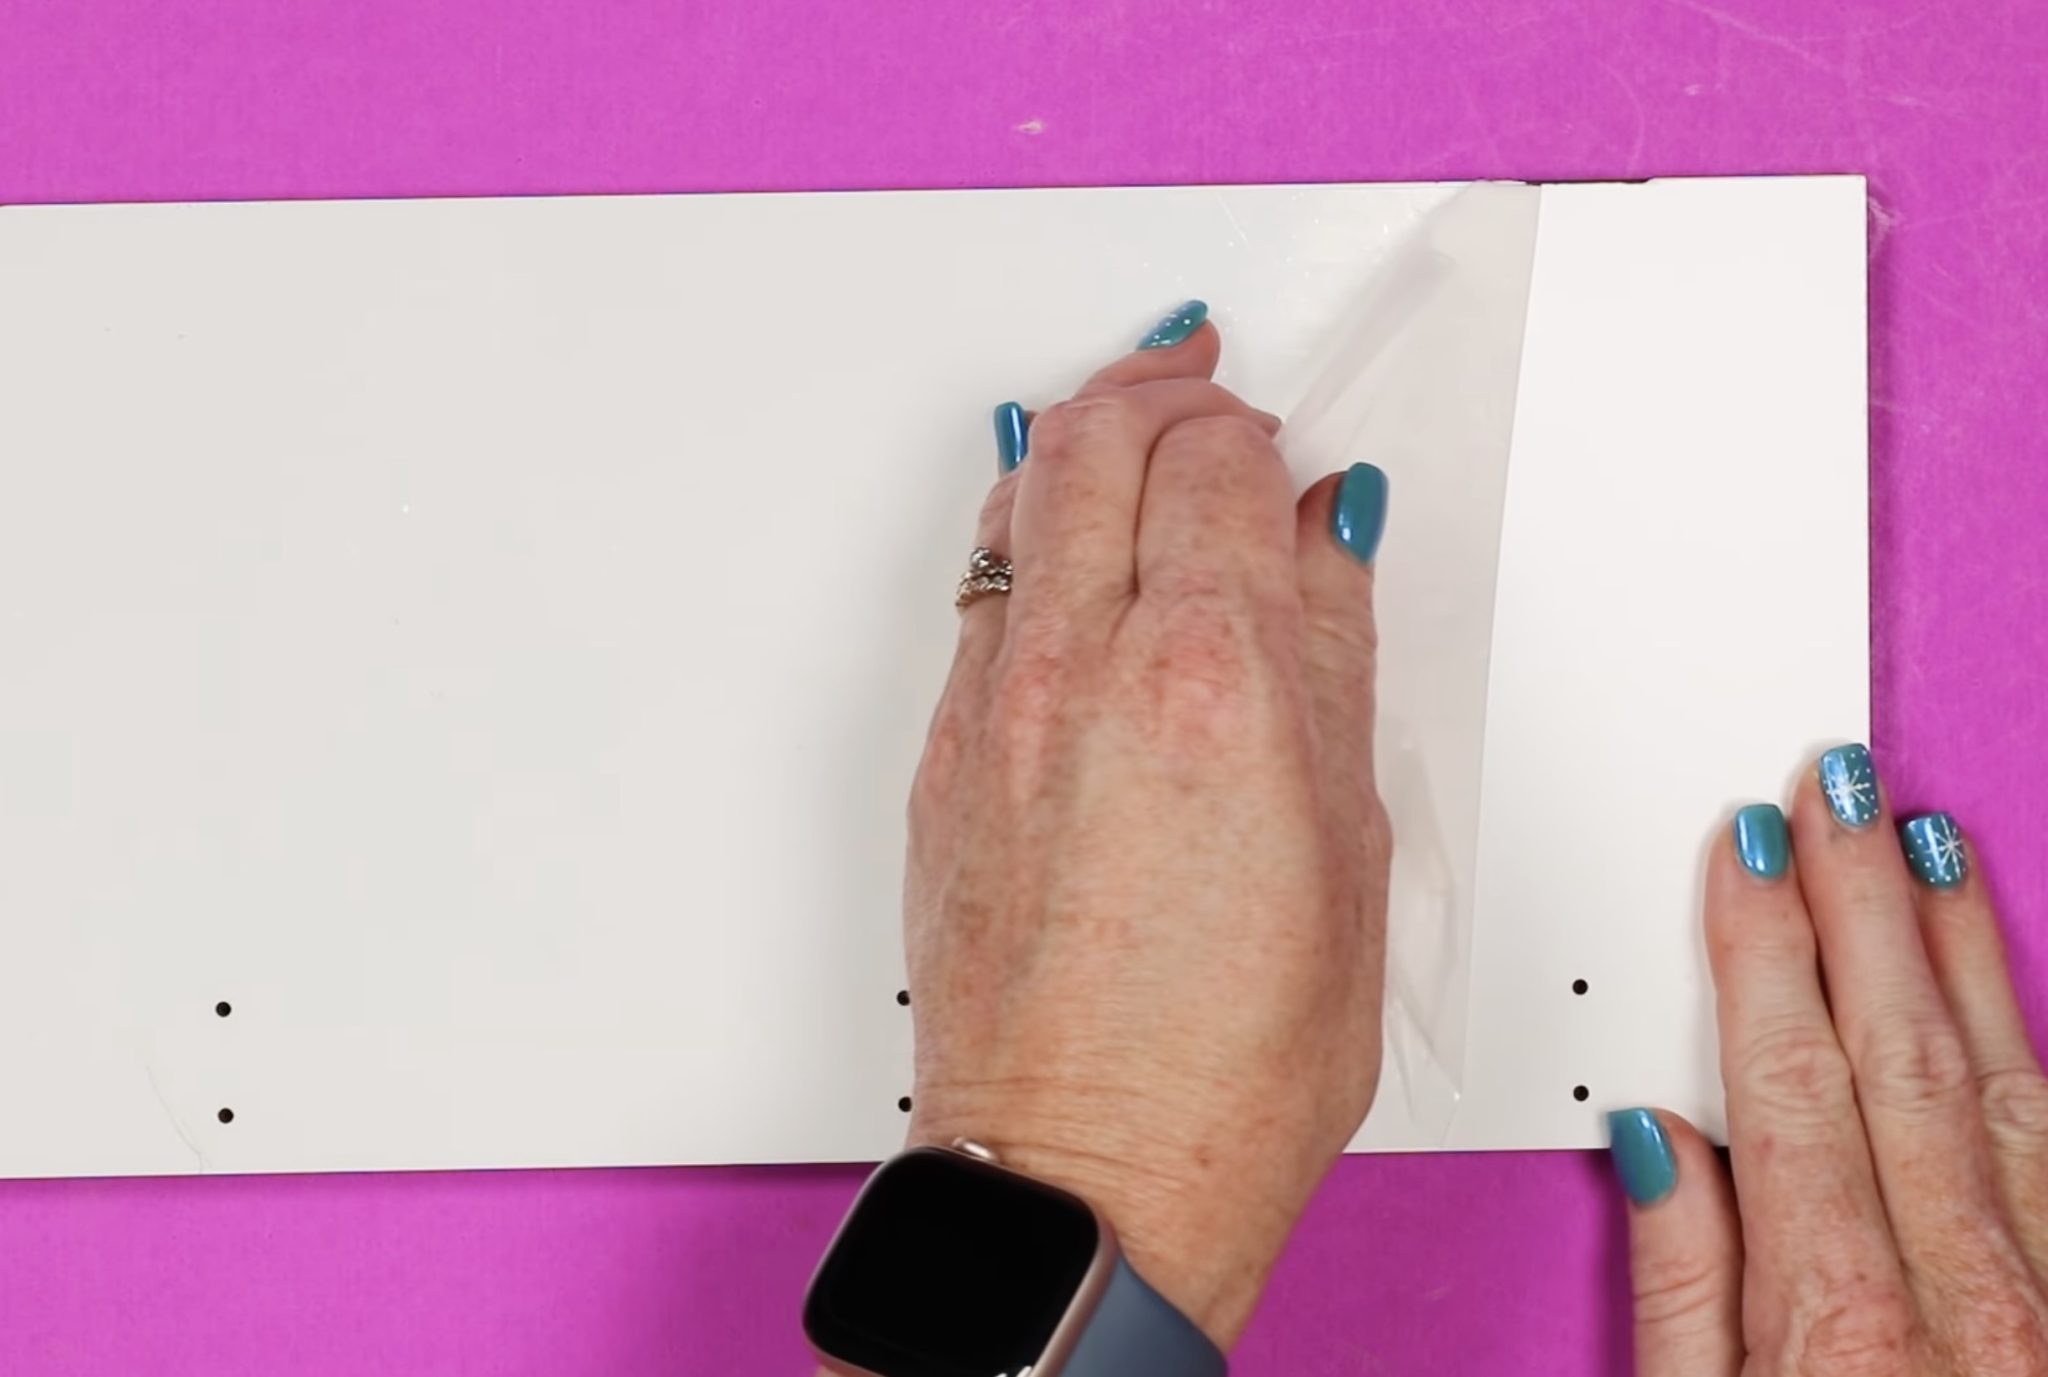
Pin
With the film removed, check all the edges of your sign. Sometimes there can be a little black from the edges that comes over onto the front. If there is any, use something like a scraper tool to clean it off and then lint roll the surface to remove any dust or debris.
Pin
Step 5. Add Sublimation Print
Now, we’re ready to apply the print.
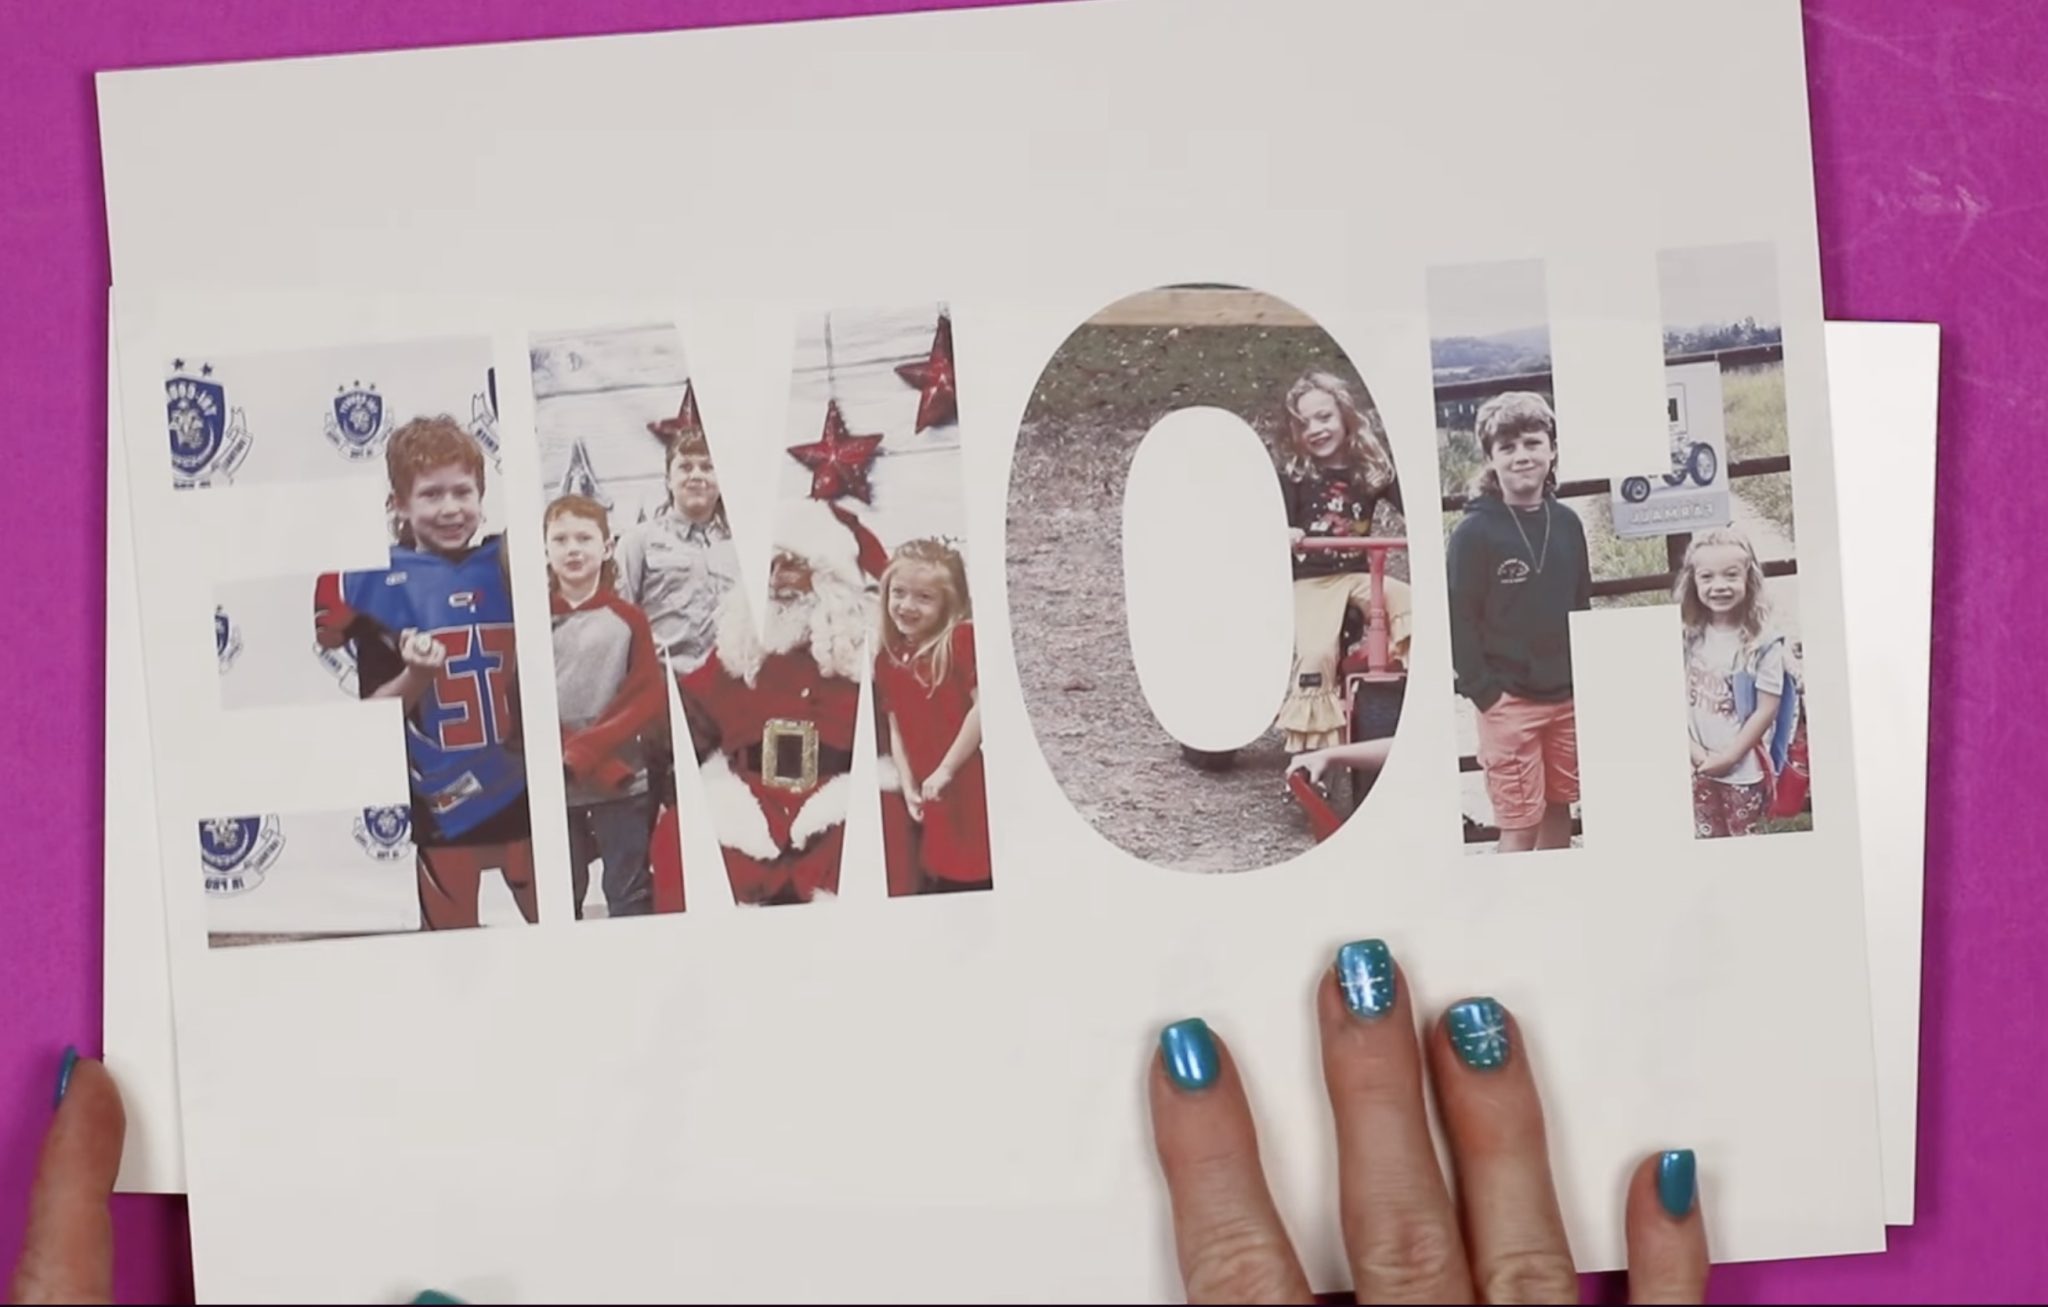
Because of the size of my design, to begin, I am going to trim the print close to the design. This will make it easier for me to locate the design exactly where I want it.
Pin
Note – pay attention to the holes for the hooks. Unless you’re doing a full design, you’ll want to raise the design a little above those holes because the top of the hook is a little higher than the hole.
Pin
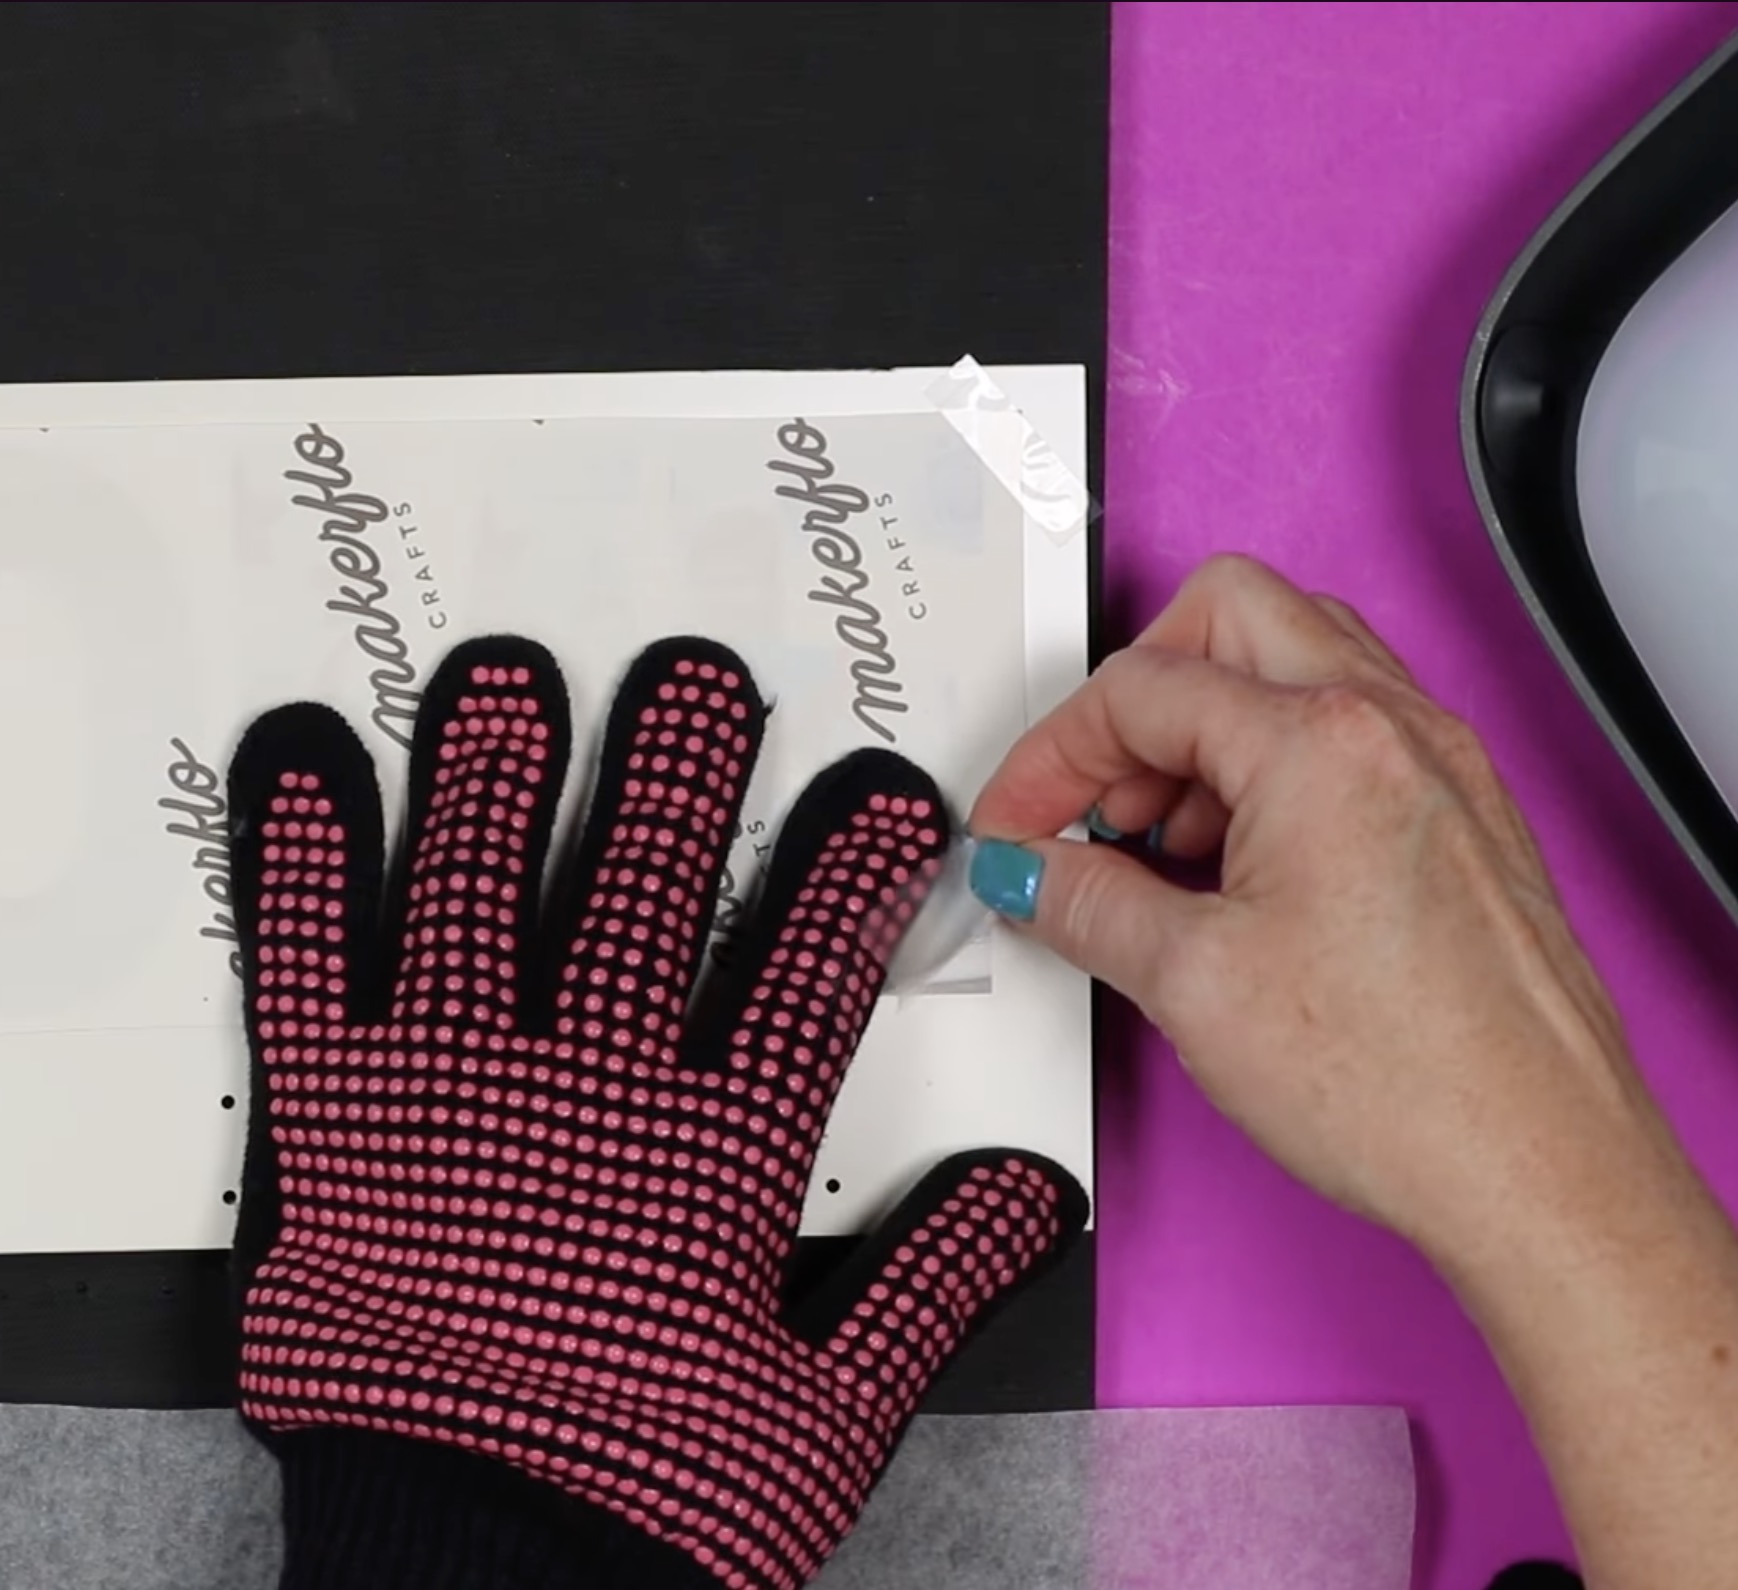
With the design located, secure it in place with heat-resistant tape.
Pin
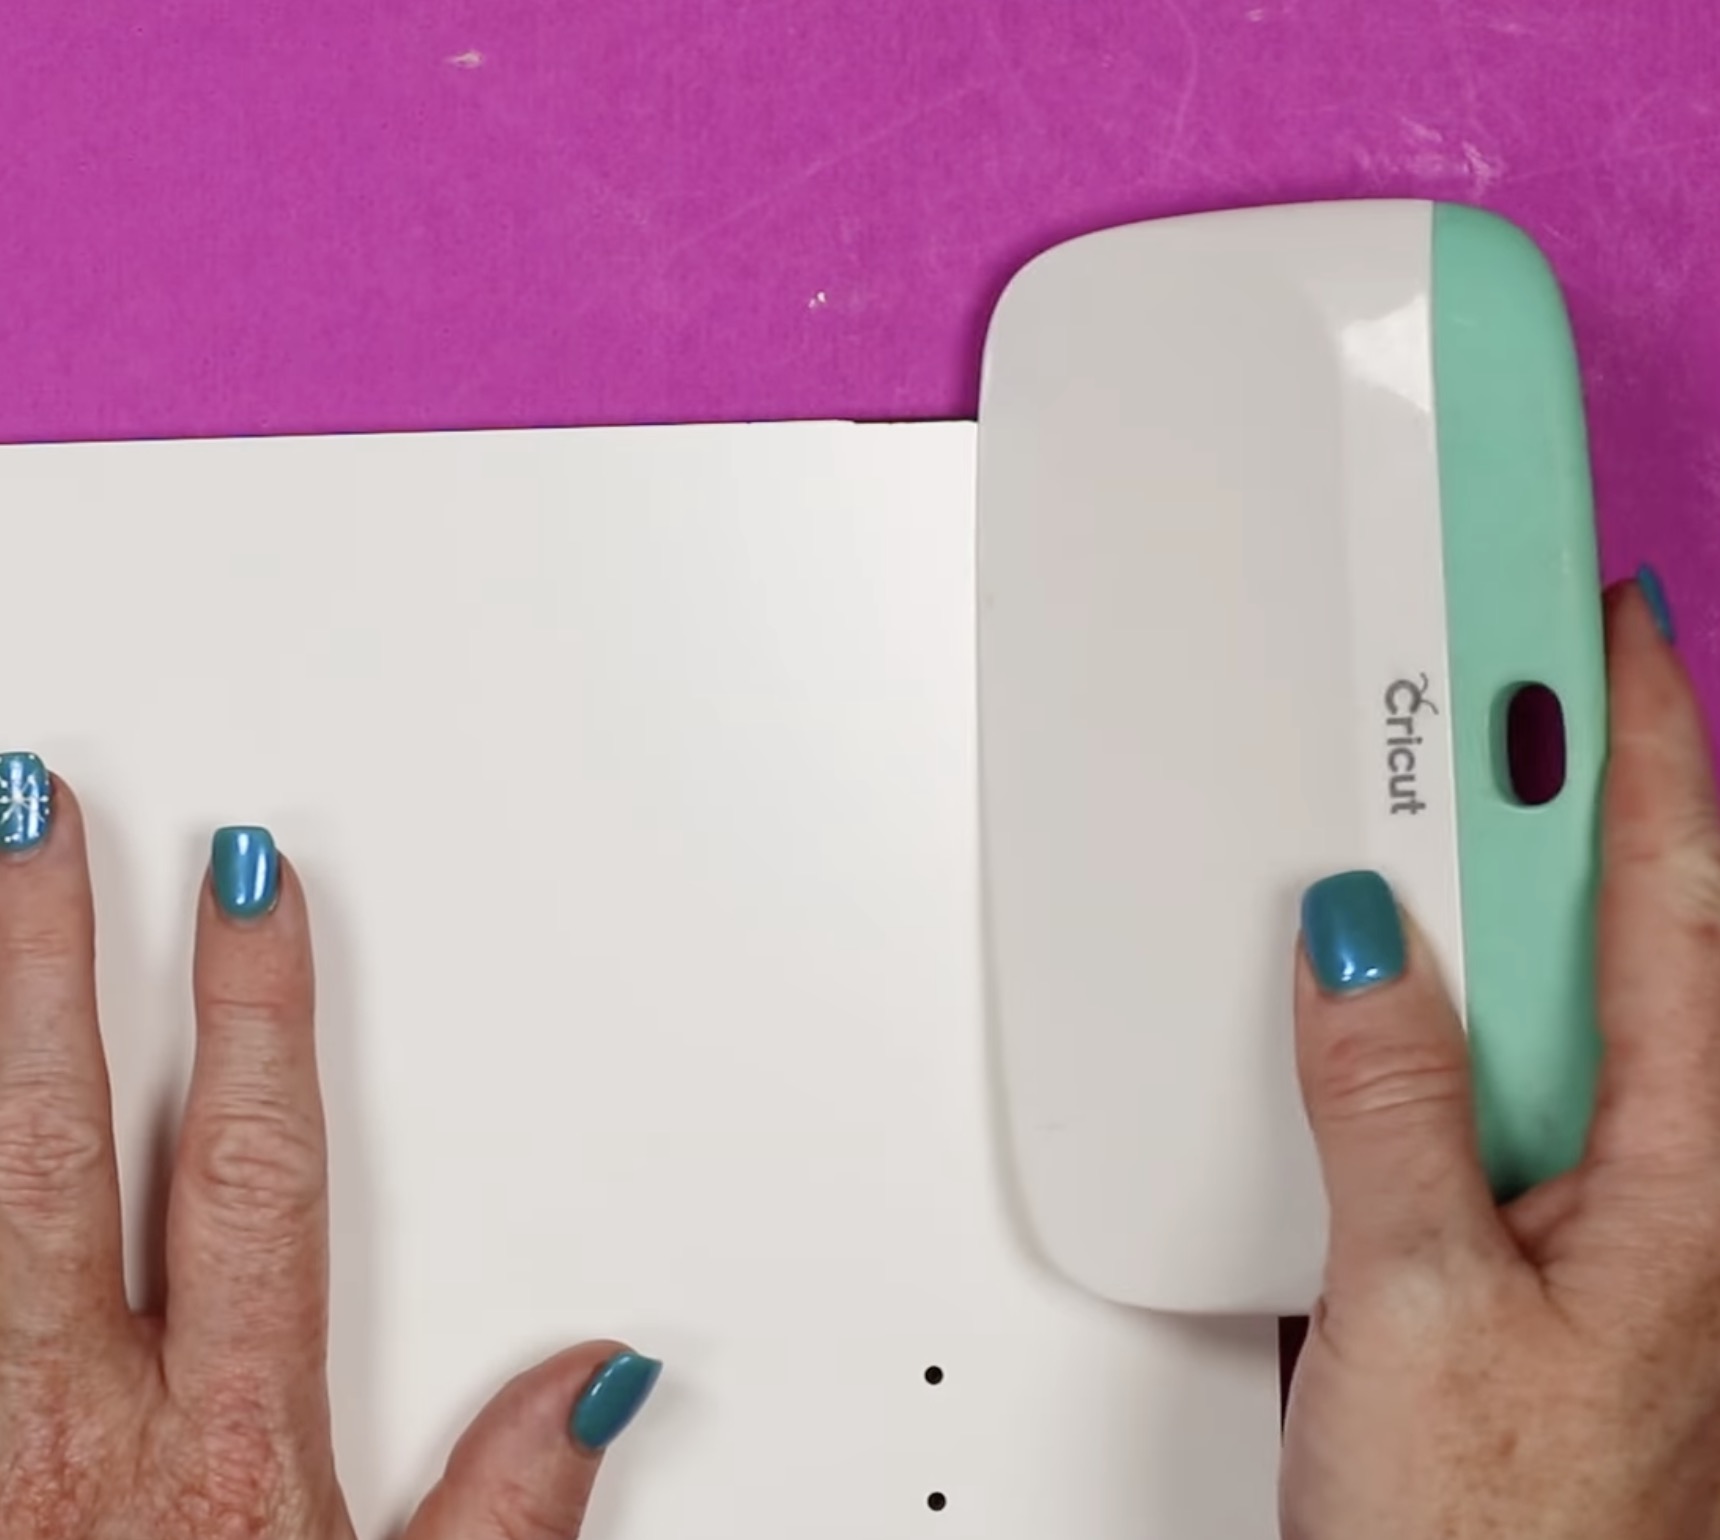
Step 6. Press the Design
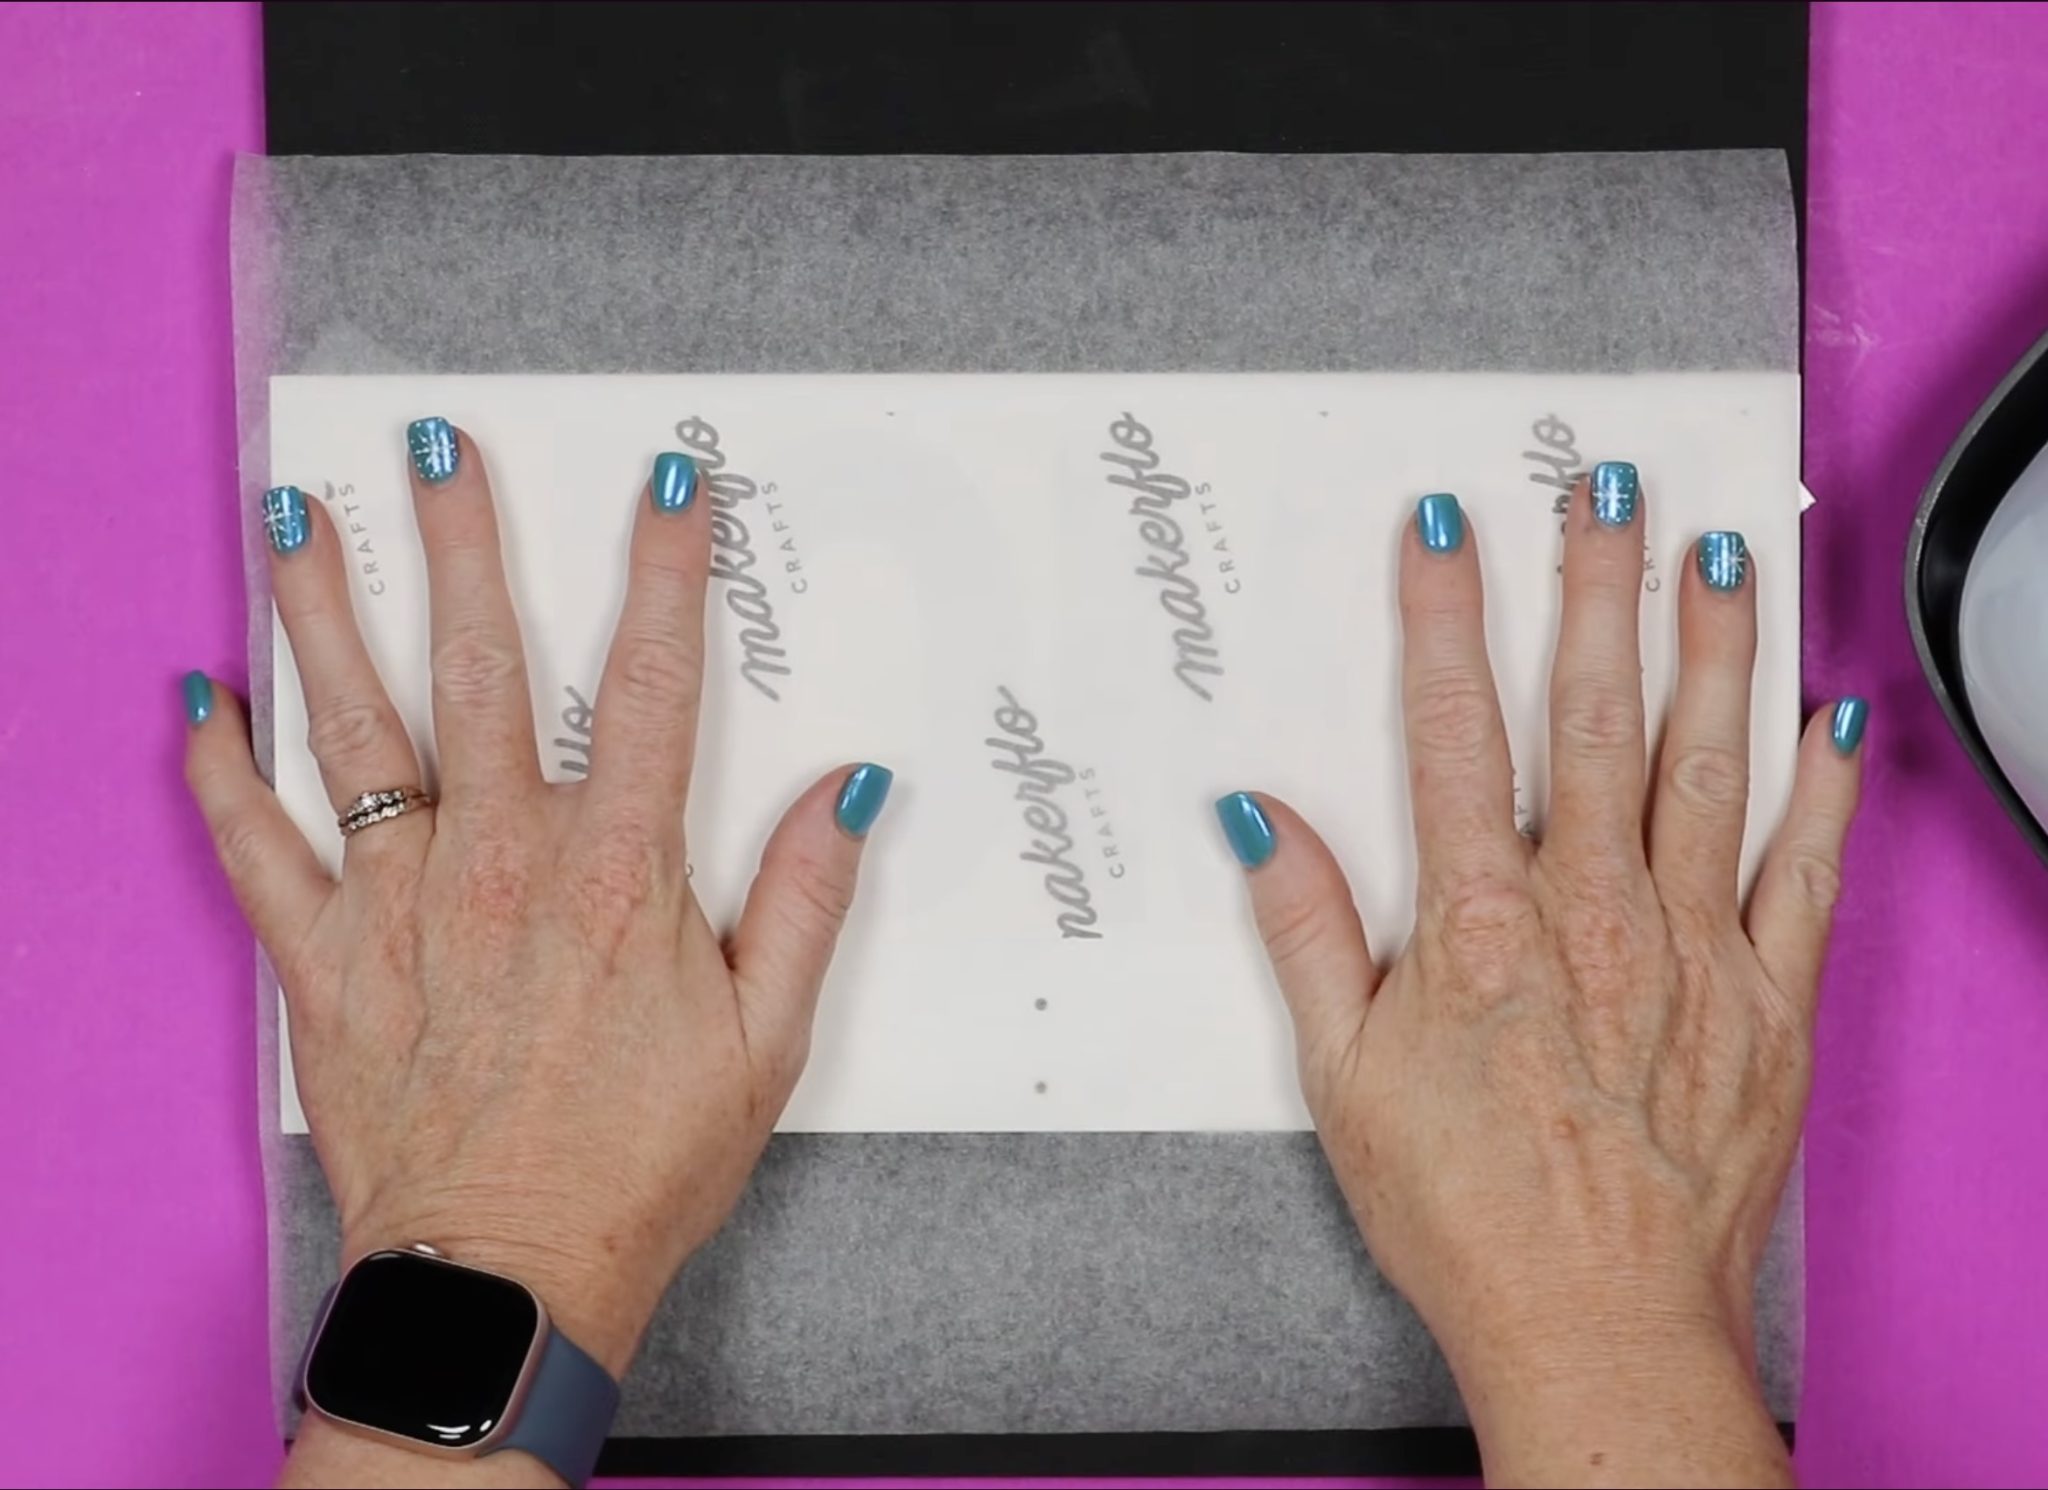
Place the sublimation hanging organizer on a heat-resistant mat and cover the design with protective paper.
Pin
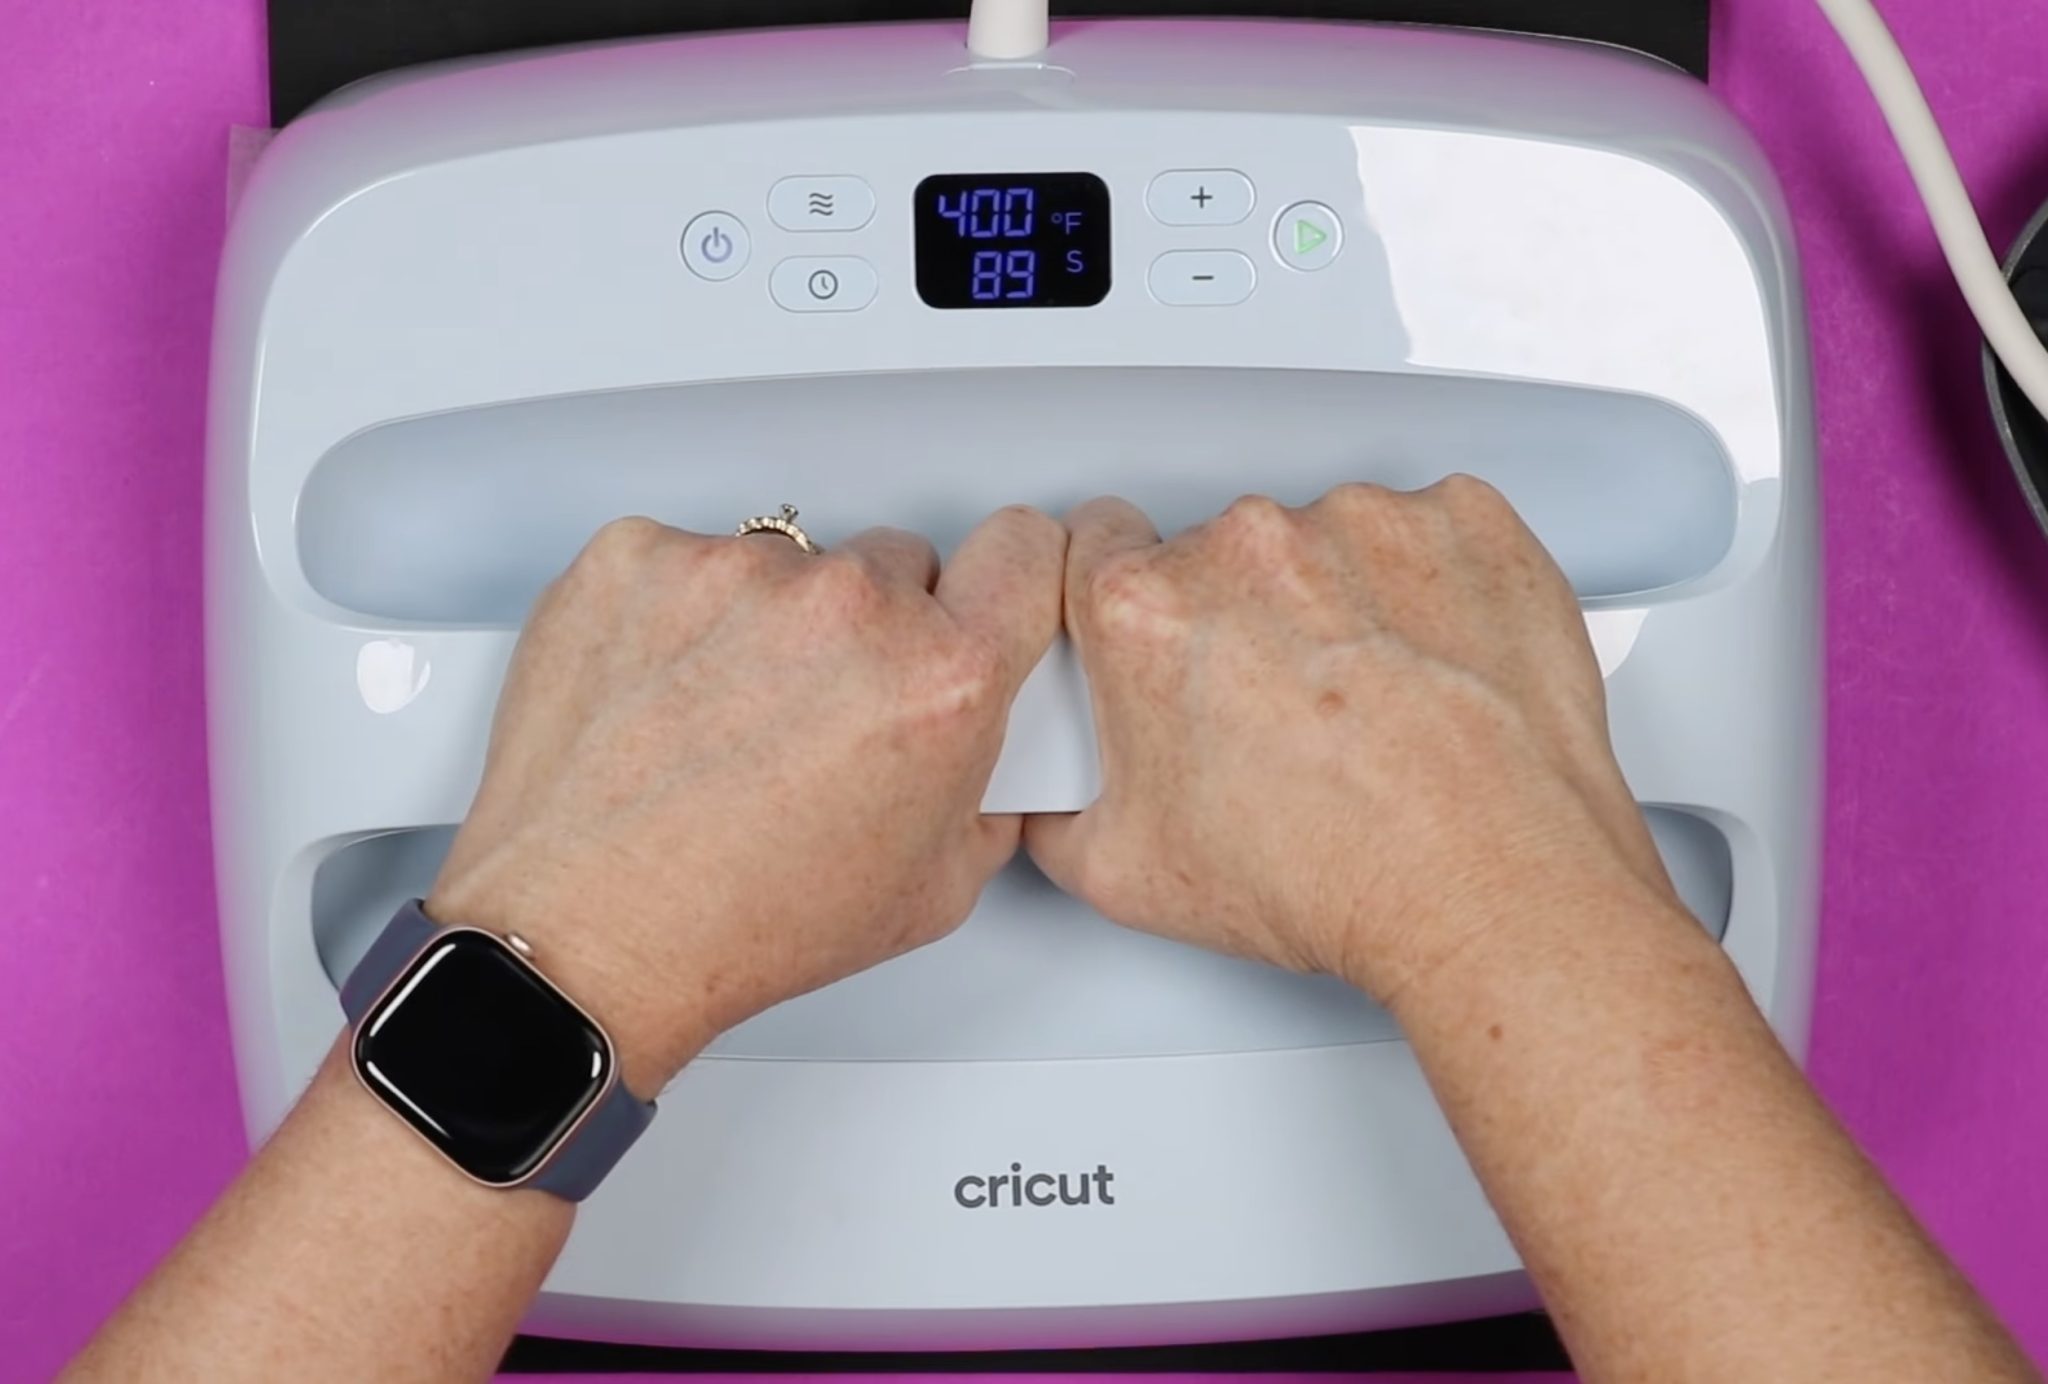
I am using my 10-inch by 12-inch EasyPress 3 because it will cover the entire design. Preheat the press to 400 degrees and set the timer to 90 seconds.
Pin
Place the EasyPress on the print, making sure to cover the entire print. Apply medium pressure for the entire time.
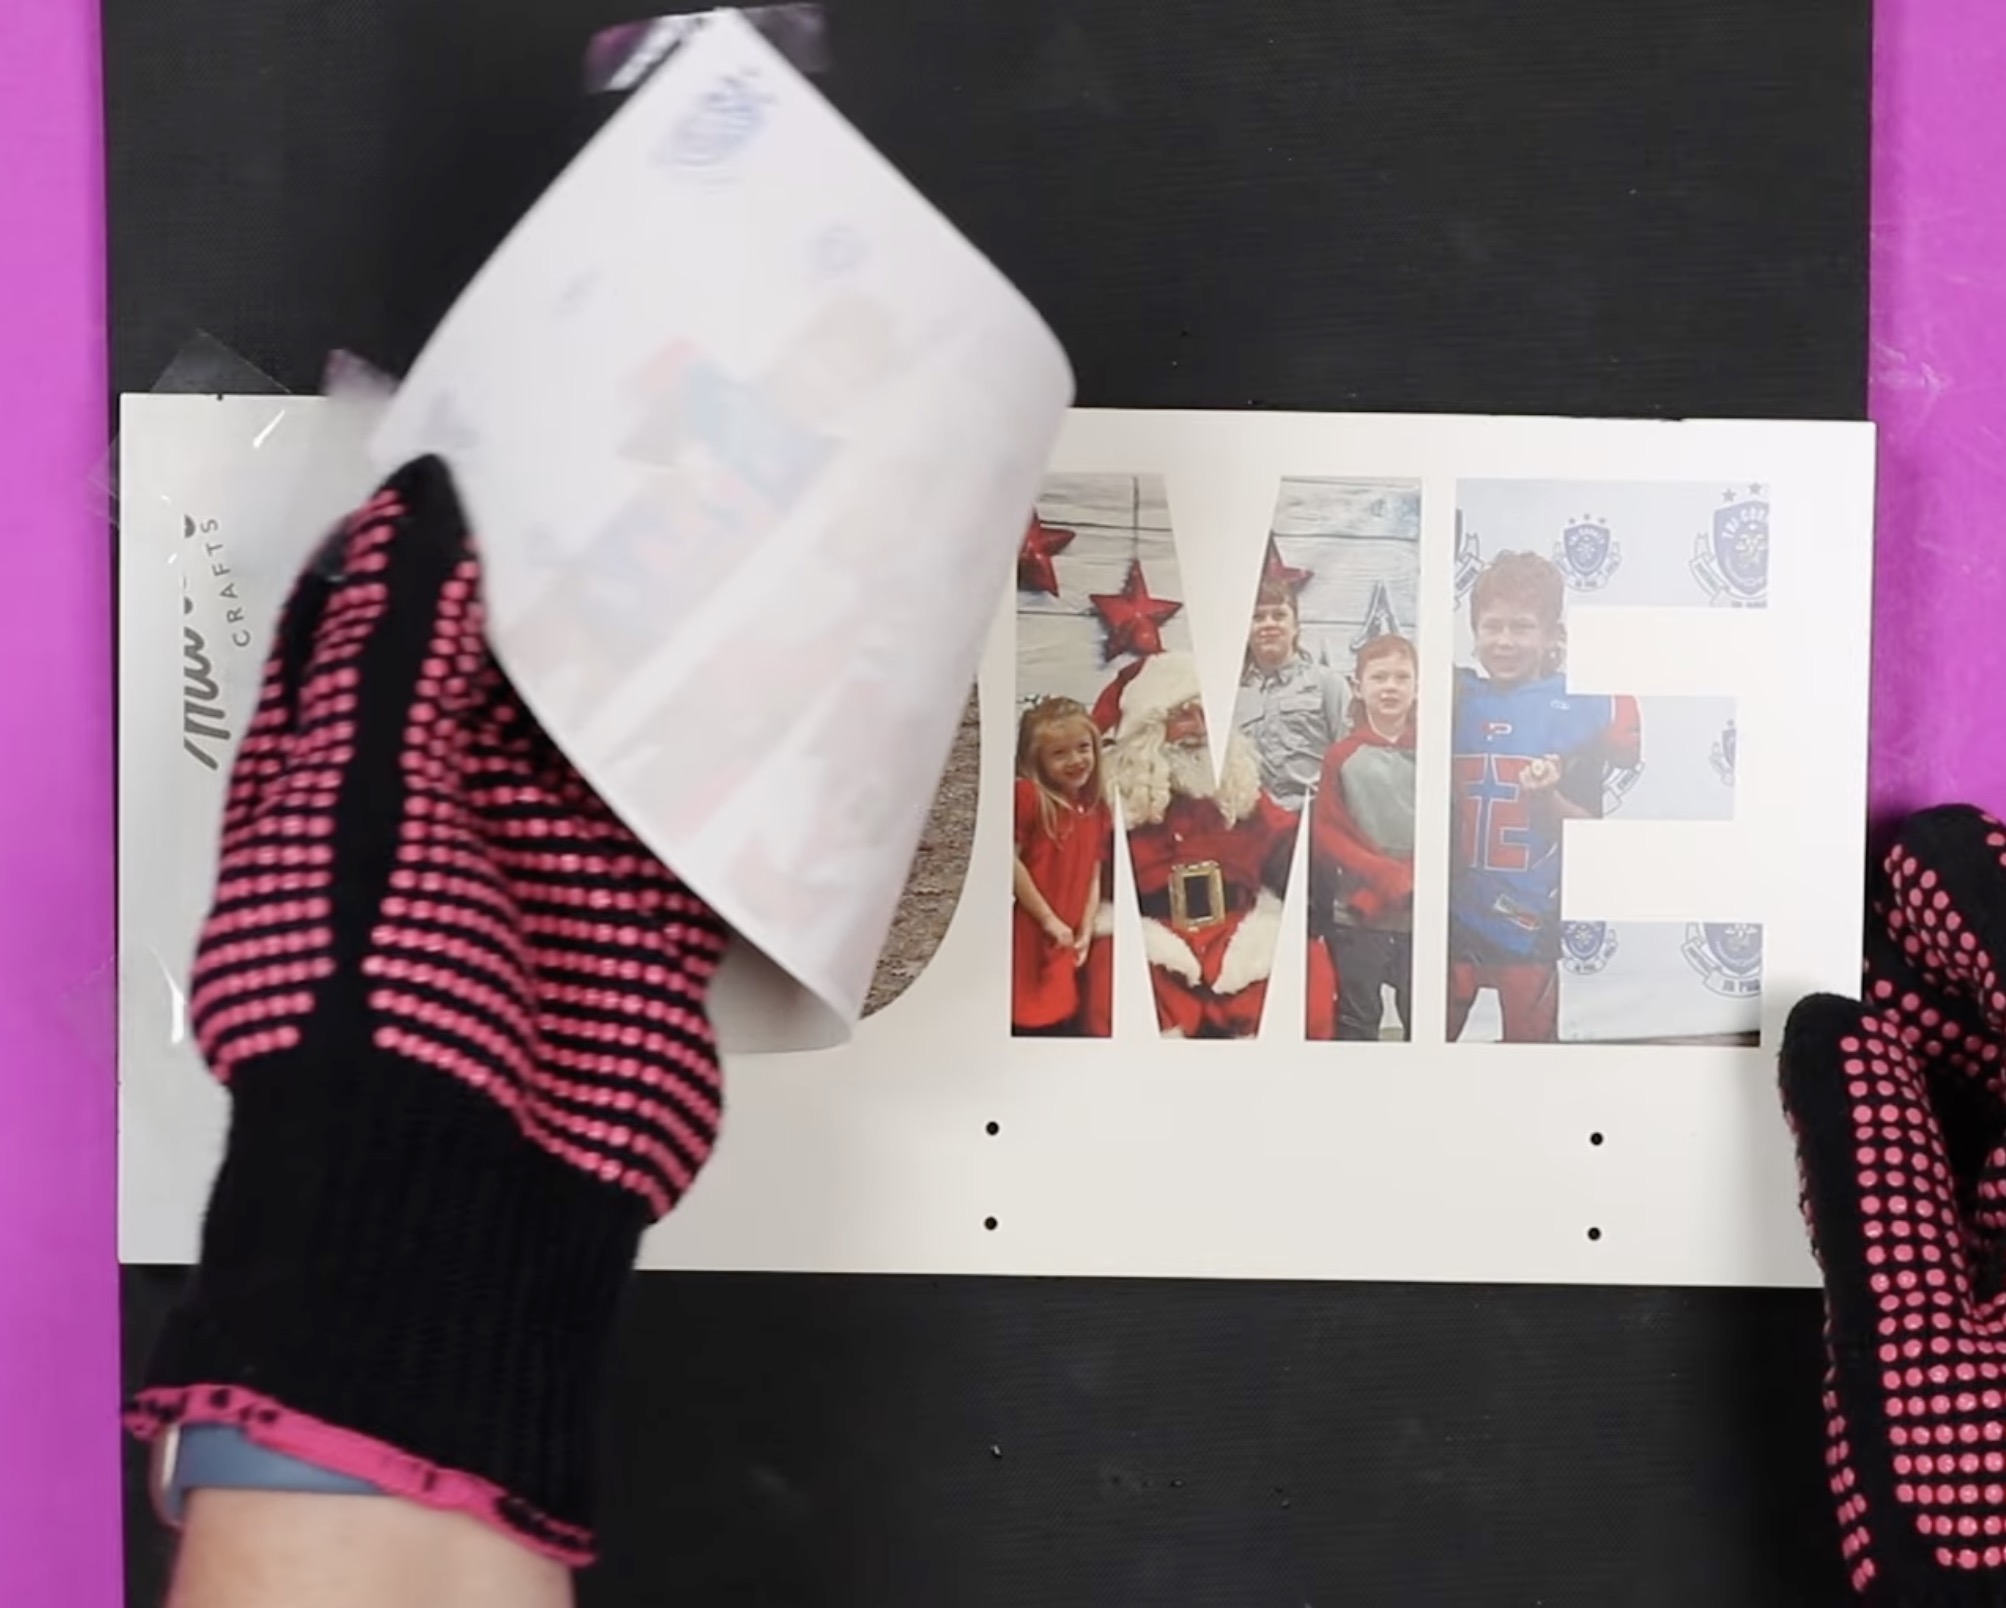
Step 7. Remove Sublimation Print
When the time is up, remove the EasyPress and place it to the side. Your organizer will be very hot, so using heat-resistant gloves, lift the corner of your print and check that the design has transferred. Place the print back down and repeat the process for each corner.
Pin
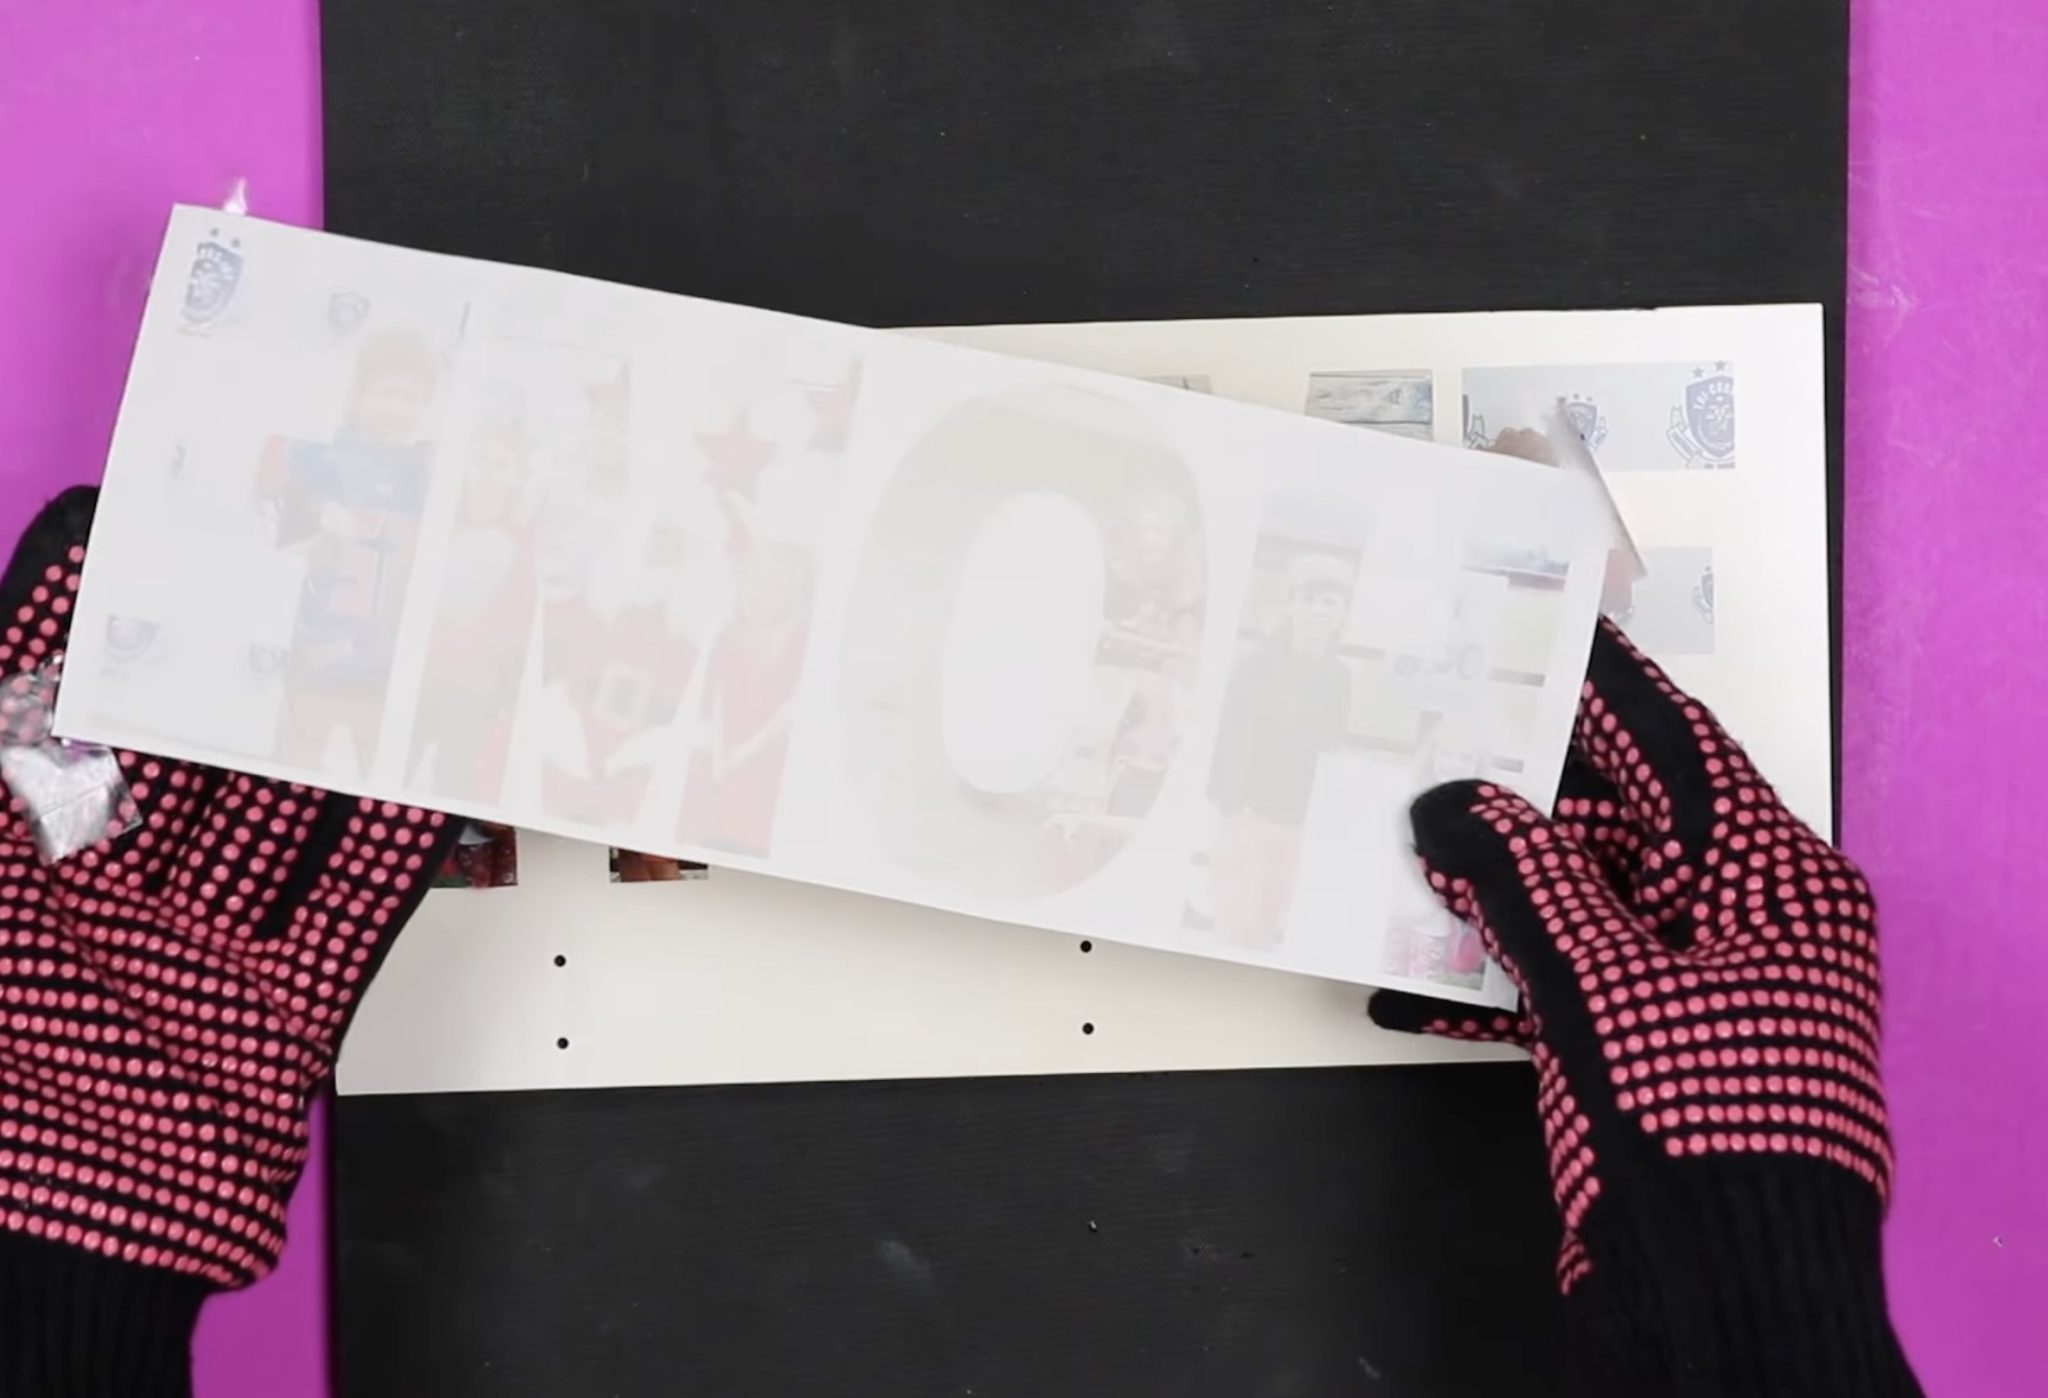
My design transferred beautifully with one press.
Pin
Almost all of the ink has transferred from the paper to the sublimation hanging organizer.
Pin
Remove the print and then flip the organizer over and place it under the heat-resistant mat, with something heavy on top while it cools. This will prevent the blank from warping while it cools.
Pin
Step 8. Finish Sublimation Hanging Organizer
The only thing left to do at this point is to add the hooks.
There are holes pre-drilled for the hooks, and the hooks come with screws. Secure the hooks using a screwdriver, and your hanging organizer is finished.
Pin
More Ideas for a Sublimation Hanging Organizer
I am loving how this project turned out. It was so easy, even with the design process.
Pin
While I customized my organizer with the word Home and photos, you can do any design and word you want.
I am excited about all the different ways this can be used. I was thinking it would even be adorable in a kitchen for hanging aprons, decor pieces, or kitchen towels.
I did notice when I purchased this organizer with these hooks that the inventory was low. I linked to a few other options in the supply list above. If you choose an option different from the one I used, make sure to check the time and temperature recommendations.
All that’s left for you to do is choose where you want to put your hanging sublimation organizer and the design you want to add to it.
I hope I’ve answered any questions you have. If you have any additional questions, leave them in the comments, and I’ll be happy to answer them for you.
Try a chicken nugget casserole with a cordon bleu twist, turning nuggets, ham, and cheese into cozy comfort food. If you're anything like me, you're a [...]
A navy blue house has a bold, timeless elegance, but choosing the right flowers to complement it can be surprisingly tricky. The wrong colors can disa [...]
With maritime lanterns with sand you can bring a real holiday feeling home. All you need is a few materials, a little creativity and a little patience [...]
What if I told you that this perfect, buttery, crunch-in-your-mouth English toffee recipe is surprisingly easy to make with your family? You may think [...]
We use cookies on our website to give you the most relevant experience by remembering your preferences and repeat visits. By clicking “Accept”, you consent to the use of ALL the cookies.
This website uses cookies to improve your experience while you navigate through the website. Out of these, the cookies that are categorized as necessary are stored on your browser as they are essential for the working of basic functionalities of the website. We also use third-party cookies that help us analyze and understand how you use this website. These cookies will be stored in your browser only with your consent. You also have the option to opt-out of these cookies. But opting out of some of these cookies may affect your browsing experience.
Necessary cookies are absolutely essential for the website to function properly. These cookies ensure basic functionalities and security features of the website, anonymously.
Cookie
Duration
Description
cookielawinfo-checbox-analytics
11 months
This cookie is set by GDPR Cookie Consent plugin. The cookie is used to store the user consent for the cookies in the category "Analytics".
cookielawinfo-checbox-functional
11 months
The cookie is set by GDPR cookie consent to record the user consent for the cookies in the category "Functional".
cookielawinfo-checbox-others
11 months
This cookie is set by GDPR Cookie Consent plugin. The cookie is used to store the user consent for the cookies in the category "Other.
cookielawinfo-checkbox-necessary
11 months
This cookie is set by GDPR Cookie Consent plugin. The cookies is used to store the user consent for the cookies in the category "Necessary".
cookielawinfo-checkbox-performance
11 months
This cookie is set by GDPR Cookie Consent plugin. The cookie is used to store the user consent for the cookies in the category "Performance".
viewed_cookie_policy
11 months
The cookie is set by the GDPR Cookie Consent plugin and is used to store whether or not user has consented to the use of cookies. It does not store any personal data.
Functional cookies help to perform certain functionalities like sharing the content of the website on social media platforms, collect feedbacks, and other third-party features.
Performance cookies are used to understand and analyze the key performance indexes of the website which helps in delivering a better user experience for the visitors.
Analytical cookies are used to understand how visitors interact with the website. These cookies help provide information on metrics the number of visitors, bounce rate, traffic source, etc.
Advertisement cookies are used to provide visitors with relevant ads and marketing campaigns. These cookies track visitors across websites and collect information to provide customized ads.