Learning how to make Recycled Paper is easy, fun and straightforward with this no fail, step-by-step tutorial! Don’t worry – as a lifelong fiber-arts enthusiast, I’ve made this paper hundreds of times and have included all my best tips and tricks so your paper will turn out great every time.
Jump to:
This eco-friendly craft upcycles materials you already have around the house to create homemade paper from scratch. You might be surprised at how simple it is to turn scraps into gorgeous, textured, one-of-a-kind pieces of paper! As Judy commented, “These are the best instructions I’ve seen…great for children AND adults!”
Who invented paper anyways?
During our home schooling years long ago we studied paper making while doing a unit study on China. Paper was invented by the Chinese in about 100 AD. Cool, huh?
We made paper with some friends and then did some printing and brush painting on it. I still have mine somewhere…
It was one of those creative projects that brought art alongside education, one of my favorite ways to learn.
Materials Needed for Making Recycled Paper
Gather up your supplies and have a table to spread out on (this also works well outside). You’ll want a bit of space to work with.
SUPPLIES TO MAKE RECYCLED PAPER:
Frames, need two 8×10 in size (upcycled some old ones)
Window screen
Heavy duty stapler
Recycled paper, shredded if you can
Dryer lint, colored paper, other papers to add for fun
Blender
Tub
Sponge
Bath towels
Paper towels
Iron & ironing board
Instructions to Make Recycled Paper
1. Make a mould and deckle!! 🙂
The first thing to do is to make a mould and deckle. A what?! Ha! Let me explain.
These are the devices you will use to strain the paper pulp and form it into a sheet of paper. Don’t worry, it isn’t a complicated thing to make. You should be able to find the items needed at your local hardware store or home depot, or possibly even a thrift store!
The easiest way to make the mould and deckle is to use two old wooden frames. I used an 8 by 10 inch old picture frame, as this creates paper close to a traditional 8.5 by 11 inch size.
Once you’ve chosen your own frame size, take them apart and discard the glass, cardboard and any nails or tabs they may have. You only want the wooden frame itself.
Tip: Take care to get wooden frames. Some of the plastic frames look like wood.
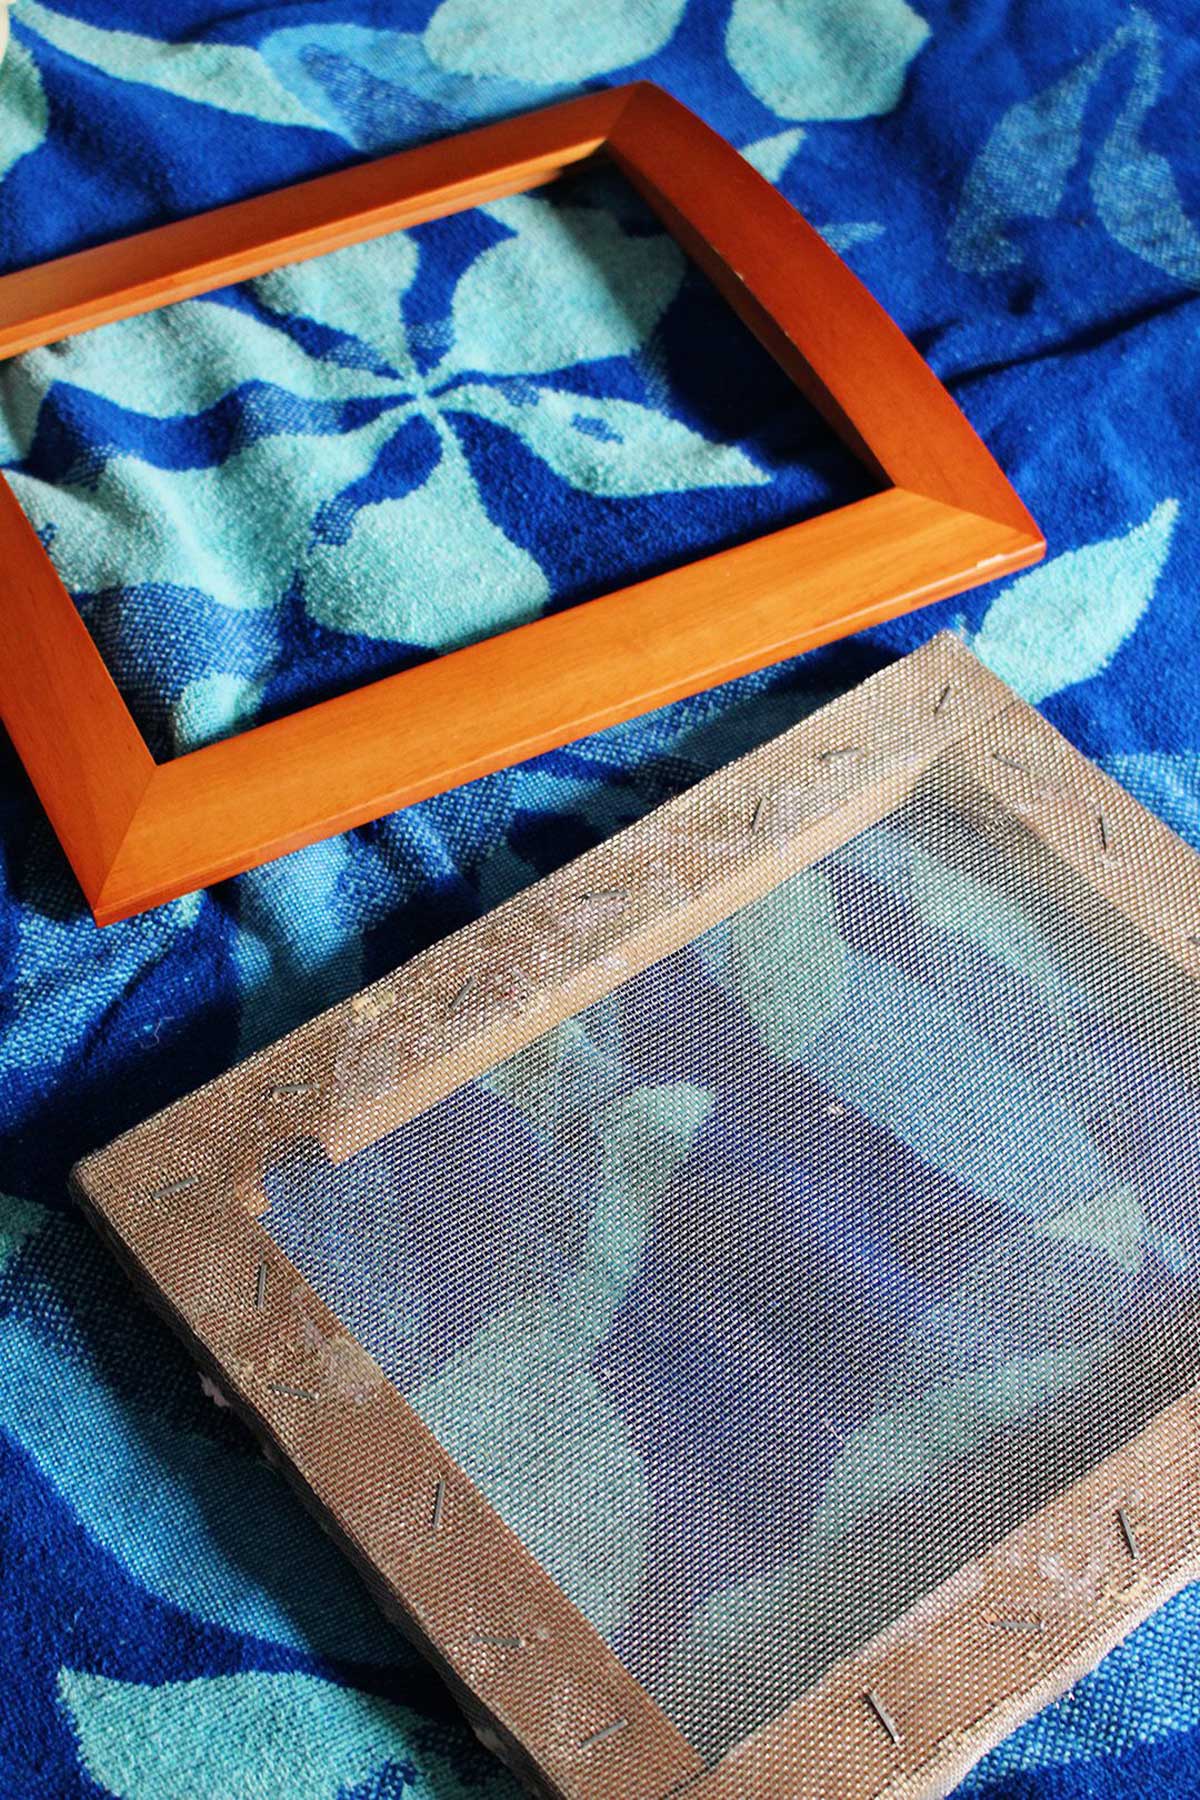
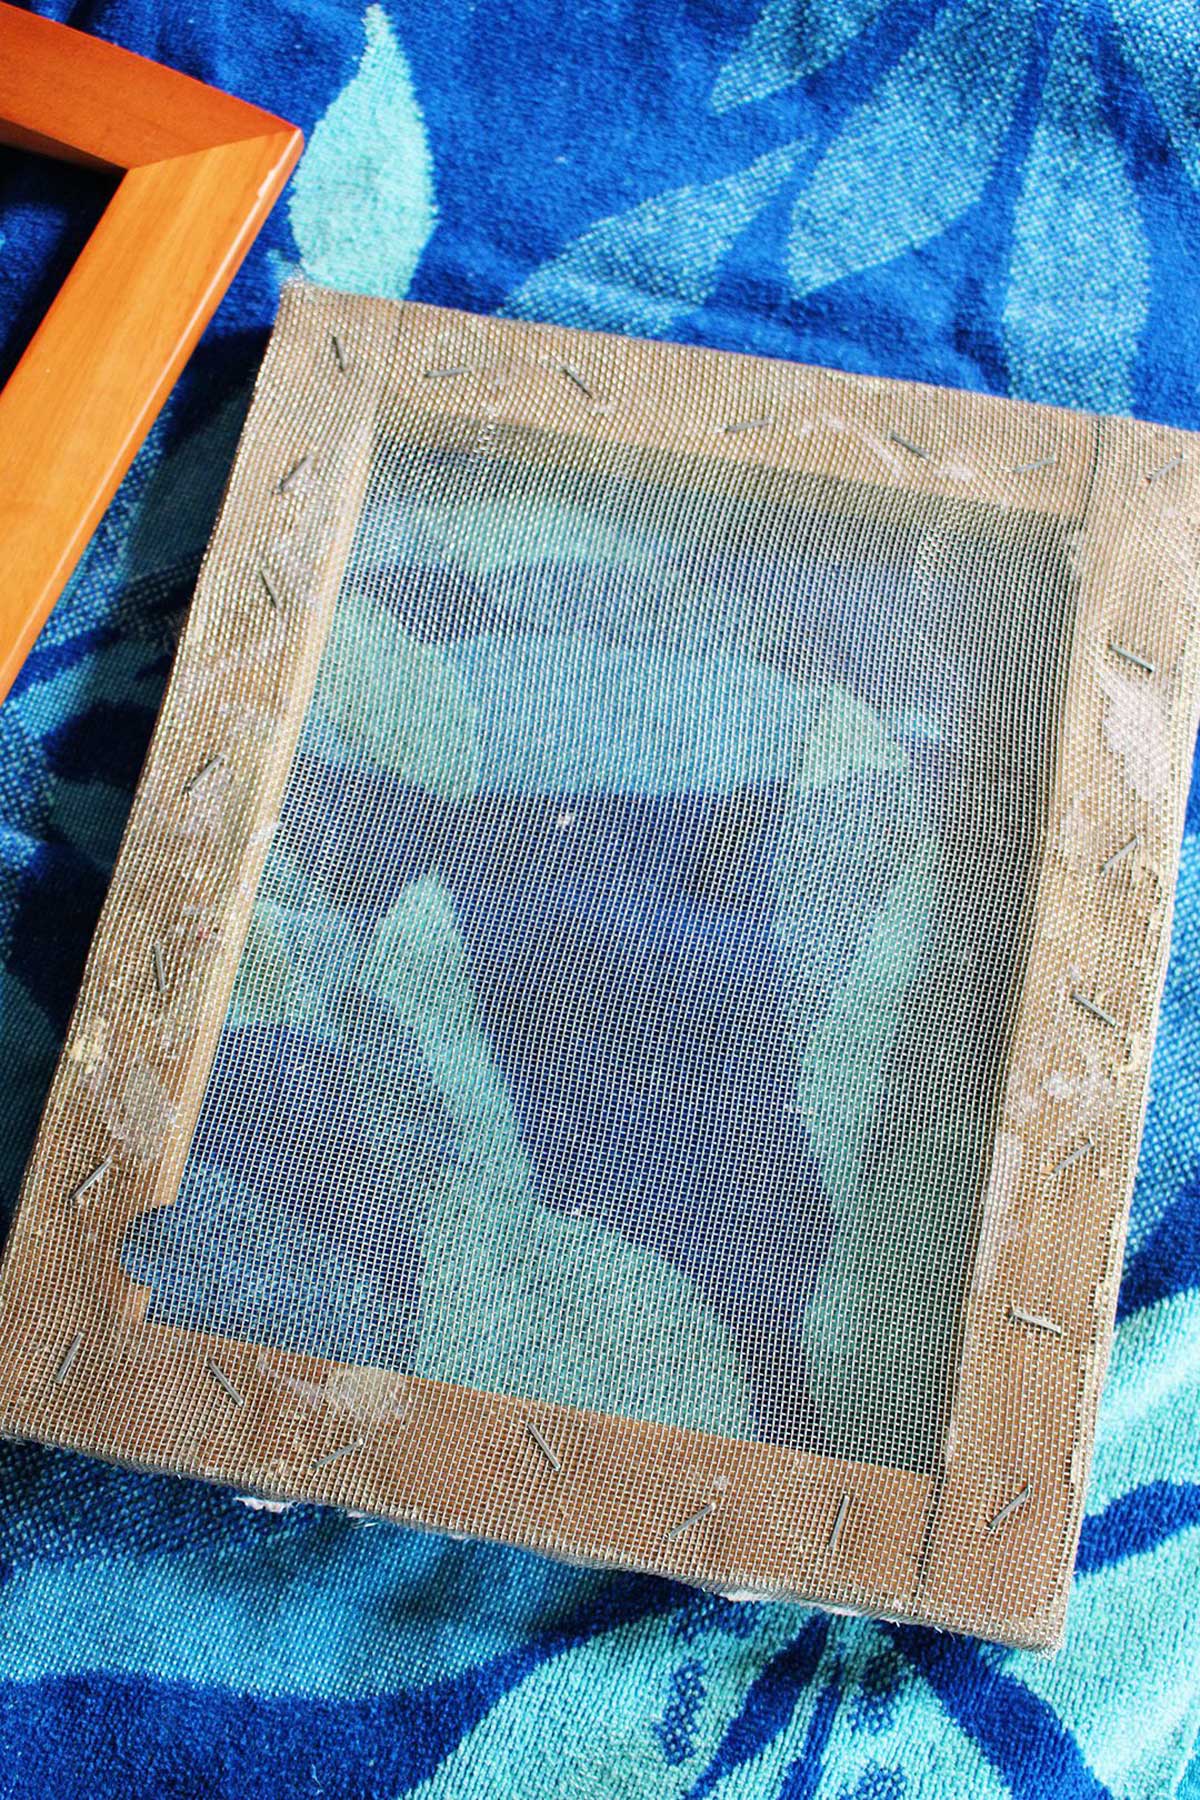
You will take one of the frames and staple a piece of the window screen or fine mesh onto it to cover the opening. Staple the screen onto the flat side of the frame, not the ridged decorative side.
This is your “deckle” that will strain the paper pulp. Papa nailed 4 boards together for me all those years ago to make us a deckle so mine looks a bit different.
The second frame will be used as it is on top of the screened frame and will be the “mould” that provides an edge for the paper. More on this later.
2. Add water to the tub…
Next, you’ll need a tub or very large bowl that is big enough to fit the frame size you chose for your mould and deckle. A storage tub works great for this.
Take a few minutes to pour enough water into the large container that the mould and deckle can rest down into the water, about 3 inches deep or so in the tub.
You will use this for dipping in just a few minutes.
The Best Kind of Recycled Paper to Use
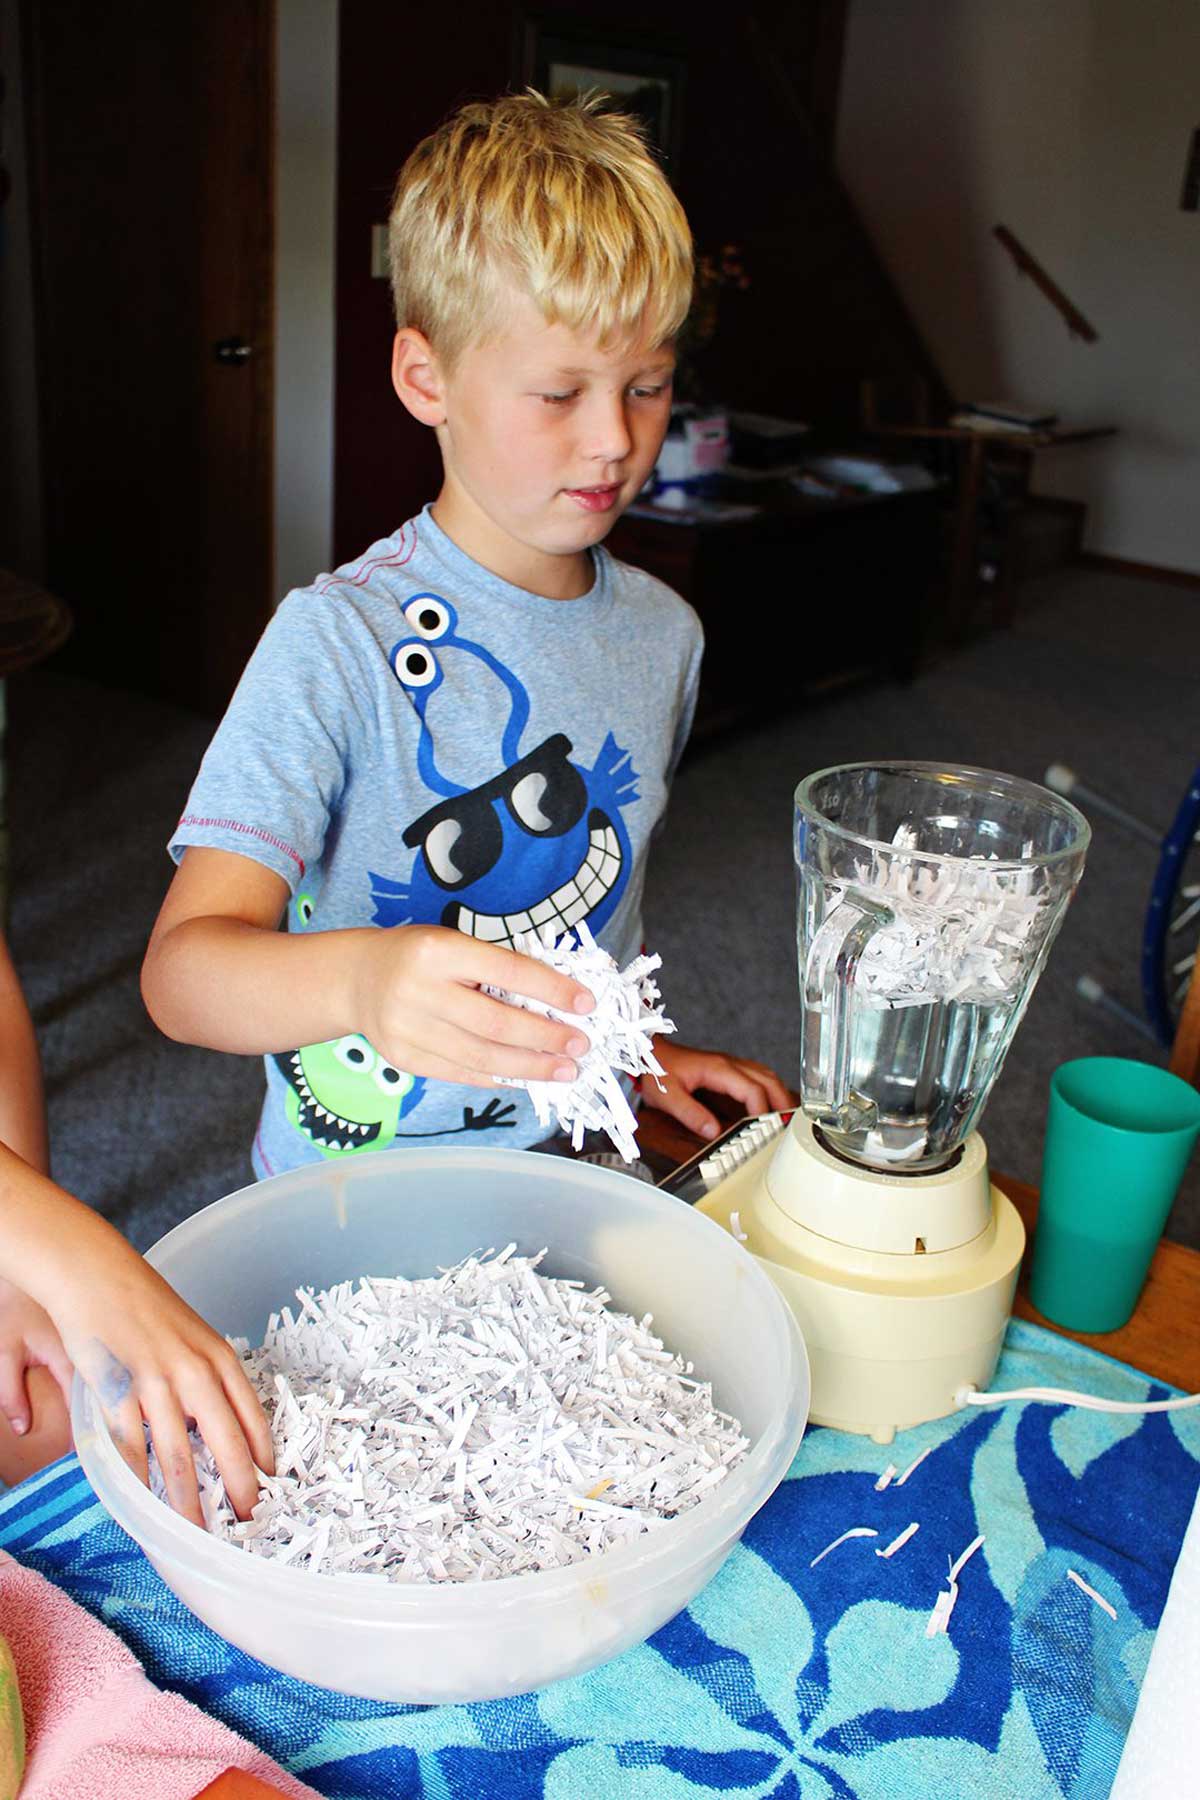
This morning we raided my paper shredder and got a big bowl of shredded scrap paper as you see in the pictures. This light paper worked famously.
If you don’t have a shredder, gather old papers that are to go into the recycling bin like office paper, junk mail or a brown paper bag. Take your sheets of paper and tear them into little pieces with your own hands.
You can new paper as well, choosing fun colors or simply tearing printer paper into small pieces.
Tip: Old newspapers don’t work as well as the ink makes the paper really dirty looking.
3. Creating the Paper Pulp
Let the grands place a couple handfuls of paper into the blender along with a generous amount of water.
Let them blend up the paper products and water mix until it is a globby mess. You are looking to create a fine pulp from the soaked papers.
The kids really liked this part.
If you are using thicker items like cardboard boxes, an egg carton, or paper grocery bags, you may want to soak it in hot water before blending. While made out of paper, these items would benefit from breaking down a little bit in the warm water before blending.
Now that you’ve let the paper soak and created a pulp, you are ready for the next steps!
Tip: The paper pulp should be in plenty of water or it will be hard on the blender motor. Add some extra water if you are finding that it doesn’t want to blend. A loose mixture with some excess water also works better in the paper making process.
4. Now the Fun Part of Making Recycled Paper…
Ready for the fun part?
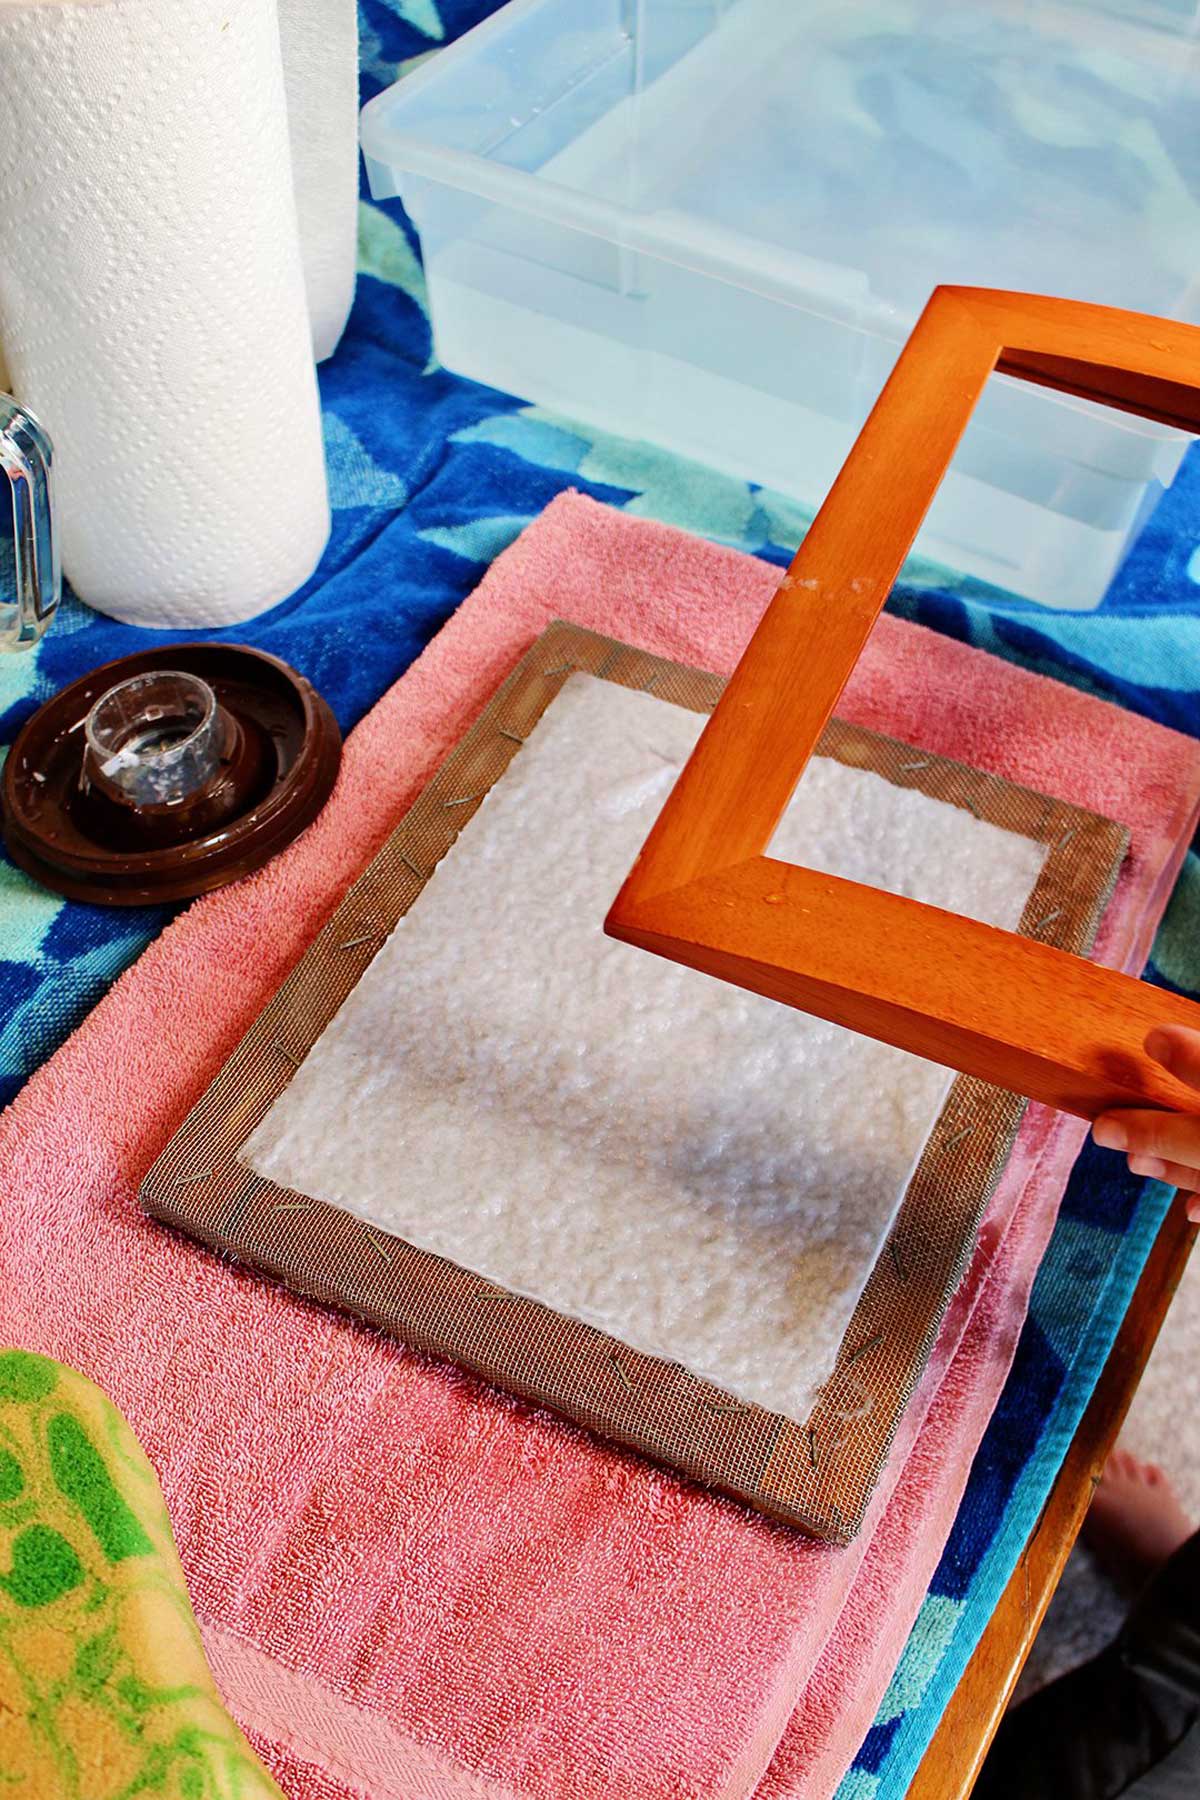
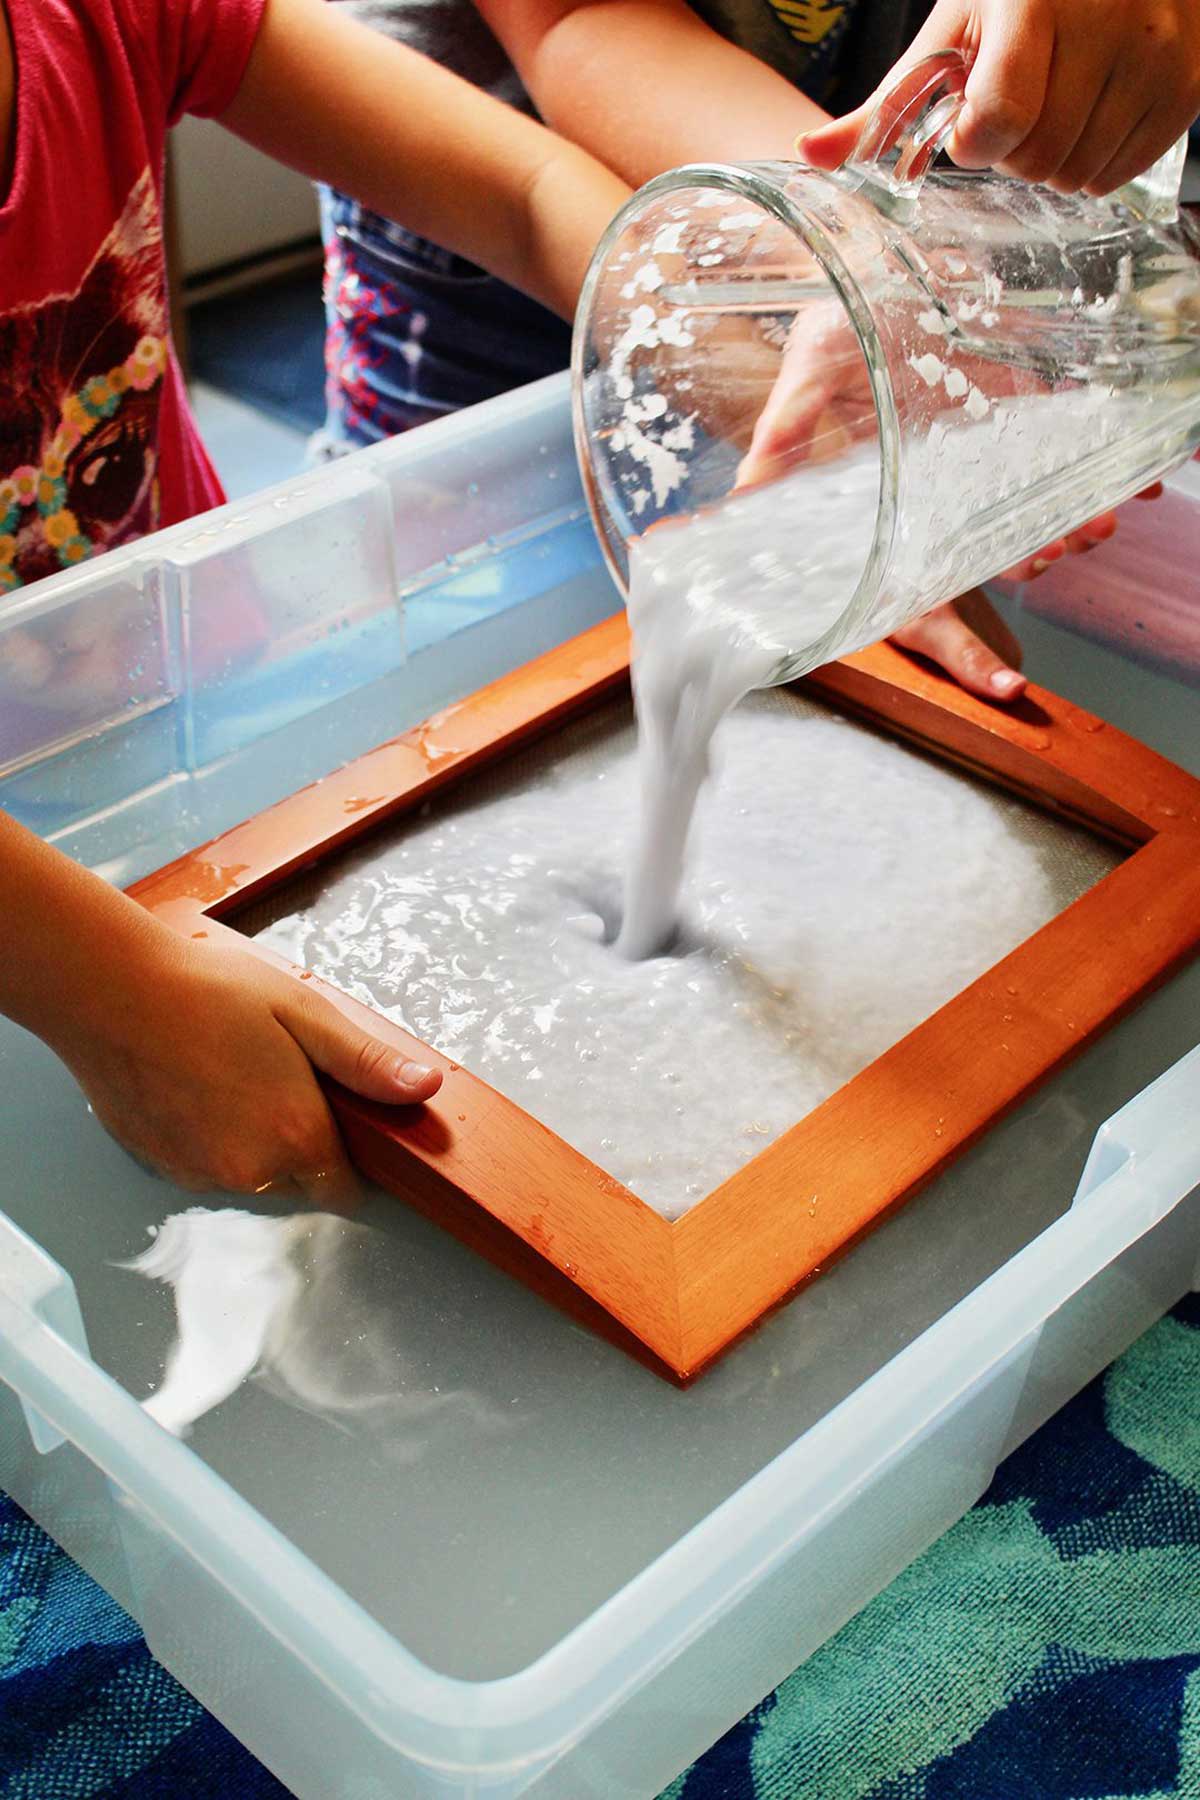
The little artists hold the mould and deckle, flat sides together, in the tub of water (the deckle, with the screen side up, is on the bottom). They need to hold them together firmly during this process and position it so that they are under the water, but not so far that the pulp will go everywhere in the tub.
Pour the smooth pulp into the open area of the mould and onto the screen of the deckle. It will spread out over the entire screen into a flat sheet naturally on its own.
Have them pull the mould and deckle out of the water and let the water drain off and into the tub.
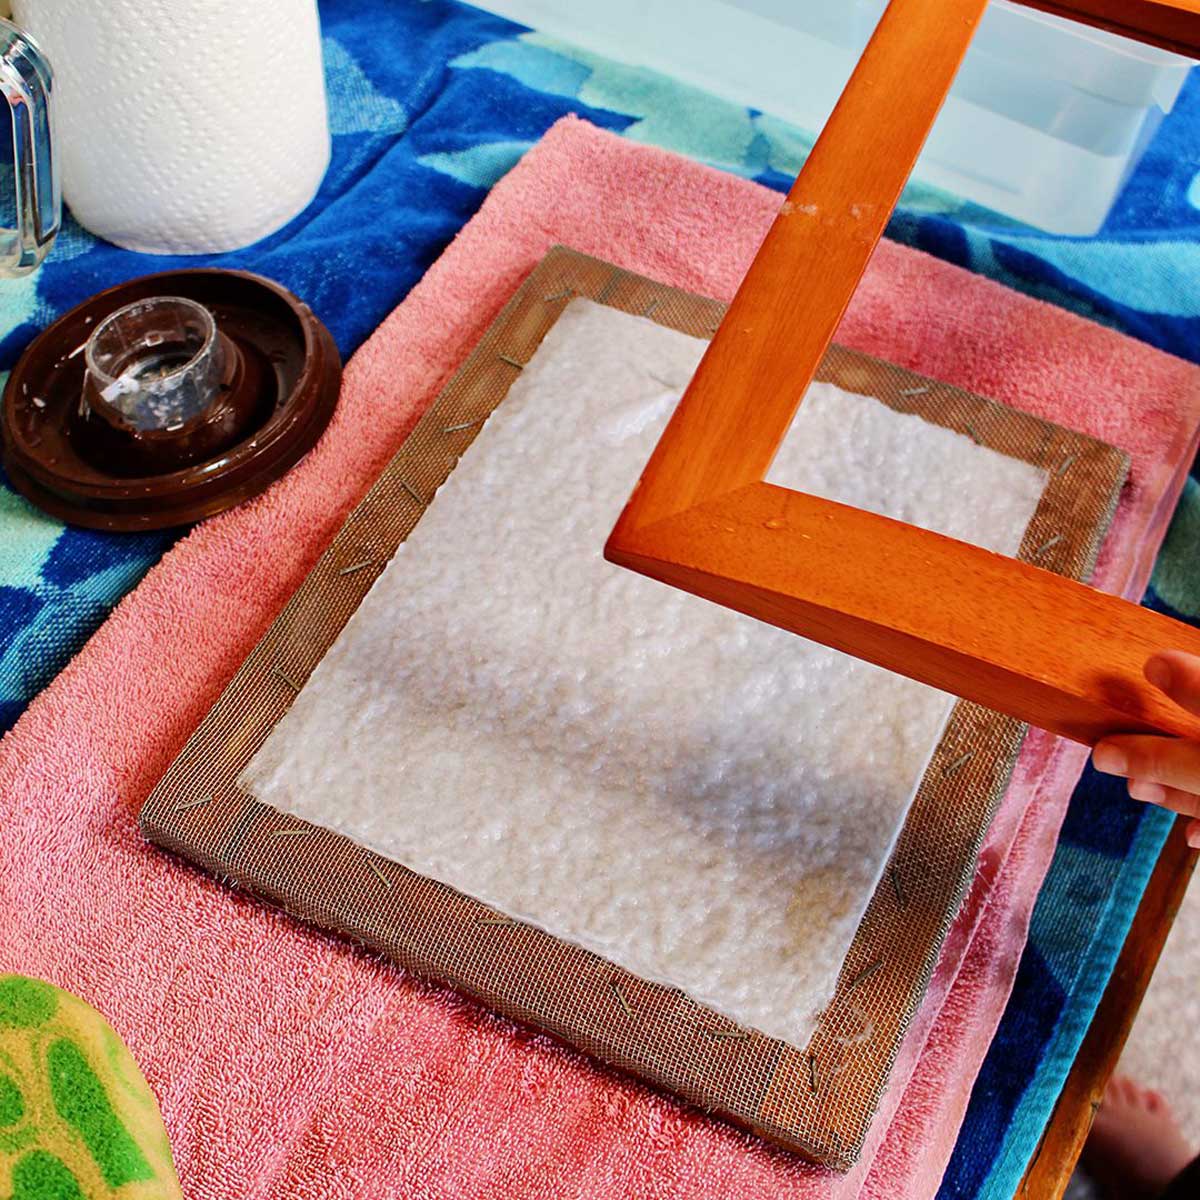
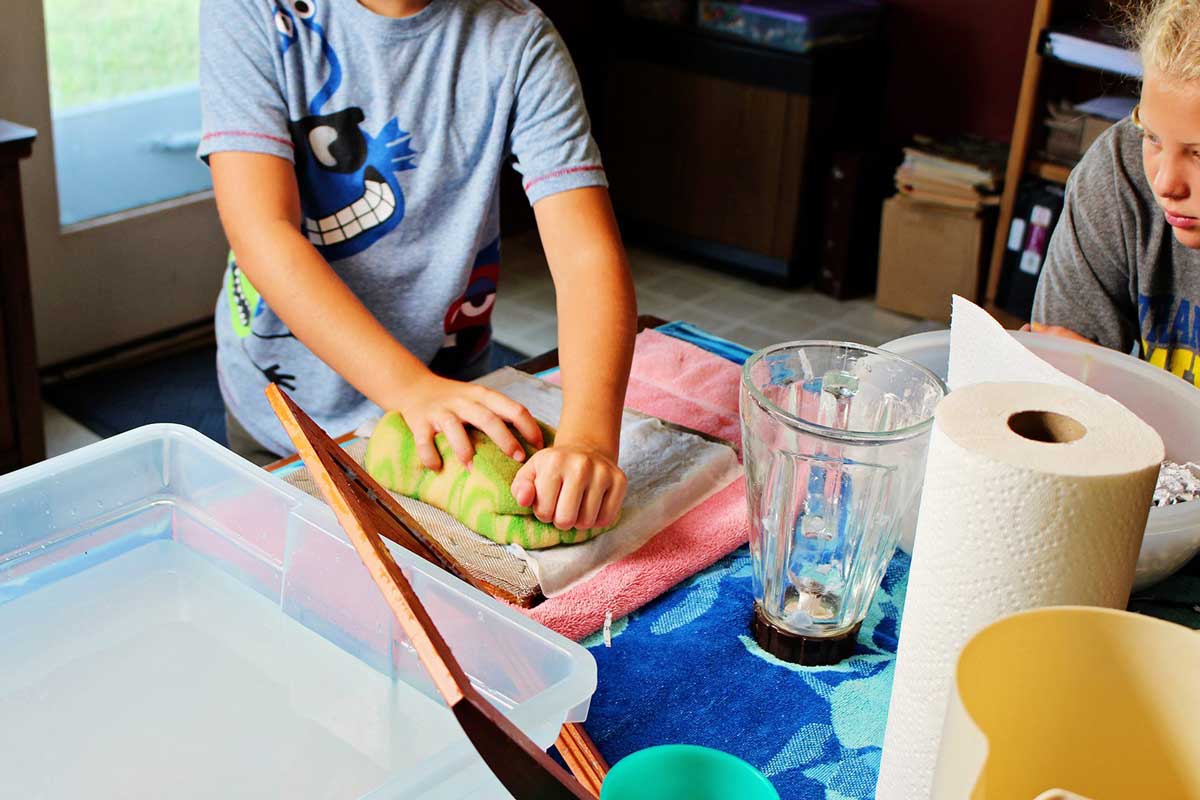
5. Couch the Paper
Set the mould and deckle on a set of towels and gently lift the mould off. It is so cool to see the layer of pulp sitting on the deckle screen in a wet sheet.
Place a paper towel over the pulp area. Gently dab it with the flat surface of the sponge to absorb a little water each time.
Twist the water out of the sponge several times as you continue to dab out as much water as you are able. Taking the water out of the pulp is called couching (which is pronounced “cooching”), FYI.
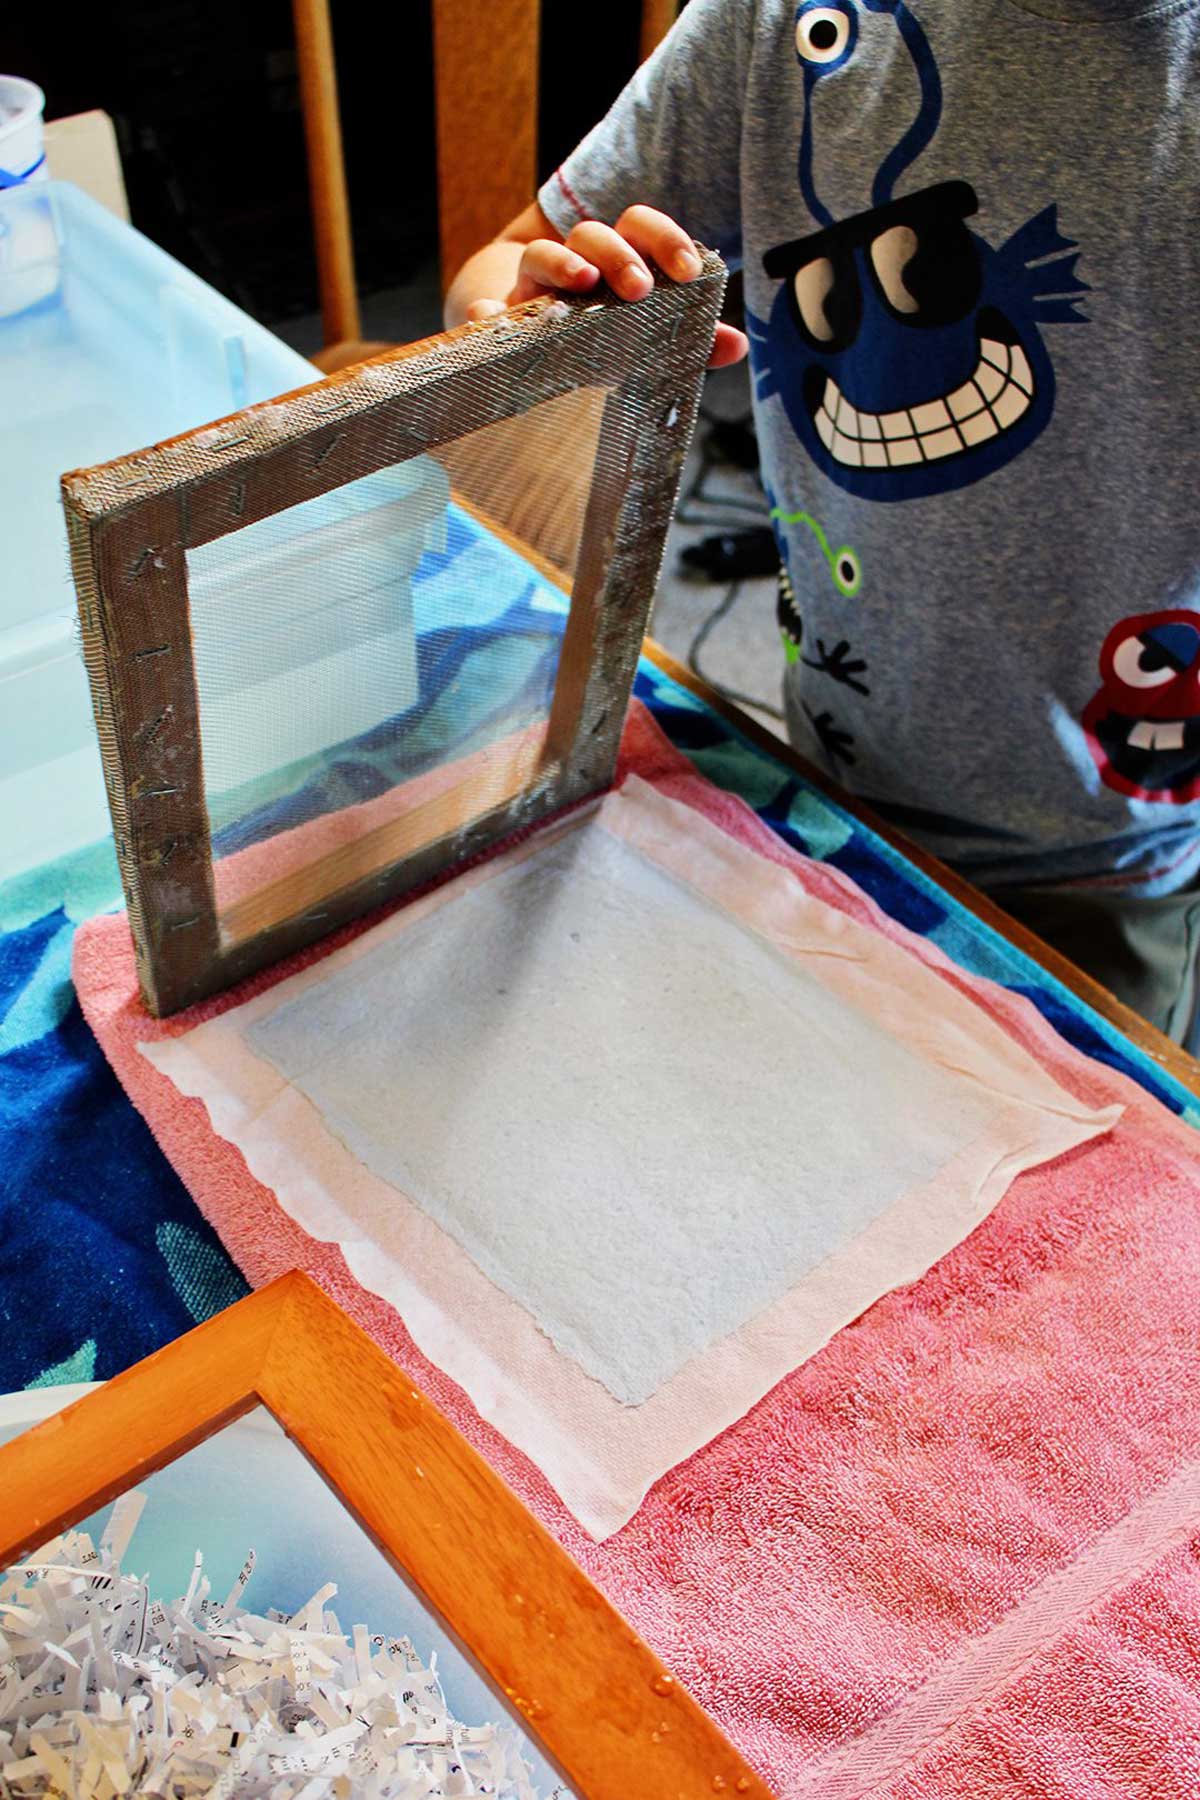
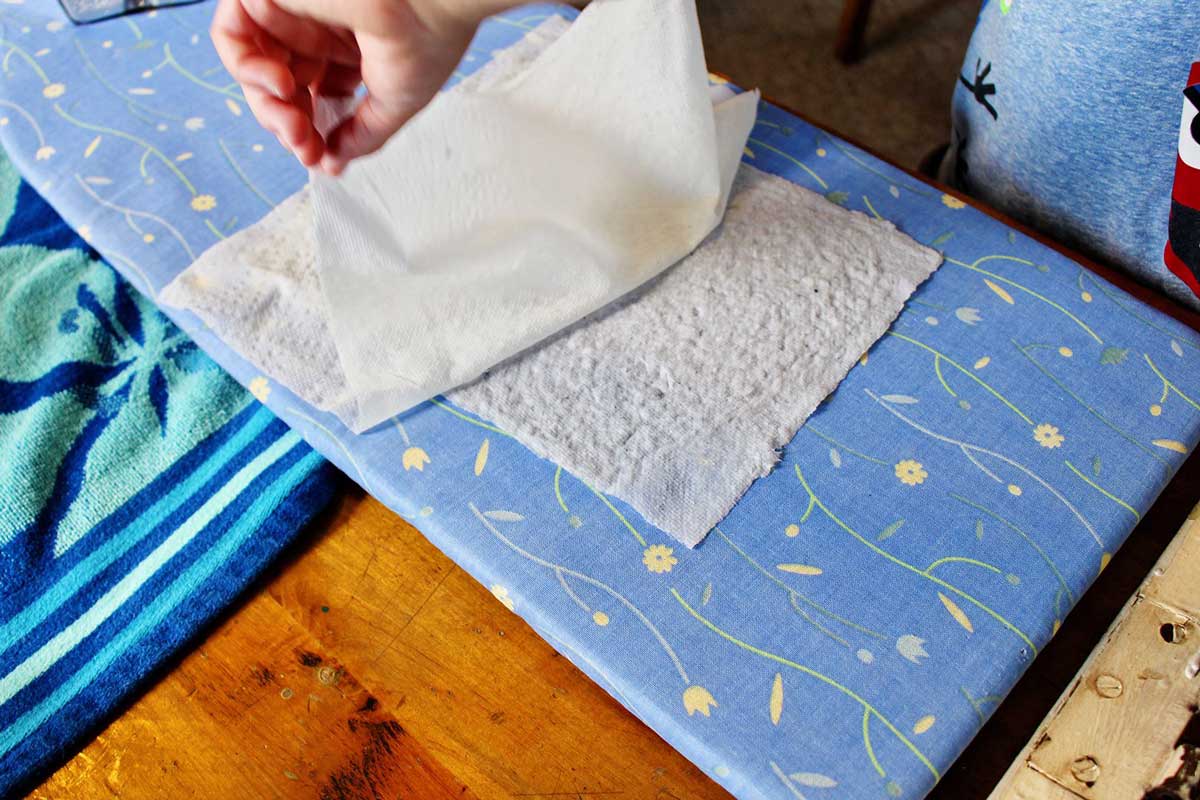
Let your grand quickly turn the deckle over so that the paper towel is flat on the towel. Gently pull the deckle off, leaving the paper towel with the paper on it.
6. Dry the Paper
Bring the paper towel and paper over to the ironing board.
Place a tea towel over it and iron it very gently with very slight pressing motion. You could also use microfiber towels or another very fine weave towel.
Ironing the paper won’t get it dry, but this will provide some pressure and heat to get the paper fibers to bond. There isn’t any glue to hold the paper fibers together!
Paper is usually placed in a press where it dries and is pressed flat. I don’t have this available so this process does the trick instead.
We set our papers to the side to finish drying.
DIY Paper Variations
Now let’s talk about the ways you can mix it up and make various types of paper. Like I said, the possibilities are endless 😉
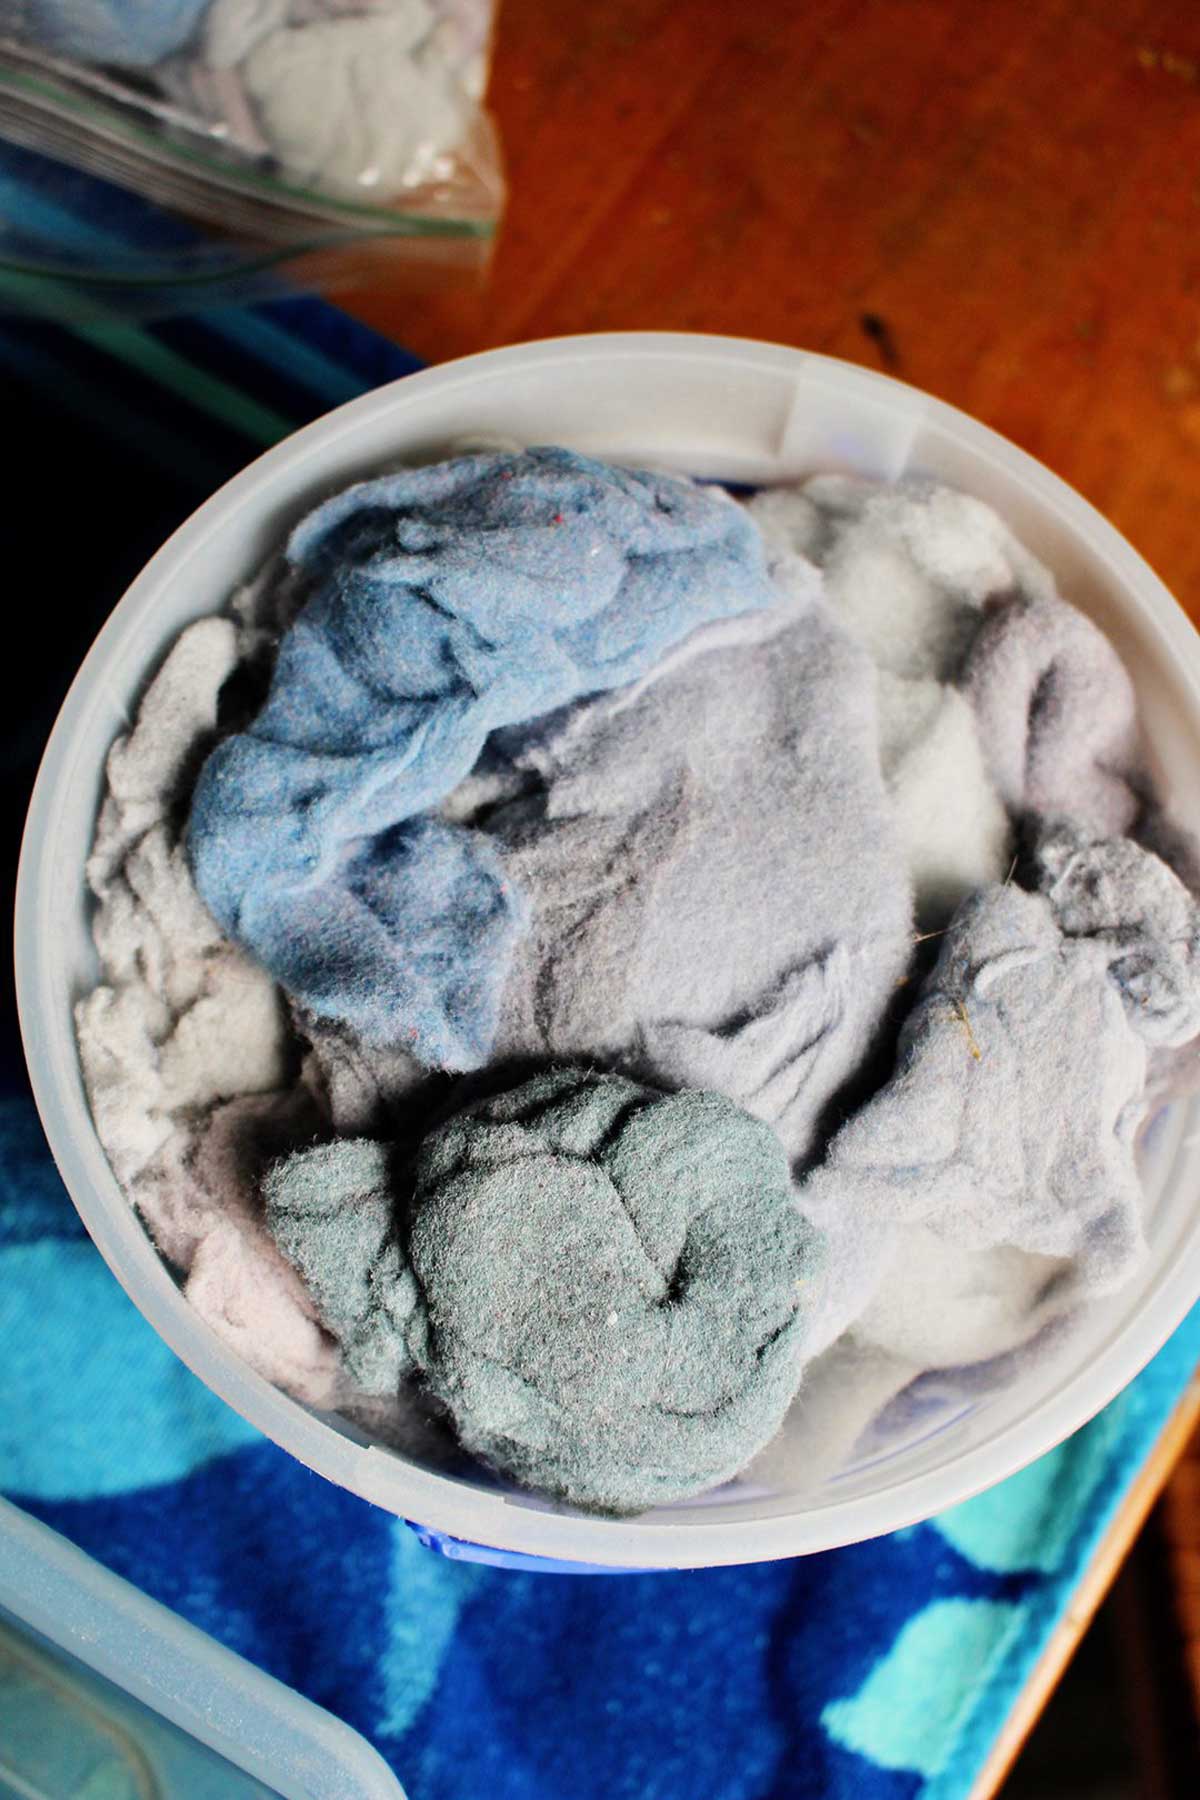
The second piece of paper the kids made had some paper pulp and a small handful of dryer lint. The couldn’t believe I’d saved dryer lint!!
It works really well to get fabric fibers into the paper. Papa and I end up with a lot of blue lint from towels and jeans which made a light blue paper.
If you want to change the color in other ways, you can use bits of construction paper or colored paper (how about yellow pages?) to make speckled paper, which looks really cool. You could also try putting some food dye or food coloring in the blender so it turns it fun colors like pink and yellow, but I haven’t tried that myself.
I have also seen paper made with decorative material like little leaves, flower petals, or even pieces of fabric. These will be placed on it as soon as the pulp is spread on the deckle and mould. These items bond into the pulp as it is couched.
As you can see, this could get addicting!! I hope you have a blast with this project.
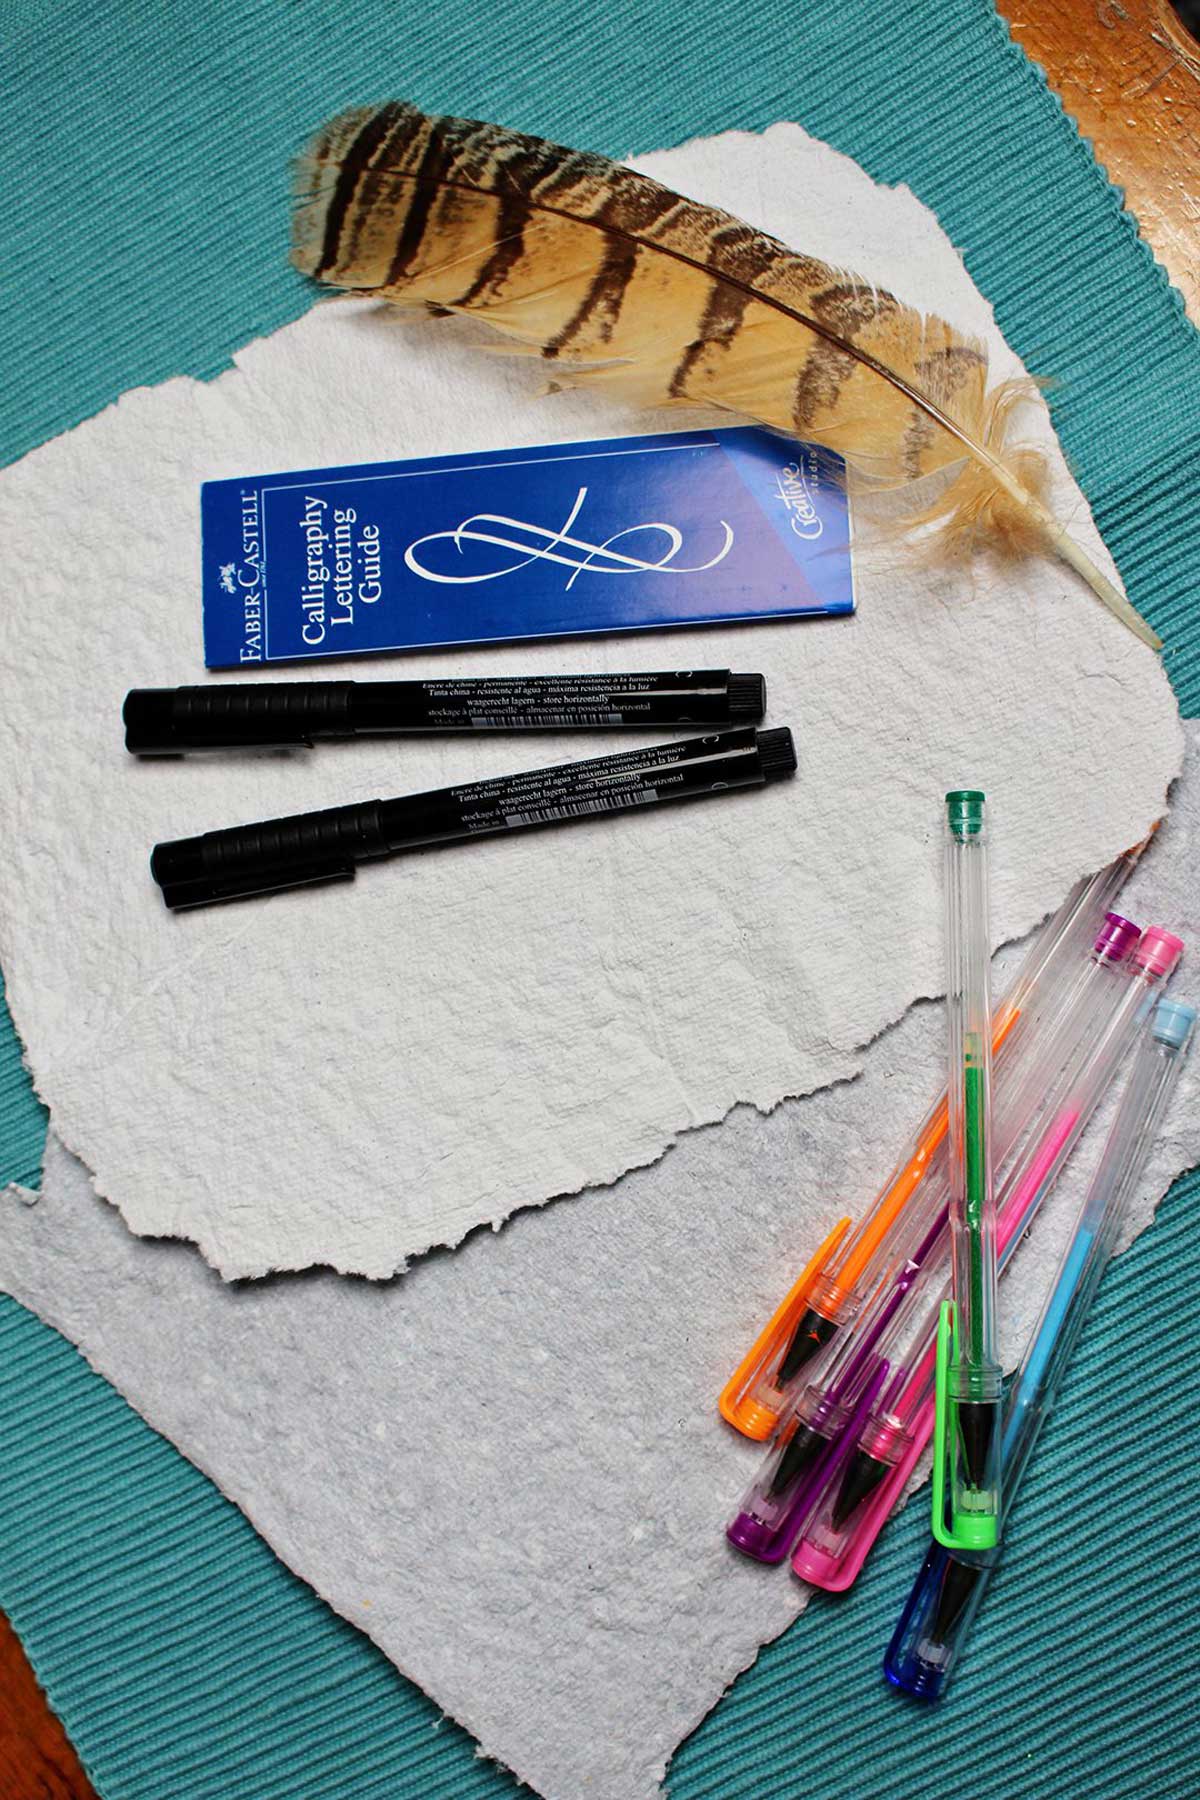
Stand by as we will use this paper in the future for printing or drawing.
How to Use Your Recycled Paper
Once your paper is completely dried through, this thing of glorious handmade beauty is finished and ready to use!
We used our paper for art projects, painting on it with acrylic paints. I’ve found that this paper is so fun to make into DIY stationary, like your own personalized cards!
This type of paper can be on the thicker side, but I think you could also bind it together to make notebooks or art journals.
The possibilities are endless!
DIY Paper FAQ’s
How do you make recycled paper at home?
Making your own recycled paper is easier than you might think! You can make your own mould and deckle with old picture frames, then create a pulp from recycled paper pieces and water. Pour the pulp into the frames, partially submerged in water, then remove as much water as possible. Let it dry fully and you have your own recycled paper, made at home!
How to make recycled paper with kids?
Paper making is a fun craft for kids and great way to use recycled paper! Kids will love blending up recycled paper and water to create their own pulp. They can pour the pulp onto the mould and deckle, the help dry the paper as well. In the end, they will have their very own homemade recycled paper!
How to make eco-friendly paper?
Making your own eco-friendly paper is easy to do with recycled materials! Use scraps of paper from a paper shredder. Or if you don’t have a shredder, gather old papers that are to go into the recycling bin like office paper, junk mail or a brown paper bag. Simply tear up the recycled paper into small pieces to use for your paper pulp!
More Fun Recycled Craft Projects for Kids
If the kids want to use more recycled items for fun arts and crafts, check out these ideas from around the blog!
Enjoy!
If you try this craft, let me know! Go ahead and leave a comment, rate it, and tag a photo with #WelcometoNanas wherever you post.
Come join the fun at https://welcometonanas.com
More from Welcome To Nana’s
How to Make Homemade Paper
Shelly
Follow these easy step-by-step instructions to make your own, customizable, Recycled Paper at Home!
Prep Time 45 minutesmins
Drying Time 1 dayd
Total Time 1 dayd45 minutesmins
Type Paper Craft, Recycled Craft
Equipment
Heavy duty stapler
Blender
Tub
Sponge
Bath towels
Paper towels
Items Required
28×10″ Framesupcycled some old ones, preferably wood
1pieceWindow screen
Recycled papershredded or torn
Dryer lint, colored paper, other papers to add for funoptional
Instructions
Make a Mould and Deckle
Take the two frames apart and discard the glass, cardboard and any nails or tabs they may have. You only want the frame itself.
Take one of the frames and staple a piece of the window screen onto it to cover the opening
Staple the screen onto the flat side of the frame, not the ridged decorative side. This is your “deckle” that will strain the paper pulp.
The second frame will be used as it is on top of the screened frame and will be the “mould” that provides an edge for the paper.
Let’s Make Some Paper!
Take a few minutes to pour water into the tub to about 3 inches deep or so.
Shred or tear old papers that are to go into the recycling bin into little pieces.
Let the grands place a couple handfuls of paper into the blender along with a generous amount of water. Let them blend up the paper and water until it is a globby mess. The paper pulp should be in plenty of water or it will be hard on the blender motor. It also works better in the paper making process.
Hold the mould and deckle, flat sides together, in the tub of water (the deckle, with the screen side up, is on the bottom). Hold them together firmly during this process and position it so that they are under the water but not so far that the pulp will go everywhere in the tub.
Pour the pulp into the open area of the mould and onto the screen of the deckle. It will spread out naturally on its own.
Pull the mould and deckle out of the water and let the water drain off and into the tub.
Set the mould and deckle on a set of towels and gently lift the mould off.
Place a paper towel over the pulp area. Gently dab it with the flat surface of the sponge. Twist the water out of the sponge several times as you continue to dab out some of the water.
Turn the deckle over so that the paper towel is flat on the towel. Gently pull the deckle off, leaving the paper towel with the paper on it.
Bring the paper towel and paper over to the ironing board. Place a tea towel over it and iron it very gently with very little pressing motion. This will provide some pressure and heat to get the paper fibers to bond.
Set your paper to the side to finish drying, and make some more!
Apply the Vinyl Decal Before applying the decal, clean the surface well. I like using a little isopropyl alcohol because it removes grease and dries q [...]
These photo gift ideas and DIY projects make it simple to turn photos into thoughtful gifts for family, friends, and memorable moments. If you love gi [...]
Best Cut for Beef Tips Choosing the right cut makes a big difference, especially when cooking in liquid for several hours. Sirloin - Best Overall Choi [...]
Make DIY luggage tags using Mod Podge, cardboard, and fabric! A fun, easy way to personalize your suitcase and identify it fast. No sewing required. S [...]
Prep the Table This is my "new" coffee table, which I purchased for $15 on Facebook Marketplace. It is a sturdy, solid wood table, perfect for refinis [...]
Children can assemble their own easy holiday paper chain countdown using this tutorial! This kids advent calendar is made from construction paper, can [...]
Snowman Assembly This is where the snowman starts to come to life. Stack your longest strips neatly, line up the ends, and punch a hole in each end us [...]
Sew the Stocking Layer the stocking pieces, white cotton, two woven burlap with right sides together, and then the other white cotton layer. Sew aroun [...]
We use cookies on our website to give you the most relevant experience by remembering your preferences and repeat visits. By clicking “Accept”, you consent to the use of ALL the cookies.
This website uses cookies to improve your experience while you navigate through the website. Out of these, the cookies that are categorized as necessary are stored on your browser as they are essential for the working of basic functionalities of the website. We also use third-party cookies that help us analyze and understand how you use this website. These cookies will be stored in your browser only with your consent. You also have the option to opt-out of these cookies. But opting out of some of these cookies may affect your browsing experience.
Necessary cookies are absolutely essential for the website to function properly. These cookies ensure basic functionalities and security features of the website, anonymously.
Cookie
Duration
Description
cookielawinfo-checbox-analytics
11 months
This cookie is set by GDPR Cookie Consent plugin. The cookie is used to store the user consent for the cookies in the category "Analytics".
cookielawinfo-checbox-functional
11 months
The cookie is set by GDPR cookie consent to record the user consent for the cookies in the category "Functional".
cookielawinfo-checbox-others
11 months
This cookie is set by GDPR Cookie Consent plugin. The cookie is used to store the user consent for the cookies in the category "Other.
cookielawinfo-checkbox-necessary
11 months
This cookie is set by GDPR Cookie Consent plugin. The cookies is used to store the user consent for the cookies in the category "Necessary".
cookielawinfo-checkbox-performance
11 months
This cookie is set by GDPR Cookie Consent plugin. The cookie is used to store the user consent for the cookies in the category "Performance".
viewed_cookie_policy
11 months
The cookie is set by the GDPR Cookie Consent plugin and is used to store whether or not user has consented to the use of cookies. It does not store any personal data.
Functional cookies help to perform certain functionalities like sharing the content of the website on social media platforms, collect feedbacks, and other third-party features.
Performance cookies are used to understand and analyze the key performance indexes of the website which helps in delivering a better user experience for the visitors.
Analytical cookies are used to understand how visitors interact with the website. These cookies help provide information on metrics the number of visitors, bounce rate, traffic source, etc.
Advertisement cookies are used to provide visitors with relevant ads and marketing campaigns. These cookies track visitors across websites and collect information to provide customized ads.